Your method...

Butch I use a .0005 resolution B/S best test indicator fixed to the mast by a mag base. I track up the "X" side and then rotate to the "Y" and repeat the process. Once done there I sweep it for center using a Blake Coaxial.

It's little more work than using a cats head, but I like it because of the added control I feel I have when doing the machine operations on the business end of the receiver.

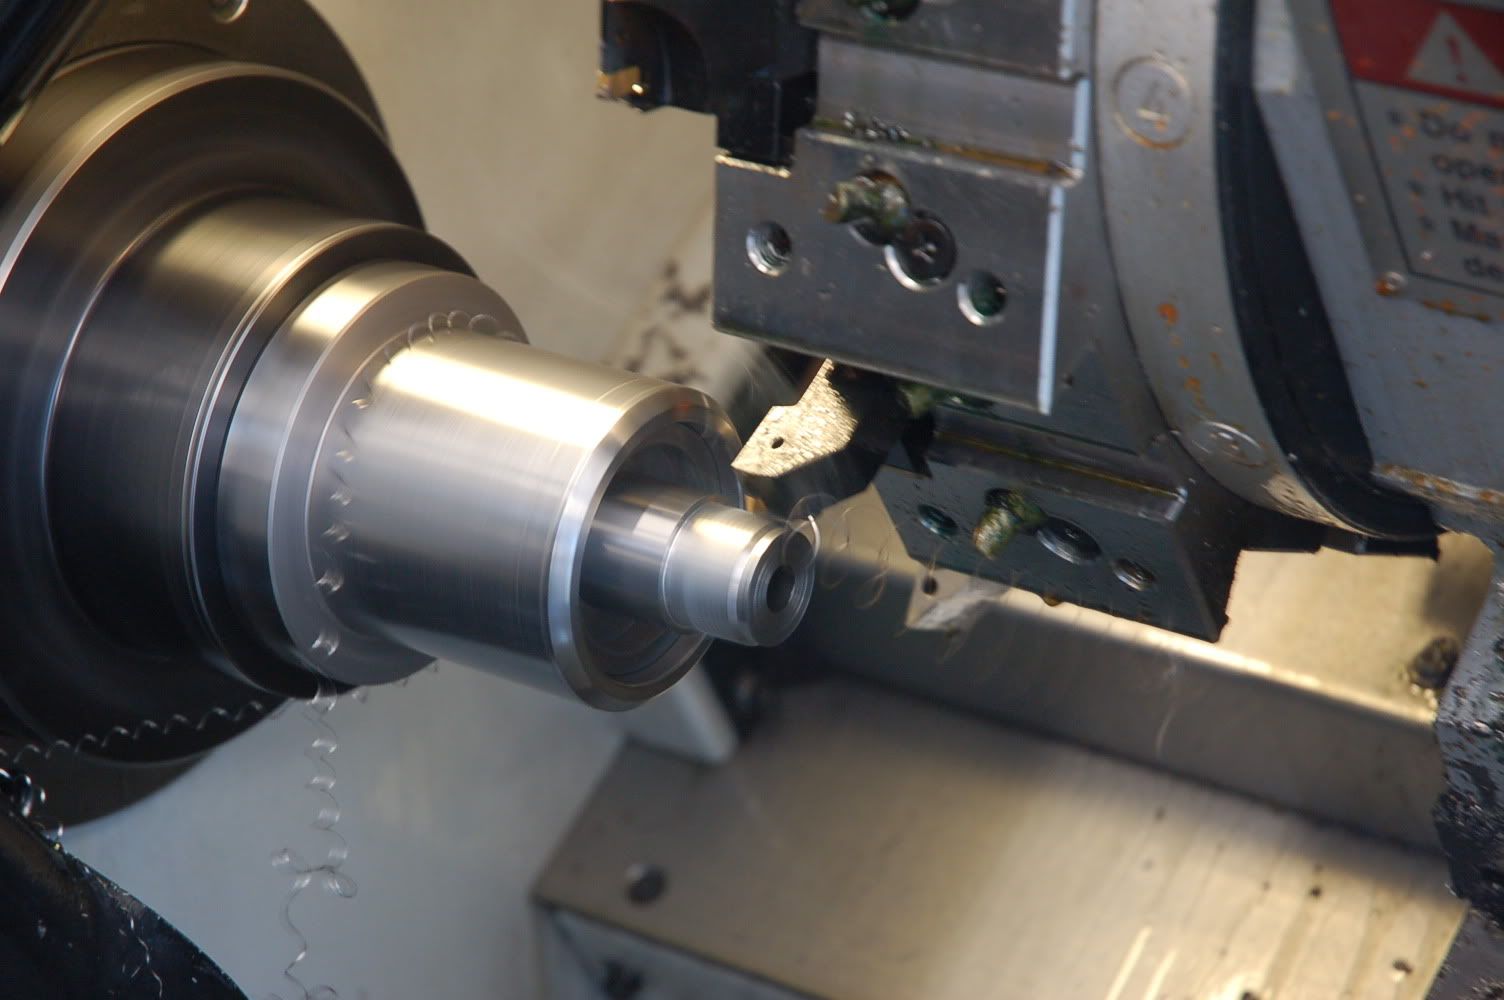
All I'm doing is peeling skin from a cat starting at the arse instead of the nose. It's fundamental machine work that any job shop in America can perform if a guy has a little patience. Specifically the threadmilling portion of the process.

Thanks for your interest and no hard feelings here.

cheers and have a great weekend to all. I'm going to wine and dine momma and see if she'll take her nickers off for me later.

Chad
 
Last edited by a moderator:
Have fun tonight. I just wanted to know how you moved the indexer to indicate it in. I can move the indicator around the bottom next to the jaws and move the table to get it as close as I want. When you either move the quill up or the table down to indicate the upper part of the mandrell, how do you compensate for the hopefully small amount of lean to use simple terms? I can't do that in 20 minutes.
Butch
 
Butch,

I'm not using a CNC knee mill or manual machine. It's a full on vertical machining center so unless I make a HUGE mistake like crashing the spindle through the table at a rapid rate (which would be around 600 inches per minute) the perpendicularity between the mill table and the spindle bore should never really change.

All the tool length offsets are stored in the control so once that tool is called upon in a program the machine automatically knows the distance from the datum point to the business end of the tool. This saves tons of time because I touch off with one tool, adjust the work plane offset (G54) and I'm done. Everything references off of the work plane call out.

The set up is a no chit 10 minute ordeal. Yeah, sometimes it does take a little longer, but not often. I do use shim stock on the base but it's surprising just how parallel/consistent the Rem actions really are. Some may turn the nose up at this, but from what I've seen they are pretty dern close and in a number of instances I don't have to shim anything. What I do see is runout from the bore centerline to the ID of the receiver ring. This isn't all that surprising when I consider how the action gets made by the manufacturer. I once went through the trouble of making an expandable threaded tennon (split like a collet) that threaded into the receiver with a ground OD stub just so that I could measure the runout from bore CL to the CL of the receiver threads. Assuming my tool was/is accurate I typically got as good as .003 to sometimes being over .012". This is what lead me to setting my thread pitch at 1.085" as it covers the whole range.


Hope that answers the question.

Cheers,

C
 
Last edited by a moderator:
Tighten a loose bolt for better accuracy!

I've just read through this thread and saw where NesikaChad mentioned earlier that he does the math and comes to the conclusion that in practice a sloppy bolt really doesn't matter for accuracy.

I build mostly 1000 yard and other extreme accuracy benchrest rifles, so I do put my complete emphasis on all the little details which can (and do) affect accuracy because I thoroughly believe it makes a noticeable difference. But I also build quite a number of F-class and other score-shooting type rifles where the expectation of accuracy for a lot of these shooters doesn't seem to be quite as high as the benchrest crowd demands. But in my mind, it should be - if you can get your 1000 yard agg potential down even a fraction of an inch - just look at the agg results of any big competition and see just how little difference there is between some of the top places. Then convert that philosophy over to score shooting (like F-Class, Camp Perry, and NRA Highpower style shooting) and it makes me wonder if the some of the non-winning shooter's guns had a few less variables and shot even a little bit better, how this could have improved their standings.

So, I'd like to comment on what I've come to believe over many years of tightening bolt slop on several hundred accuracy-oriented rifles. At first I was a little skeptical too, but by now I completely and thoroughly believe that tightening up a sloppy bolt definitely does affect real-world accuracy in a lot of rifles, sometimes considerably so! There are always variables and you can find guns that will shoot really well when things aren't as tight and good as we'd like to see, but over and over again I've seen the accuracy improve. I've had it too many times now where everything else was good on a rifle with poor accuracy, and the only thing I did was tighten the bolt play, and the rifle immediately shot better. Sometimes I did the before and after shooting/testing myself on a customers rifle, and often I hear back from my more experienced customers on just how much improvement there was - and I listen to these guys!

In fact I feel strongly enough about the benefits of doing this that I take considerable time in my custom gunsmithing classes and in my new extreme accuracy series of do-it-yourself gunsmithing DVD's explaining this in detail, showing exactly how to measure for this, and then showing an easy way for anybody (hobbyists as well as pros) to correct this.

Remember, one of the big things to getting the most accuracy out of a rifle is controlling the vibrations that happen when a gun is fired, and these vibrations affect the barrel movement while the bullet is going through the bore. The more the barrel moves, the further the muzzle moves and causes bullet dispersion - affecting the accuracy. When the bolt has slop, and the lugs are off their seats - no matter if it's a very slight amount - when the gun fires, the action flexes hard until both lugs contact. The barrel is hooked to the front of the action, and the more the action flexes, the more the barrel "whips" or moves while the bullet is going through it.

So if we can eliminate most of the bolt play, this helps it stay in almost exactly the same place in the receiver for every shot, it physically moves much less when the gun fires, plus the lugs will stay in more uniform contact with the lug seats - all of which help control the vibration and unwanted movement of the action and barrel, thus helping the accuracy.

Gordy Gritters
www.extremeaccuracyinstitute.com
www.gordysgunsmithshop.com
 
Gordy has been around the block a time or 2! He knows of what he speaks. If you start with a part that is not uniform and you depend on it for your indicating, you are in trouble.
Butch
 
Mr. Gritters and the rest of the fella's,

I just read Mr. Gritters post in re: his opinions on bolt fit and do not dispute his findings on a good, minimum tolerance fit between the bolt and the action bolt raceway. I have sleeved the bolt on all of the accuracy rifles I have built so far, as I feel it probably makes a difference and is therefore worth the extra effort.

I am having trouble getting my mind around Mr. Gritters statement of "BOTH LUGS" being out of contact and when the round is fired, the action flexes hard until both lugs contact. If both lugs are out of contact when the round is fired, wouldn't that cause the bolt to be pushed backwords (very quickly!) into contact with the locking lug recesses, as oppossed to the action flexing? And if so, given lugs and lug recesses that are dead nuts square to each other, would this cause the action to flex? And if it does cause the action to flex, I imagine it would be along the vertical plane, so what direction would the action flex? I'm not disputing what Mr. Gritters said, but I'm having trouble picturing it. I can picture my bolt moves backwords theory, so that's why I mention it. Whatever happens, I can see the resulting and unwanted vibrations that are a result.

But since we're talking (I think!) about trued actions with a sloppy bolt fit left unattended to, I think one lug contacting (the bottom/6 o'clock lug), when the rifle is cocked, is the more likely scenario. If this is true, what happens when that rifle is fired? When the sear lets go, the firing pin starts moving forword, while the bolt, heretofore pinned up against the top, or near the top of the action raceway, starts to drop. What wins the race? The firing pin hitting the primer (with the top lug out of contact), or the rear of the bolt bottoming out in the raceway (and the top lug now in contact)? If the firing pin wins this race, would not the pressure of the cartridge case on the bolt face, with the bottom lug acting as a fulcrum or pivot (as only the outside diameter of the bottom lug should be in full contact), cause the top lug to seat...in a screaming hurry? Or would the bottom lug flex to full contact, maybe causing the whole bolt to flex, and then the top lug seats? And as the rear of the bolt may not have made it down all the way yet, I imagine that thing is going to get slapped down with some authority. And during all of this, is the action flexing? Whateverthehell is happening, again I certainly can see the unwanted vibrations that would result.

My head hurts. I do look forword to your replies...

Justin
 
Last edited:
Justin, I owe you some Excedrin for your headache, buddy!! :) I read your post here and wondered "where is he getting this from?" until I went back and read my post again. Then I had to laugh at myself because I can see where you got it from - about now I can hear my kids say "Duh, Dad!" :). That's what I get for taking a short break at the shop, going onto BR Central for a few minutes this afternoon and not proof-reading my own post!

Of course you are right, the mainspring will be pushing back on the striker making sure at least one lug is touching (sometimes more than one on multiple lug bolts) while in the cocked position, and most often it is the bottom lug. I have my thoughts on what order things are happening then when the firing pin get released and slams forward, the cartridge fires, the bolt drops and/or slams down in the bolt bore, and the non-contacting lug or lugs are forced against their seats, but my real concern is what the result often is and more important how to correct this since I've dealt with it so many times over the years.

I also know just how flexible metal is - take a big heavy benchrest barrel, for example, after it's chucked up solid in a lathe with just a few inches sticking out of the chuck jaws. Put a sensitive dial indicator against the barrel and note just how little finger pressure it takes to deflect (bend) the barrel measurably when you push against it. Now think just how much thinner (and more easily flexed) an action is, just how much pressure is being placed on the one contacting bolt lug and it's corresponding lug seat when the firing pin strikes the primer, then even more so when the cartridge fires and expands hard back against the bolt face. EVERYTHING is flexing, and I do know that the more you can minimize this flexing and subsequent vibrations which are being directly and instantly transmitted into the barrel, and the more you can get it do everything the same every time, the better the rifle will shoot.

So hopefully this makes a little more sense to you now!

Gordy Gritters
www.extremeaccuracyinstitute.com
www.gordysgunsmithshop.com
 
Last edited by a moderator:
Mr. Gritters,

Thank you for the swift reply and the Excedrin offer! My head is no longer thumping and I should make a full recovery. And as for proof reading, I can't say a thing as I just found a mis-spelled word in my post that I'm quite sure my dog could have spelled correctly.

I guess, all things considered, it really doesn't matter in what order all of this is happening...whether the bolt drops first, or the firing pin strikes the primer first. Either scenario produces non-desirable effects. What matters is that it does happen, it's results probably aren't condusive to gilt edge accuracy, and what can be done to eliminate, or at least minimize this from happening. Hence, bolt sleeving, Borden Bumps, and quite possibly the 90 degree sear/cocking piece arrangement.

What are your thoughts, or anybody else's, on bushing bolts that go on a hunting/big game rifle?

Justin
 
What are your thoughts, or anybody else's, on bushing bolts that go on a hunting/big game rifle?

Justin

If the rifle is to be used for long range shooting then I can see no reason to give up accuracy.....? IMO the ethical thing to do is maximize your potential, and NOT sleeving a bolt will absolutely guarantee less than maximum potential.

I guess sleeving the bolt on your 600 nitro could be considered to be counterproductive.....

al

Al,

I kinda think along those same lines, but do worry about the minimum tolerances, a bit of dirt and an inoperable bolt. The rifle in question would be a deer/pronghorn gun...and hopefully no 600 yard shots. The owner is a hunter...not an accurate rifle loony like all of us. I'm just concerned that if he spilled his beer or can of Copenhagen on the action, it would gum up the whole works. It would be "light" beer though...

Justin
 
Justin, I think Al has some good thoughts on making a hunting rifle, especially a long range hunting rifle, as accurate as possible. I build and accurize a lot of hunting rifles and the majority of these guys want some serious accuracy.

How I approach this bolt clearance issue will vary from project to project depending on a number of variables: Is it for hunting or competition? Does the bolt need to be able to cycle and feed fast or not? Does it matter if you can see that the rifle has been modified (sleeves on a bolt are very visible)? If it's a competition gun, especially for a "factory class", is it legal to machine the bolt for sleeves? Etc....

First of all, I know of and use three main ways to minimize bolt play in an action: one is by machining the bolt and installing sleeves to enlarge the diameter to take up this space, second is by buying and fitting an oversized aftermarket bolt (like you can get from Pacific Tool and Gauge for some rifles), and the third method is by what I call "epoxy sleeving" the action which reduces the bolt clearance in the action (I show and explain this method in great detail in my classes and in an upcoming DVD). All three methods minimize the bolt play for better accuracy.

How much clearance you end up with will have an effect on the above things like ease of cycling, etc. What I have found over the years to work very well has led me to devise some basic "rules of thumb" that I go by. If fast cycling, sleeve visibility, or match rules are not an issue, I will set the bolt to receiver clearance around .001" - .0015". For fast cycling competition rifles (like our 1000 yard benchrest guns), I will set the clearance about .002"-.0025" depending on the person and application. For hunting rifles I usually go .0025"-.003". When I use the "epoxy sleeve" method, I set the clearance around .0025"-.003" when fast cycling is needed since the epoxy drags just a slight bit more than metal on metal does. I've also used epoxy sleeving for years on match rifles when no extra machining is allowed -the rifles are extremely accurate and nobody can tell by looking that you've done a thing to it!! :)

This is what has worked well for me - hope this helps!

Gordy Gritters
www.extremeaccuracyinstitute.com
www.gordysgunsmithshop.com
 
Several years ago, I had a conversation on the effect of bolt clearance with the fellow that used to make the RamPro actions. He told me that once when a customer brought in a Remington with a sloppy bolt fit, that had some accuracy issues, he drilled and tapped the rear bridge, just above the lug raceways, angled to the CL of the action. In these holes, he installed ball head set screws, and set the clearance to the uncocked bolt to a minimum clearance by running them in till they touched and then backing them out a calculated amount, to produce the clearance that he wanted. I believe that they were secured with something like locktite. He said that after that the rifle started shooting like a 40X, maybe an exaggeration, but the point was that it had a major effect on the rifle's accuracy.

Gordy,speaking of action vibration, did you read the thread about using teflon tape to take up the slop in shroud thread fit?

Boyd
 
Last edited:
Mr. Gritters

I've just read through this thread and saw where NesikaChad mentioned earlier that he does the math and comes to the conclusion that in practice a sloppy bolt really doesn't matter for accuracy.

I have to ask exactly where/when did I state this?

I do recall stating that I have been a long time advocate of the almost zero tolerance fit between bolt and receiver as advertised by the Nesika and Borden line of actions. (Borden bump feature)

I also recall stating that when the math is done, the figure of .00015" is minimal.

In my figures I stated a bolt to receiver clearance of .0045" or a .009" difference in diameters. If I understood your post right you quoted a clearance of .0015" to .002". Essentially half the distance that I posted.
If the figures are linear (I'm attempting to avoid doing the math all over again) then that would put your actions out of theoretical squareness by .000075" where's mine is out of squareness by .00015".

I just plucked and measured a hair from my skull. It's .0025" in diameter according to my Mitutoyo micrometer. My figure of .00015" splits that hair 16.6 times. Your figure splits it 33.3 times. I realize I'm only a high school graduate, but I just have a real difficult time accepting that 33 split hairs verses 16 split hairs makes the difference between X's and not so many X's. Now, is there a point where it does begin to affect things significantly? I'm sure there is.

I built Kyle Leibertrau's rifle that he won the 2007 World Palma Championships with. (Junior individual and team events) I built this on a Nesika K action in 2004/5. I built Charles Clark's Palma gun that he took to Worlds back in 03, also on a Nesika action (model J). Both guns will hold a 1/3rd of a minute for elevation back at 1K. So I will concede that there may be merit to what your saying. But I temper that with the memory of a beat up Remington 700 owned by retired Sgt. Major Norm Crawford who was also on the 03 Palma Team. His "sow's ear" is every bit as capable as the rifles I built and to the best of my knowledge it does not have any sort of modification to minimize the bolt to receiver tolerance. Then there's Mr. Corbin Shell who won a Tennessee 1000 yard state level match a few years back with a Mauser that Hitler probably carried.

So please be patient with my skepticism. I'm about finished with this action that I'm working on right now. This is a personal gun that I'm going to use for blasting at yotes this winter. I'm going to finish it per my plans and then do some group testing. I'll then pull the bolt, bush it, and repeat the tests. If the gun shows a conclusive and dramatic change/improvement I will be the first to jump on this thread with a big ol helping of shoe leather and crow.

Regardless, this is one of the most interesting and constructive threads that I've seen on this forum in a long time.

Cheers,

Chad
 
Last edited by a moderator:
Gordy,speaking of action vibration, did you read the thread about using teflon tape to take up the slop in shroud thread fit?

I'm sure teflon tape will work but there is another way also:

DSC_0023-3.jpg


DSC_0025-2.jpg


DSC_0027-3.jpg
 
This is a very easy to do and solid, clean method of bumping a bolt.

I "bump" the occasional 700 bolt. When I am truing the action (as I described above) and have a tight bushing in the rear of the action, I take a diameter measurement from the bushing.

I machine two standard 3/8's inch dovetails in the bolt body right where they would contact the rear bridge on the receiver when the bolt is closed. Then those dovetails are fitted with steel dovetail blanks and they are machined to the diameter measurement I got from the bushing.

The bolt operates freely with the "bump" not coming into play until the bolt is closed... and when you close it all rear up and down movement is eliminated.

I can not take credit for this idea, I first heard about this method from Bill Leeper who frequents this and other "gun" sites occasionally.

Here is a picture of the bottom "bump" on a 700.
700boltbump-0.jpg
 
Last edited by a moderator:
Dennis,

Of all the methods I've seen, I must admit that is the most clever one yet. Very cool and thanks for sharing.

One of my biggest turn offs with the bushing method has been the cosmetics when finished.

Thank you.

Chad
 
Dennis

I don't think I would have thought of that in a million years because I don't use a dovetail cutter that often. Thanks for sharing.

Dave
 
Gentlemen,

An informative and interesting thread this certainly has been.

Mr. Gritters: Thank you for the info on the clearances you use. It's nice to have some guidelines for the different classes of rifles. The ones I have done have all been minimum tolerance (.001-.0005) live varmint rifles. They are a bit temperamental when it comes to cycling, but it's not an issue to me when out zapping ground squirrels. I know that it's there and try and work the bolt straight back and forth, without side pressure. I have noticed increased difficulty in closing the action, which I assumed comes from the decreased tolerances and the bolt's movement upwards being restricted by the presence of the sleeves. The same mechanics are happening during cocking, but with not as much space for it all to happen in. Has this been your, and anybody else's experience as well?

Now I'm going to throw this out here...and may get very publicly flogged. Has anybody experimented with "alternate" materials to use as sleeving material (If I understand Mr. Gritter's "epoxy sleeving" correctly, the answer would be yes)? Specifically the space age plastics that are available. My line of thinking is this: We can reduce the tolerances to a minimum, but we're still going to get some movement when the bolt drops. And quite possibly, we are going to get some unwanted vibrations out of said movement. It would seem that using one of the super plastics for the sleeves would help in the vibration dampening department. The fly in the ointment as I see it would be the durability of the plastic sleeve. Will it wear, how much, and how long will it take? I don't know if there is any validity to any of this, so I thought I would ask. Opine away...

Thanks for a great thread...I'm learning alot.

Justin
 
Justin,
There are a lot of synthetics that would wear for a long time. Some of them might not glue well. I have found that you can run tight bolt clearances if they are fitted properly and the primary extraction angles and clearances are right. Fluting helps if you have a little trash on the bolt. You can have the bolts coated or QPQ which really slicks them up.
Dennis, you and Bill have a neat way to do it.
Butch
 
Could not stand it... had to jump in....

I grew up on manual machines (40+ years), doing the trig functions on paper and with a slide rule. The days when indexers were hand cranked and the dial holes were pinned. about 10 years ago I went back to the community college and took machining science. The first two semesters were learning to use manual machines. Then we were introduced to G Code. The next 6 semesters were devoted to 3, 4, 5, axis machining. With a little time and skill I could measure/draw about anything and duplicate it. The world of Bill Gibbs and Gibb's Cam ripped my heart out and showwed it to me. To me machining it is more than making parts, it is artistry with a touch of common sense.

I have made actions with a manual lathe, shaper,mill and a grinder l. I have made actions with a CNC lathe, CNC mill and CNC wire EDM. The manual action was drawn up in a blue print and took several days to make. The CNC action was drawn up, tooled out, and 3D model (solid works) cut prior to indexing the first piece of stock. The final machining of the action took only a matter of hours to complete.

Was one better than the other in function, fit and accuracy. Yes, the CNC action was more uniform and was kept to .0005 tollerance overall. The manually made action had a piece of my soul attached to it. It had what I call character. I would say I am more proud of the manually made action. It used both my mind and body to complete it.

The one thing that I can saw very few people know the flaws and imperfections found on these new CNC machines. The machines are made with all kinds of imperfections. The solfware is written to correct for all the flaws found in the machine.

It is very obvious that Mr. Dixon and Mr. Lambert look at the world through different colored glasses. Mr. Dixon I have seen and been a part of both worlds. Butch and I have locked horns several times, I still like and respect Butch. I consider him a friend and call him for advice frequently. Mike Bryant who is one of the finest gunsmith around told me a number of years ago to never close my eyes or mind to new ideas and methods. I feel that was some of the best advice I have been given over my years. I use a high presure flush system and chamber through the headstock at high speed using a floating reamer holder. My chambers on good days will have less than .0002 run out, most will indicate in the machine with none . That is perfectally acceptable with the level of accuracy my customers are expecting. Most folks don't realize a change of 10 degrees up or down will cause more run out than that.

The real truth is that we only machine as good as we can, that goes back to philosophy class 101 "ideal or absolute". CNC machines don't think they just repeat what they are told. So they are only as good as the person writing the code.

I have machined in a precision shop where the run out can not be read with a mechanical indicator. Electronic indicators had to be used in a controlled enviroment.

Gun building is not rocket science, yet.

Nat Lambeth
 
Back
Top