Your method...

M

MarkR

Guest
Would anyone here mind sharing with me "their method of trueing a Rem 700 action?
Mark
 
Sure.

I have a 4 axis CNC mill.

I use a fixture that supports the action vertically in the machine and allows me to adjust for indicating along the bore CL. I locate bore CL with a ground tapered arbor I made. I indicate the Z axis in two points to ensure I'm actually vertical/parallel with the machine spindle. Then I indicate to find center.

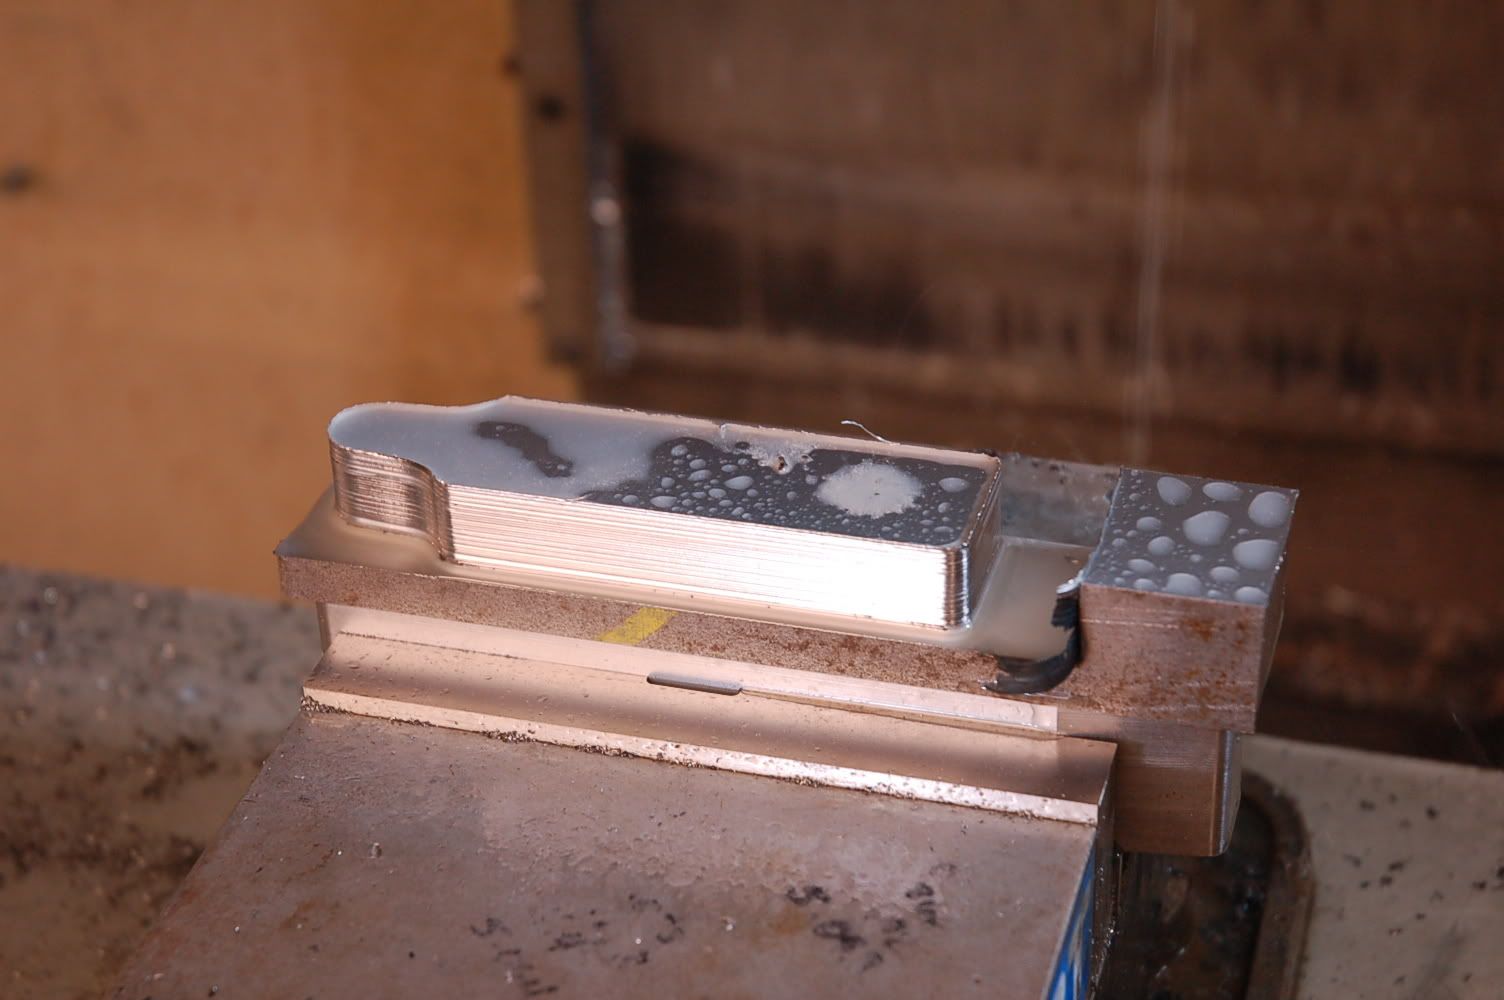
I use a 3/4" five flute carbide endmill to skim the receiver face and the lug surfaces. I cut all my threads to 1.085" OD X 16 TPI. This ensures that I get fresh material all the way around. The same tool is used for all three ops to ensure there's no tolerance stacking from using different tools with different tool offsets. This way tool wear is compensated for no matter what. The thread pitch doesn't really exist. I made it up. So if a guy wants this done he's not going to want to use his factory barrel. But why would he anyways right?

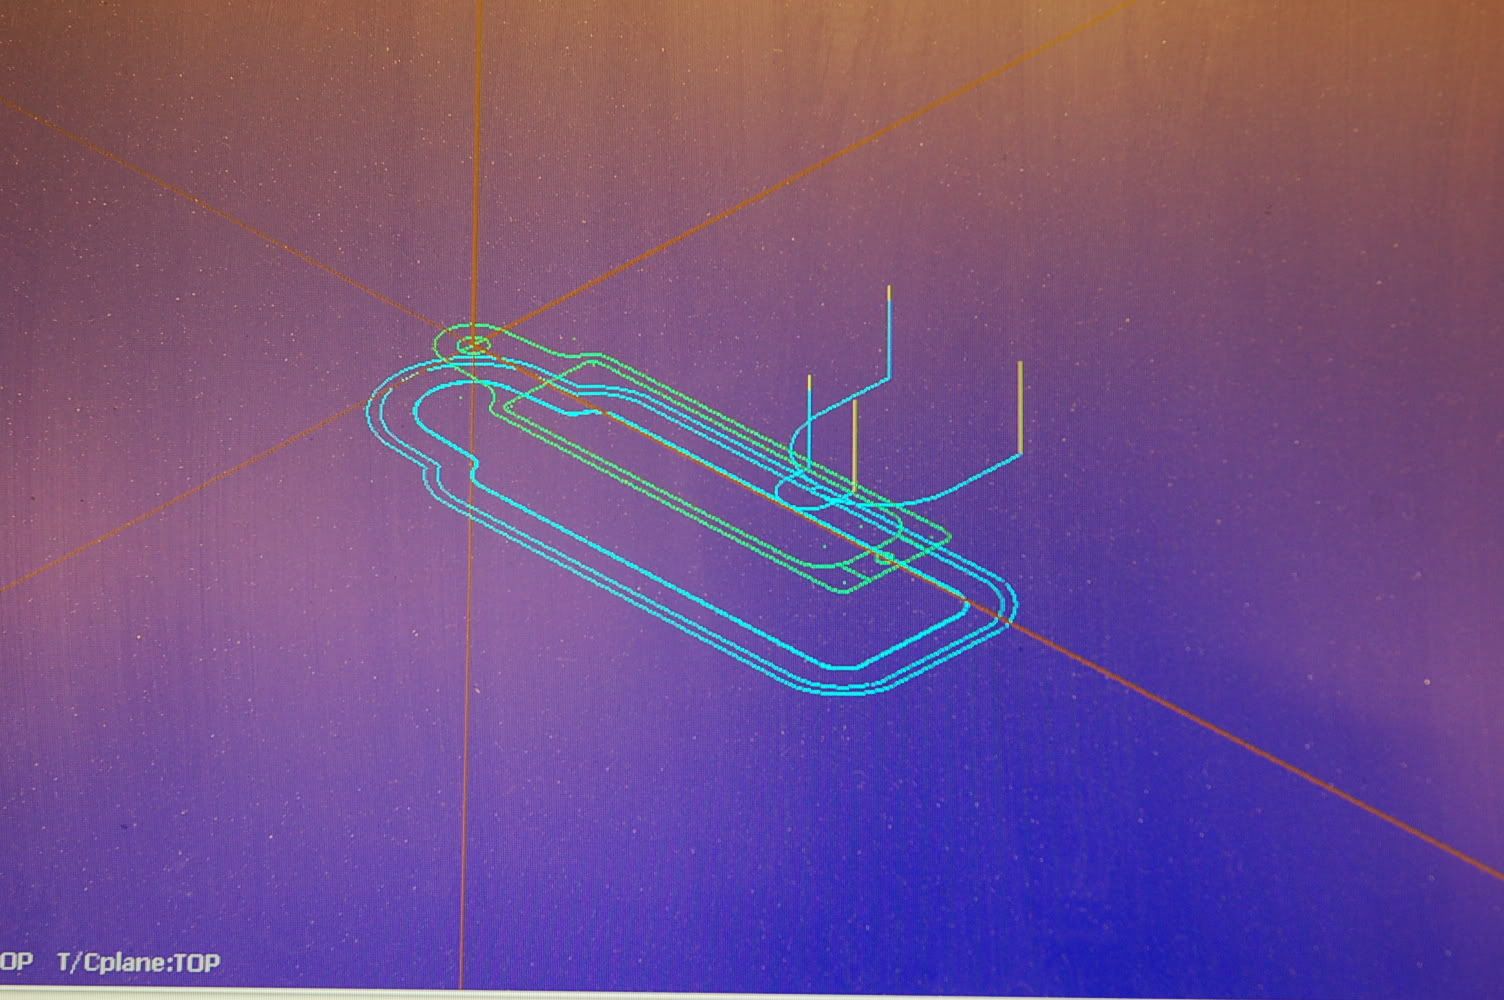
I use "circular hole interpolation" (a fancy term for thread milling) to cut the threads. I have my software set to not linearize the spline movements so that the threads end up with little "facets" along the flanks. In CNC jargon this means that I'm moving the tool (actually the table) in tiny little X/Y/Z axis straight line movements rather than a helical arc movement. To the untrained eye this would be labeled as tool chatter but in fact it isn't. I do this because I think it helps. The facets "bite" the barrel thread flanks with point contact and provide for a little more support along the entire helix of the barrel tennon/receiver ring thread fit. If you get "engineering anal" about 60* thread forms you'll quickly learn that only certain portions of the thread actually do anything.

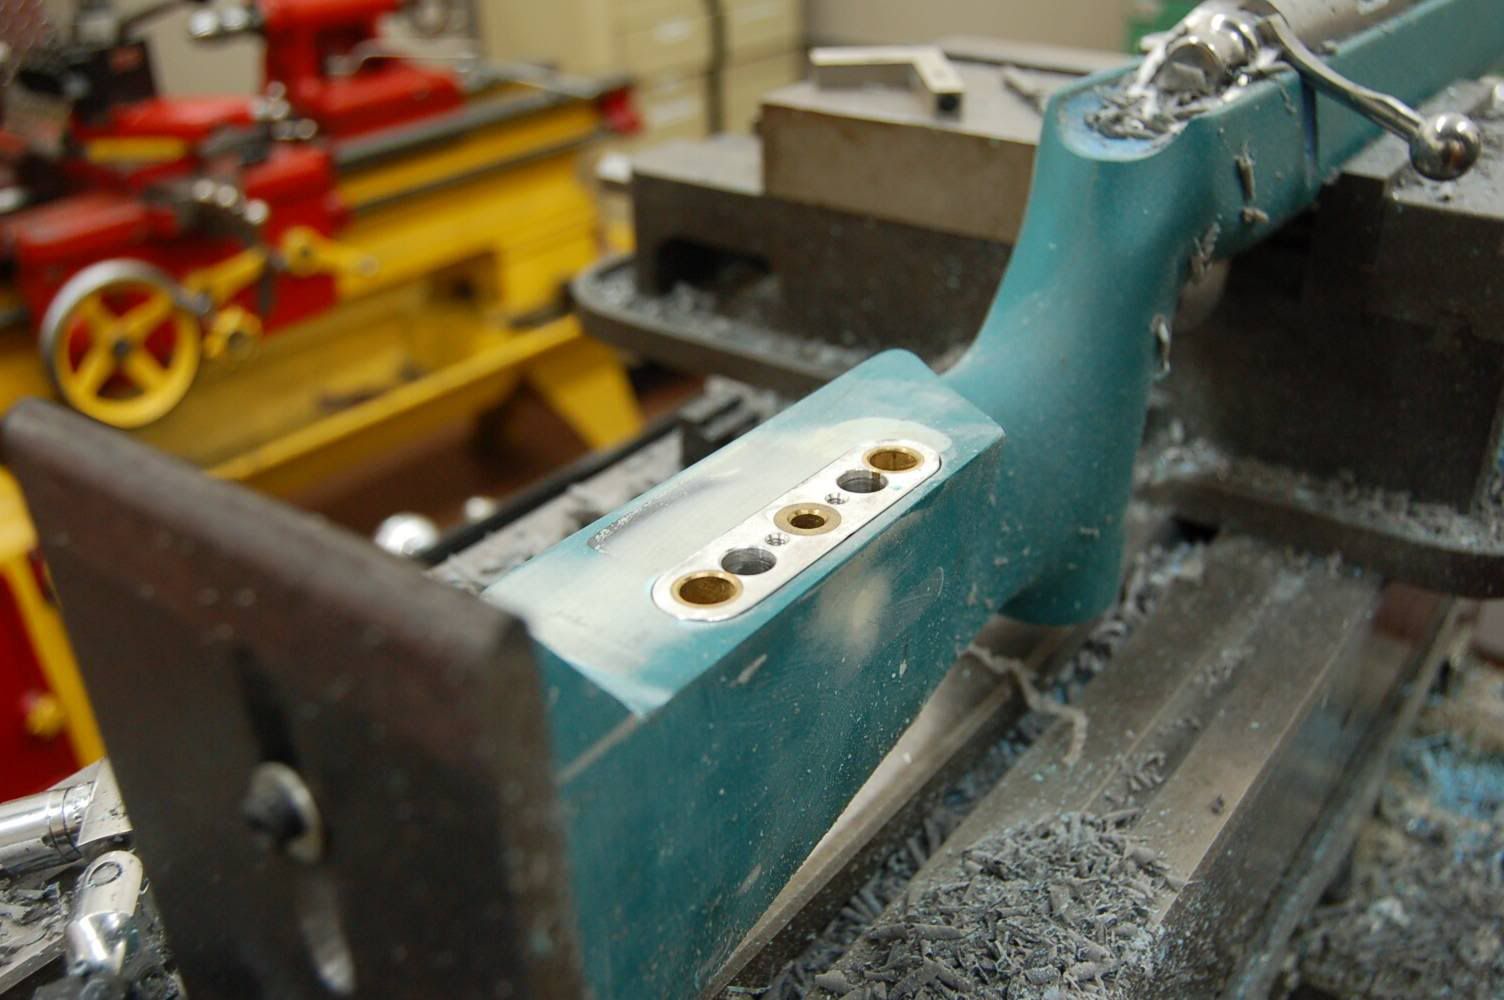
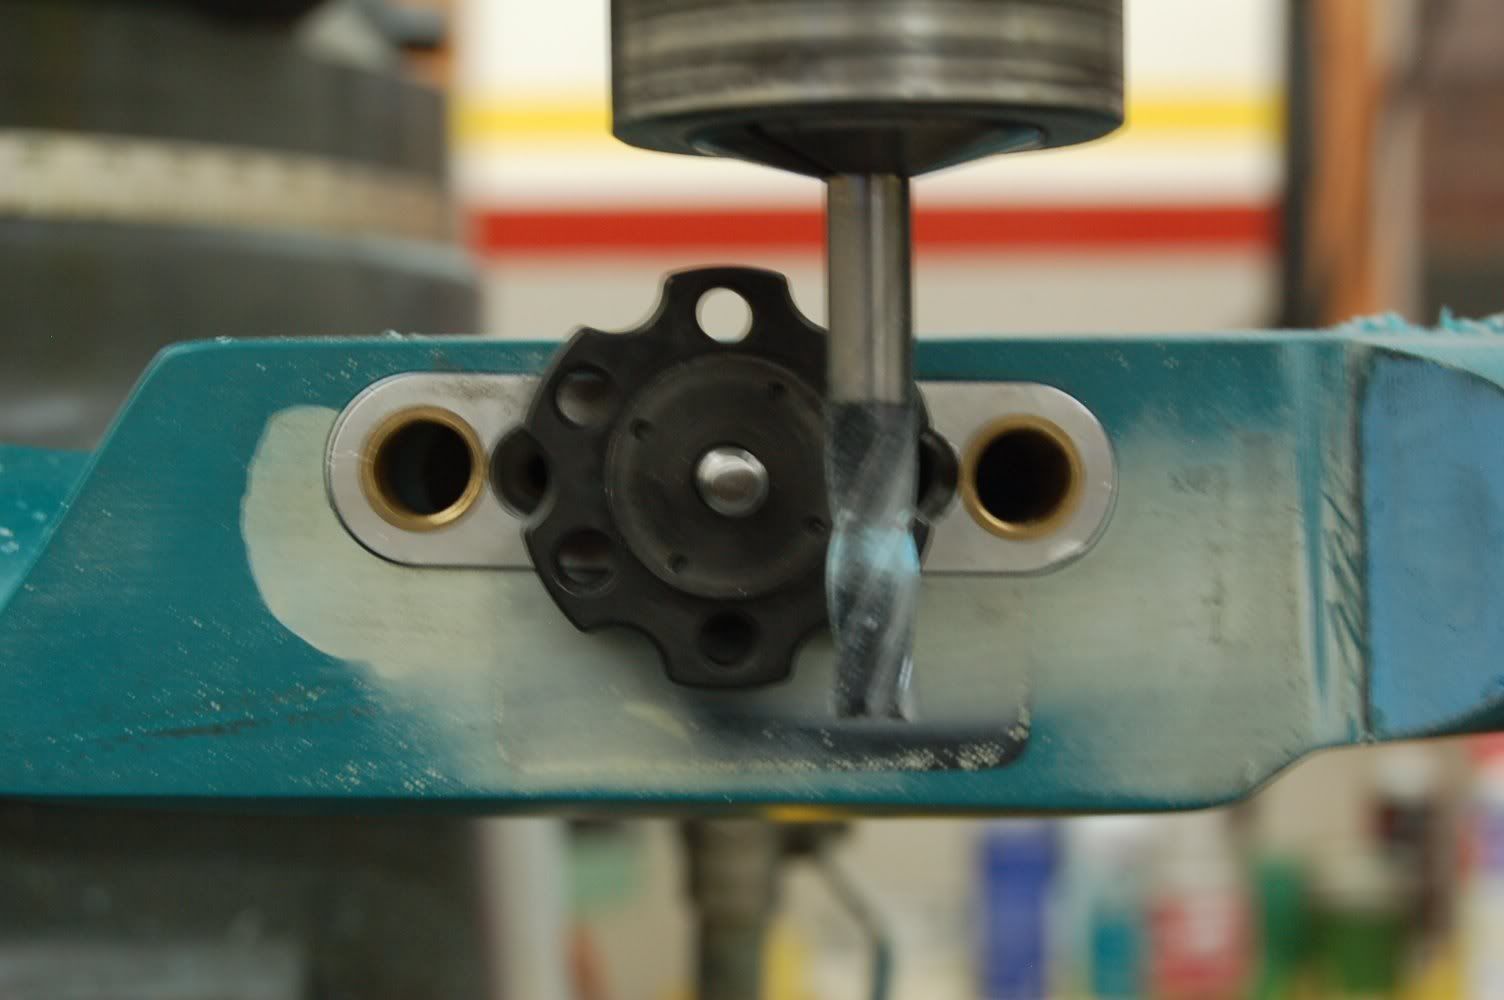
From there I'll skim the bolt lugs, spot the face, drill the receiver for a pinned recoil lug, helically flute the bolt, install an external bolt release, and open the scope ring holes to 8-40. I do this with a series of 4 pocket tool paths instead of just cramming a drill/tap through the existing holes. This way I know the scope bases will be located on the true bore centerline. I have found a few actions where they are off a little sometimes. (not often though)

Finally, it gets hand filed/sanded/finished to remove any nicks/dings from regular service.

I TIG weld the bolt handles to the bolt bodies (Remington) to ensure it doesn't fly off in the event of a sticky case extraction. This also allows me to reposition the bolt the gain back the primary extraction lost from cutting the lug faces of the bolt and the receiver. I make my own enclosed bolt shrouds, install my own cocking piece, striker spring, and striker, and revise the cocking cam geometry so that the action is a "cock on opening" only instead of the normal partial on opening, partial on closing. (this applies to Remington stuff)

It sounds like a lot of work and it is, but the result makes for a pretty nice action.

Here's a few snapshots.

Cheers and enjoy,:D:D

Chad

Chad Dixon
Gunmaker
LongRifles, Inc.

DSC_0010-3.jpg


DSC_0012-2.jpg


DSC_0044-2.jpg


DSC_0043-2.jpg


DSC_0039-2.jpg
 
Last edited by a moderator:
I now use the tooling Dave Kiff sells at Pacific Tool and Gauge. The action lug recesses, action face, and threads are aligned with the bolt race way. In a lathe I machine the lugs true with the bolt body, the bolt face is trued while held in the action with a guided cutter. Some request the firing pin be bushed, some request the bolt to be "bumped"...

The tooling consists of piloted cutters and taps, and bushings that front the front and rear of the action. You have to use this tooling to actually see how it works and how well it works.

A while ago different methods of “truing” a Remington 700 action were discussed. I mentioned I had purchased some tooling and would be testing it shortly… I bought the tooling from Dave Kiff at Pacific Tool and Die in Oregon.

Previously I had been truing 700 actions in the lathe with considerable time involved. This tooling allows me to do the job much quicker and at a savings to the customer.

The test I did was to machine threads on a barrel stub in the lathe and then screw an unaltered 700 action on to this stub.

I inserted tight fitting straight bushings in the front and rear of the action in the bolt race way. The front of the action required a bushing of .7015”; the rear was .7025”. I then inserted a ground tool (a long piloted tap) made for those bushings and measured the run out just behind the action as I turned the lathe chuck by hand. It was running out .026”.

I then unscrewed the action and I used a piloted cutter that removed a slight amount of the tops of the threads and re-cut the face of the action and the locking lug recesses. Then using the piloted tap re threaded the action. It removed threads more on one side than the other. I had inspected the recess and the lugs were bearing well but a bit harder on the bottom lug and not particularly smooth.

After this facing and threading operation I screwed the action back on the threaded stub in the lathe with the same bushings in the bolt race way. I inserted the piloted tool (same as before) and when rotating the lathe chuck by hand found the run out was now less than .003”.
I then set the bolt itself up in the lathe and faced less than .002” of the rear of the bolt lugs. They were quite true. Then I took the bare action and screwed a bolt-facing guide into the action threads. I slipped the carbide bolt-facing tool behind the extractor. It is held there like a shell and I inserted the bolt and the tool into the action and the guide closing the bolt. It is held closed while the bolt facing-tool is pushed against the bolt and slowly turned. This is removed, inspected and redone until the bolt face just cleans up evenly. This assures the bolt face is not crooked to the bore.

Factory 700 barrels can still be used with this method although they require head spacing.

This does not make a 700 into a bench rest action, however it makes it much more accurate with a quality barrel. I feel the end result is as good as setting up and single point cutting in a lathe.

Here are two pictures of the run out, before and after...
700%20runout%201.jpg


700%20runout%202.jpg


Here is one picture of the action with the front bushing still in after re threading and facing.
700%20runout%203.jpg


Here is a different action after very lightly lapping the lugs with 600 grit to confirm the fit. Both lugs have good contact. The only reason the front of the lugs and the nose of the bolt are machined is for a more accurate measurement when fitting the barrel.

inside%20trued%20700.jpg


This is a picture showing although the front and one lug recess are faced true it still needs more facing as the other lug recess is untouched...

700%20truing%20not%20quite%20done.jpg


Check Mike Bryant's web page out... he details an excellent lathe procedure.
 
Last edited by a moderator:
Chad,

How long does it take you to set up and true an action using the set up you described (minus messing with the bolt, scope base holes, etc)? Just the nuts and bolts truing of the action.

And do the "facets" you machine into the action threads work similar in theory to the "Spiralock" threads?

Justin


Set up takes about ten minutes. This assumes I have to pull the vise, clean the T slots, stone the mill table, and wipe everything down before clamping the chuck.

Cycle times are pretty fast. These are simple programs and receivers are typically pretty easy to machine. The RPA Quadlocks can be a bit of a bear but those are fairly rare.

Threadmilling set up by far takes the longest because I am picking up an existing thread. It's just a matter of creative use of a mirror, a flashlight, some DyeChem, and manipulating tool offsets in the control.

I won't go so far to claim that the little facets on the threads behave the same way the Spirolock system works, but it is (I think anyways) kinda sorta along the same bloodline.

Spirolock has a revised thread flank geometry that allows the opposite thread to really "bite" the flank. This doesn't work that way. In fact it may not do anything at all. All I know is what I think is going on and that guns have historically done very well when they are all finished.

I may be completely full of poop on this thread thing. It's just a gut feeling I have. To add to that, my gut is usually pretty sharp about things.

Thanks.

C
 
My 700 Truing method...

Stick it back together, sell it, and get a custom action.
 
Knutz and boltz:

Unless an action has been used as a chock block for a commercial airliner or as a crowbar on an oil derrek chances are good the receiver bore is pretty straight. Since my ground tapered arbor fits tight it matters little to me because I datum everything off bore CL anyways. It can be out basically as much as it wants. I seriously don't care because when I'm done all my surfaces are going to be square, parallel, and concentric to it anyway.

As far as bolt slop goes. Yes in a perfect world it is/would be nice to have a minimal tolerance fit between the OD of the bolt and ID of the receiver bore. I have long advocated the almost zero tolerance/slip fit of a Nesika or Borden action just for this reason. (Borden bump feature is what I mean specifically)

In practice. Sit down with a trig cheat sheet or a CAD program and draw a tube with a .704" bore. Stuff a .695" OD stick through the center of it. Now load one side to the point of contact. You end up with .0045" of deflection from theoretical centerline. Now do the math.

A standard length Remington 700 bolt measures 4.400" from the lug surface to the front edge of the handle. When in battery with a loaded striker spring I have no doubt the cocking piece is pushing the bolt vertically as it tries to get over the trigger sear. It'll do this until the 12 o clock tangent of the bolt body contacts the 12 o clock tangent of the receiver bore. This means that only the lower locking lug is in contact with the receiver. That angle of deflection measures out to be .0586 degrees.

The half dozen Remington bolts I have floating around here all measure around .695" +/- .0015" so I'm feeling pretty good with my figures.

The "swept arc" of the locking lugs is around .980"

.980" - .695" ='s .290" Now divide that by 2. It's .145" that is the distance of the lug feature from the outside radius of the bolt body to the outside radius of the lugs. If you figure an angular deflection of that .0586 degrees referenced earlier in my little sermon you'll find that the "sloppy fit" between the receiver lug surface to the bolt lug surface is (drum roll please)


.00015" To put this in perspective gents, most high quality thimble micrometers are incapable of measuring this kind of dimension with any kind of reliable repeatability.

Now, it seems reasonable to me that when a 50,000 CUP cartridge lights its boiler room that .180955736847" square inches of cartridge rim (figured off a .480 cartridge case head OD) is going to have little issue with pushing that upper bolt lug the .00015" to square things up.

And all from a "chitty" pawn shop Remington 700.

My proof is you go to the firing lines of Camp Perry or any other Marquee NRA highpower match. There are dozens of Remmy 700's on the firing line and almost none of them have the little bushings epoxied on the bolt body that folks seem to rave about.

I realize benchrest guys are a very particular sort. Be that as it may I feel pretty good stating that the better shooters have realized long ago that 90% of a guns accuracy comes from a great barrel, careful ammunition preparation, and PRACTICE.

The other 10% is receiver, bedding, a crisp trigger, a good set of optics, and just dumb luck (meaning you beat the wind that day)

Hope this was at least entertaining if not even a little educational.

Cheers and all the best,

Chad


Chad Dixon
Gunmaker
LongRifles, Inc.
 
Last edited by a moderator:
now that was worth a read

Thanks Chad. That's one of the best, most informative posts I've read on this site, or any site, in a long time.
 
I agree, great post. To add to that train of thought, that vertical loading of the bolt is gone as soon as the firing pin is released by the trigger, and before the firing pin hits the primer.
 
Chad

How are you picking up the thread do you start small(diameter) and change your "Z" offset. What kind of machine are you using? I think more than one would like to know. Mark
 
Some things aren't for sharing.

It's a careful process that works.

Nough said.:D
 
Back
Top