P
You are using an out of date browser. It may not display this or other websites correctly.
You should upgrade or use an alternative browser.
You should upgrade or use an alternative browser.
P
PPP MMM
Guest
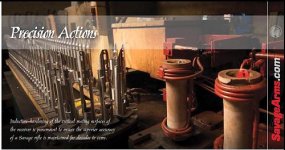
,,,,,,,,,,,,,,,,,,,For the sake of curiousity, these are snips from the savage 2008 catalogue showing heat treating stainless, highly unlikely the cm actions are much different.
Cheers
If these receivers were of 4140 steel these selectively hardened sections would have the same hardness all through and the hardness of the middle section of the receiver would be left virtually uneffected.
One would assume that the stainless steel they use has similar/comparable hardenability.
Shoot well
Peter
Last edited by a moderator:
Bill Leeper
New member
Peter,
I'm aware of the hardening attributes of 4140. I only mentioned the tendency for the steel to harden differently at different depths as a point of interest. Whether or not this would come into play on a 700 receiver, for instance, I can't say but suspect you are correct There may be some evidence of this at the locking lug seats but I'm not about to section and test one of my 700's to find out!
Interestingly, many Mausers are selectively hardened. Just what techniques they may have employed to do this, I'm not sure. Post-64 Winchester M70 receivers are also selectively hardened at the lug seats and at the extraction cam. This is evedent up to around 1978 but I haven't noticed it on the most recent CM actions and never on the SS actions.
Just what any of this has to do with Dave Manson's tooling is beyond me! Regards, Bill.
P
PPP MMM
Guest
Bill,what a bushing of P14 has to do with Masons truing tool?
I was refering to this post and also your post of thread bushing of P14. No bad feelings.
Shoot well
Peter
,,,,,,,,,,,,,,,,,,,,,I assume, and that is "dangerous", the Remington 700 action is heat treated after threading and the TIR did not exist when it was originally machined and the TIR was caused by warpage. I know when Mausers were heat treated there was a threaded mandrel inserted into the action prior to heat treating. it was put in the action to reduce warpage. I have found Remington 700s to only be surface hardened. If you completely remove the threads and cut new threads the remaining metal is much softer. This indicates to me only surface hardening. My second question would be how does the Manson tool do when it comes to a hard place in the metal. Does it skate or cut the hard spot.
Rustystud
I was refering to this post and also your post of thread bushing of P14. No bad feelings.
Shoot well
Peter
D
Dennis Sorensen
Guest
A test...
I finally got a chance to test the run out before and after using my new tools...
A while ago different methods of “truing” a Remington 700 action were discussed. I mentioned I had purchased some tooling and would be testing it shortly… I bought the tooling from Dave Kiff at Pacific Tool and Die in Oregon.
Previously I had been truing 700 actions in the lathe with considerable time involved. This tooling allows me to do the job much quicker and at a savings to the customer.
The test I did was to machine threads on a barrel stub in the lathe and then screw an unaltered 700 action on to this stub.
I inserted tight fitting straight bushings in the front and rear of the action in the bolt race way. The front of the action required a bushing of .7015”; the rear was .7025”. I then inserted a ground tool (a long piloted tap) made for those bushings and measured the run out just behind the action as I turned the lathe chuck by hand. It was running out .026”.
I then unscrewed the action and using the piloted tap re threaded the action. It removed threads more on one side than the other. Then I used a piloted cutter that removed a slight amount of the tops of the threads and re-cut the face of the action and the locking lug recesses. I had inspected the recess and the lugs were bearing well but a bit harder on the bottom lug and not particularly smooth.
After this threading and facing operation I screwed the action back on the threaded stub in the lathe with the same bushings in the bolt race way. I inserted the piloted tool (same as before) and when rotating the lathe chuck by hand found the run out was now less than .003”.
I then set the bolt itself up in the lathe and faced less than .002” of the rear of the bolt lugs. They were quite true. Then I took the bare action and screwed a bolt-facing guide into the action threads. I slipped the carbide bolt-facing tool behind the extractor. It is held there like a shell and I inserted the bolt and the tool into the action and the guide closing the bolt. It is held closed while the bolt facing-tool is pushed against the bolt and slowly turned. This is removed, inspected and redone until the bolt face just cleans up evenly. This assures the bolt face is not crooked to the bore.
Factory 700 barrels can still be used with this method although they require head spacing.
This does not make a 700 into a bench rest action, however it makes it much more accurate with a quality barrel. I feel the end result is as good as setting up and single point cutting in a lathe.
Here are two pictures of the run out, before and after...


Here is one picture of the action with the front bushing still in after re threading and facing.

I finally got a chance to test the run out before and after using my new tools...
A while ago different methods of “truing” a Remington 700 action were discussed. I mentioned I had purchased some tooling and would be testing it shortly… I bought the tooling from Dave Kiff at Pacific Tool and Die in Oregon.
Previously I had been truing 700 actions in the lathe with considerable time involved. This tooling allows me to do the job much quicker and at a savings to the customer.
The test I did was to machine threads on a barrel stub in the lathe and then screw an unaltered 700 action on to this stub.
I inserted tight fitting straight bushings in the front and rear of the action in the bolt race way. The front of the action required a bushing of .7015”; the rear was .7025”. I then inserted a ground tool (a long piloted tap) made for those bushings and measured the run out just behind the action as I turned the lathe chuck by hand. It was running out .026”.
I then unscrewed the action and using the piloted tap re threaded the action. It removed threads more on one side than the other. Then I used a piloted cutter that removed a slight amount of the tops of the threads and re-cut the face of the action and the locking lug recesses. I had inspected the recess and the lugs were bearing well but a bit harder on the bottom lug and not particularly smooth.
After this threading and facing operation I screwed the action back on the threaded stub in the lathe with the same bushings in the bolt race way. I inserted the piloted tool (same as before) and when rotating the lathe chuck by hand found the run out was now less than .003”.
I then set the bolt itself up in the lathe and faced less than .002” of the rear of the bolt lugs. They were quite true. Then I took the bare action and screwed a bolt-facing guide into the action threads. I slipped the carbide bolt-facing tool behind the extractor. It is held there like a shell and I inserted the bolt and the tool into the action and the guide closing the bolt. It is held closed while the bolt facing-tool is pushed against the bolt and slowly turned. This is removed, inspected and redone until the bolt face just cleans up evenly. This assures the bolt face is not crooked to the bore.
Factory 700 barrels can still be used with this method although they require head spacing.
This does not make a 700 into a bench rest action, however it makes it much more accurate with a quality barrel. I feel the end result is as good as setting up and single point cutting in a lathe.
Here are two pictures of the run out, before and after...


Here is one picture of the action with the front bushing still in after re threading and facing.

W
wnroscoe
Guest
Dennis,
I keep using mine and am very pleased with the results. I recently purchased the .705" raceway reamer and an after market .703" bolt from Dave. The raceway reaming and bolt replacement was worth the expense after looking at the end result. Thanks for sharing.
I keep using mine and am very pleased with the results. I recently purchased the .705" raceway reamer and an after market .703" bolt from Dave. The raceway reaming and bolt replacement was worth the expense after looking at the end result. Thanks for sharing.
Dave Tooley
Active member
Dennis
I got pretty much the same results using Dave Manson's tooling. It's not perfect but it's darn close. Wait till you strt buying new taps. It won't be as cost effective as you think. Use Moly-D for a lube. It seems to ahve extended my tap life.
Dave
I got pretty much the same results using Dave Manson's tooling. It's not perfect but it's darn close. Wait till you strt buying new taps. It won't be as cost effective as you think. Use Moly-D for a lube. It seems to ahve extended my tap life.
Dave
Jim Wooten
Just Me
Proof is how it shoots...
Pics would be nice.
David
Well, I just did my FIRST barreling project, so this was a real test of how the system works with a true newby. I used the Manson kit, and the results were better than I expected (link attached).
Now I need a lathe of my own, if I can find one within my budget range
http://benchrest.com/forums/showthread.php?t=53620
Jim
P
P Kunda
Guest
Stay away from Grizzly
Peter
,,,,,,,,,,,,,,,,,,,Well,
Now I need a lathe of my own, if I can find one within my budget range.
http://benchrest.com/forums/showthread.php?t=53620
Jim
Peter


