Action Build Log.

Most happy to see this working out :)
Looking forward to seeing the test results.
O.
 
More Progress

G'day fellas

Well as posted I got my actions back from the Armourer last month and he did a very good job. I put the bolts and receivers back up in the lathe to check his work and it was spot on:D
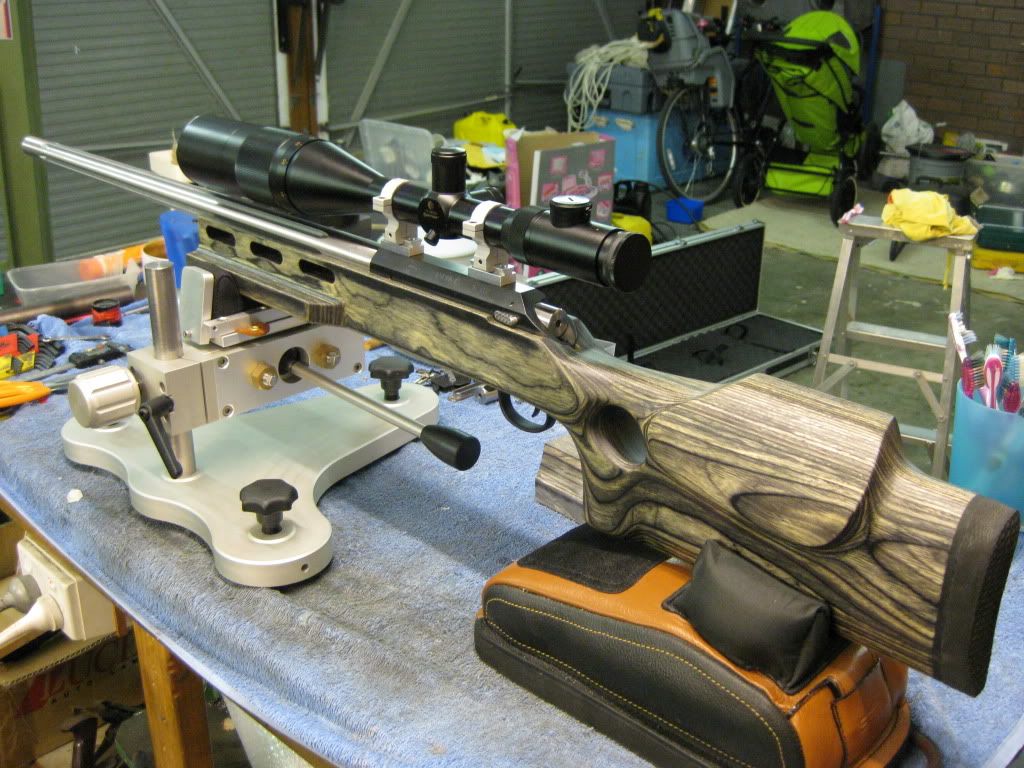
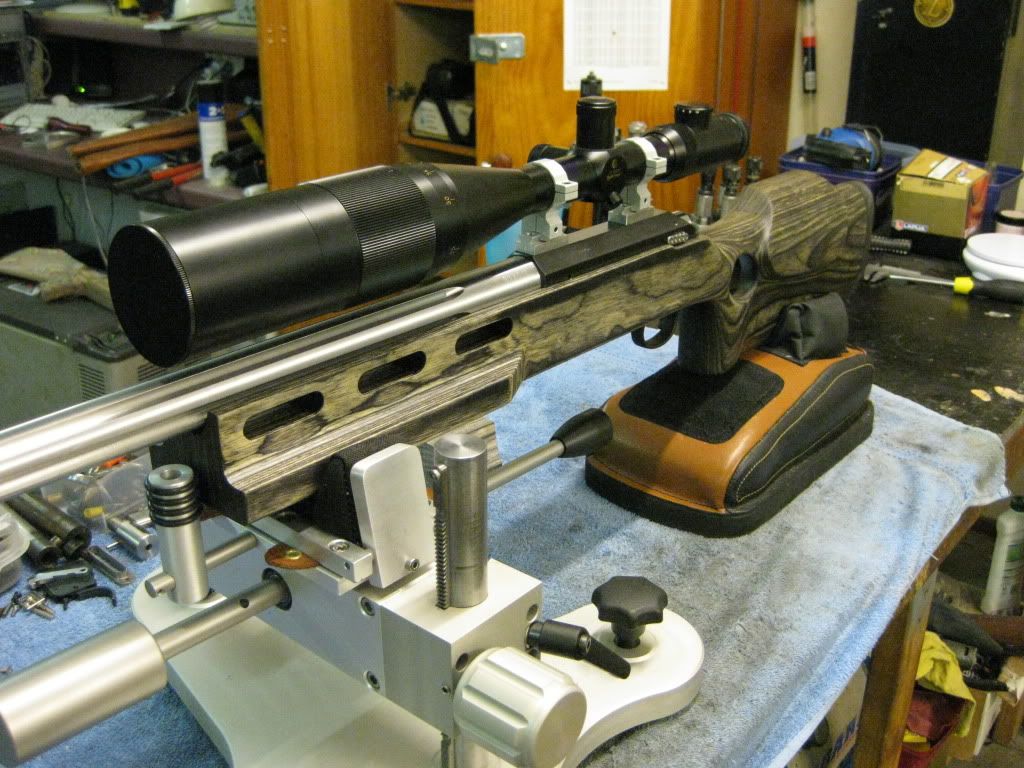
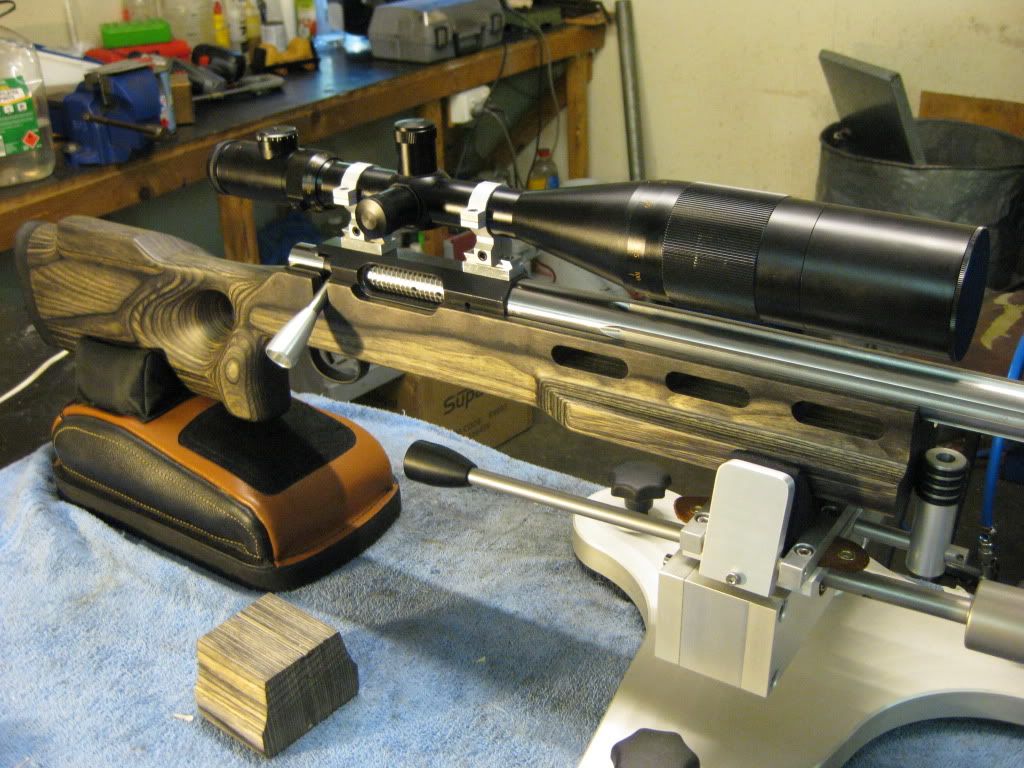
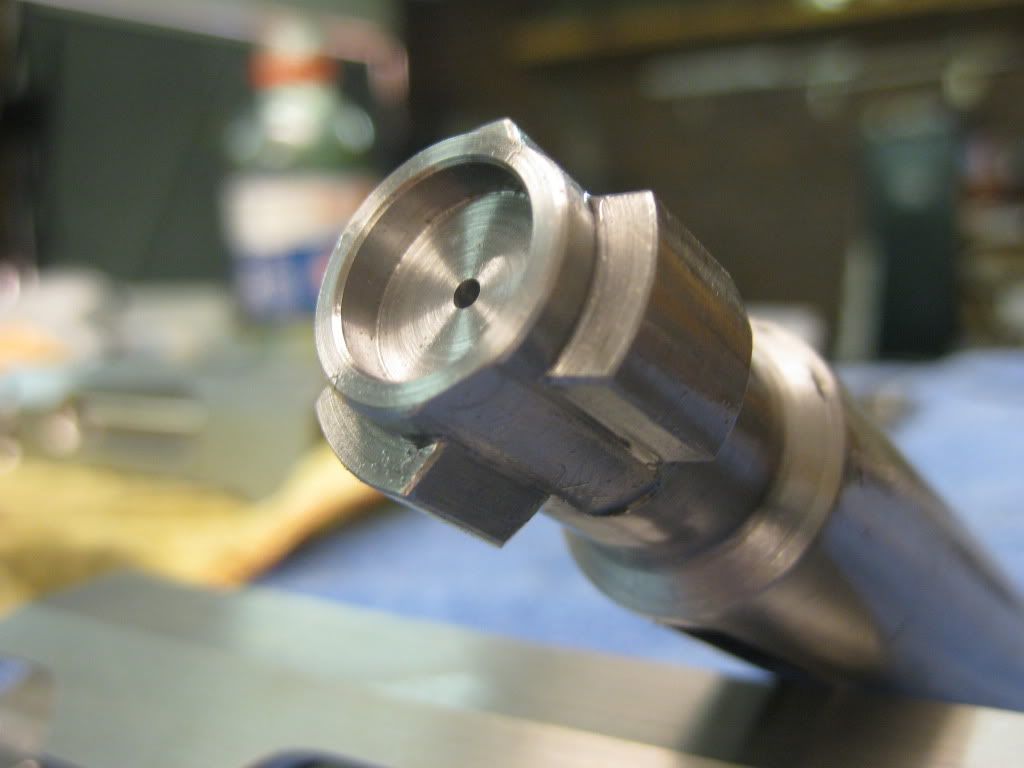
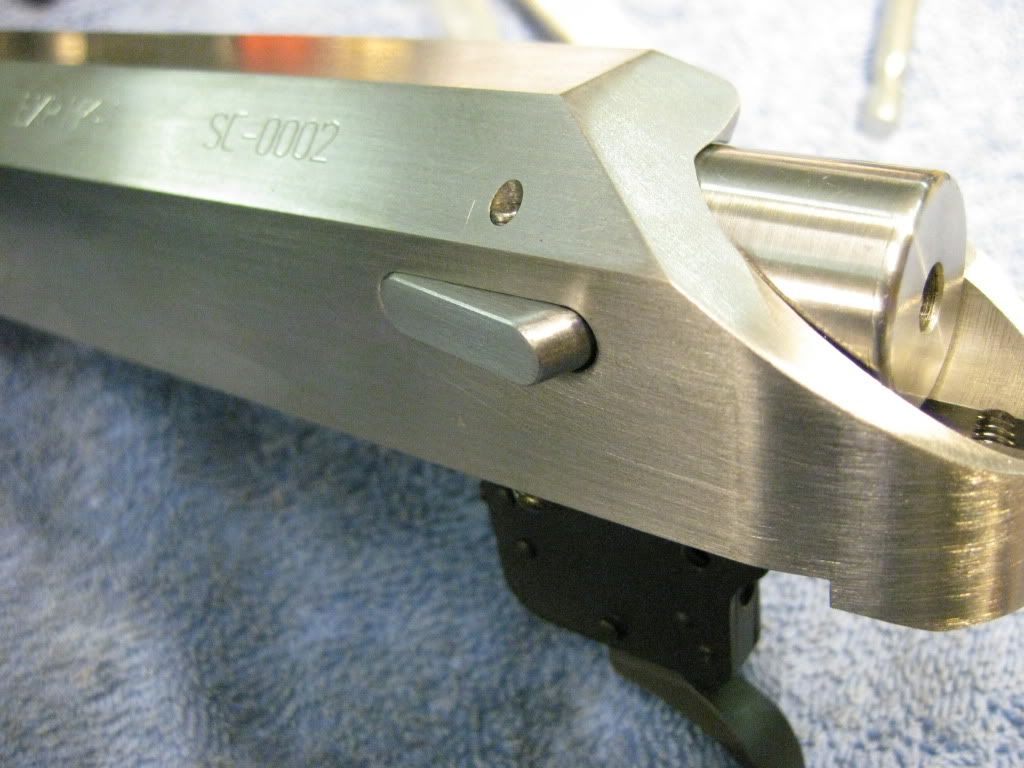
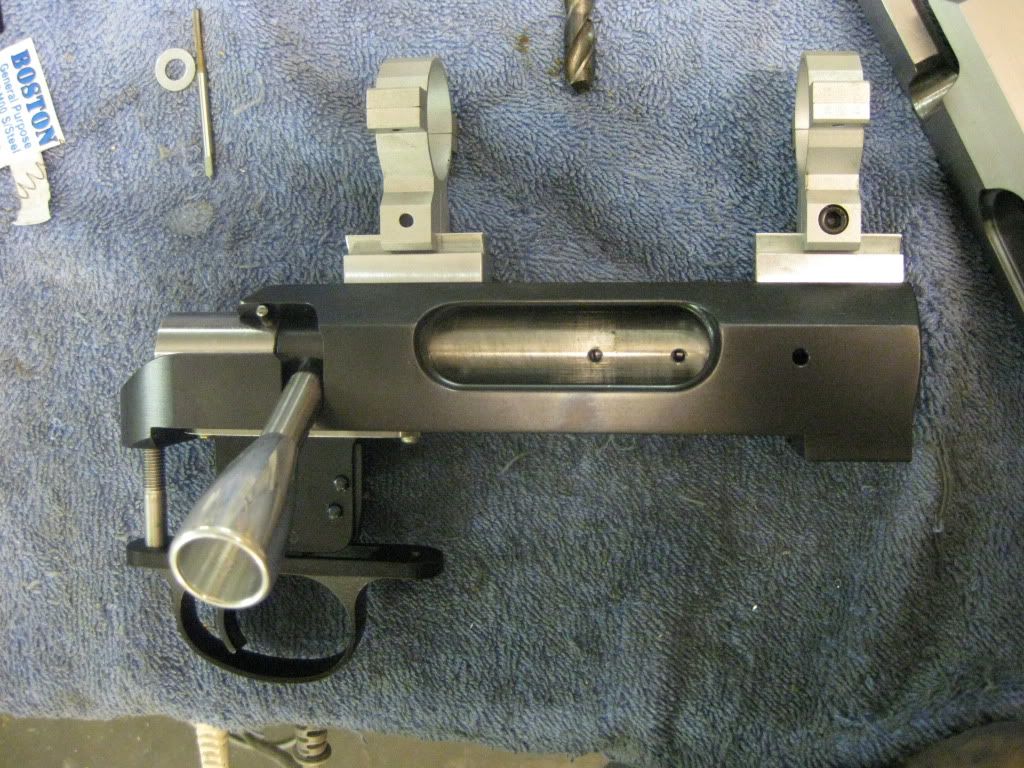
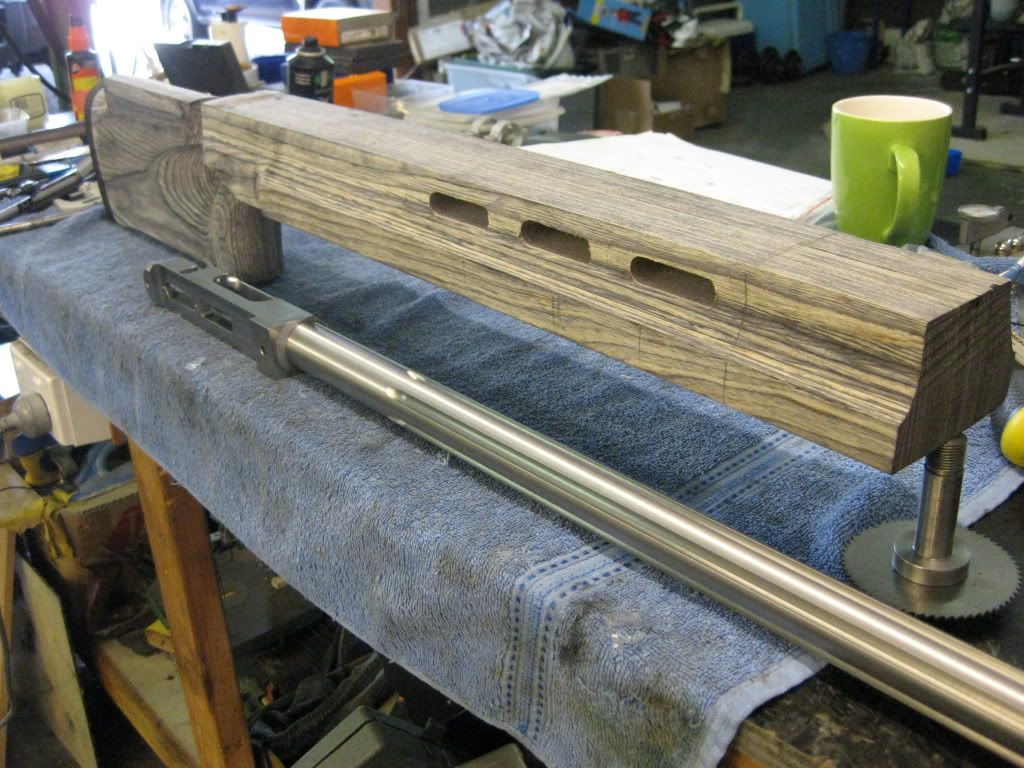
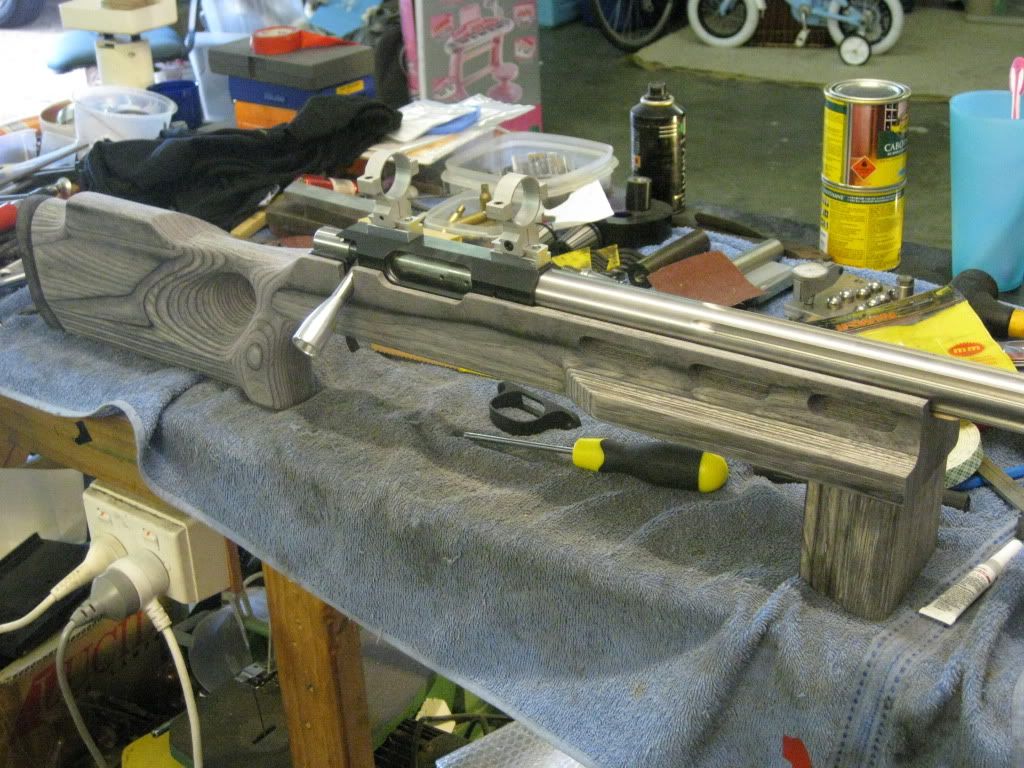
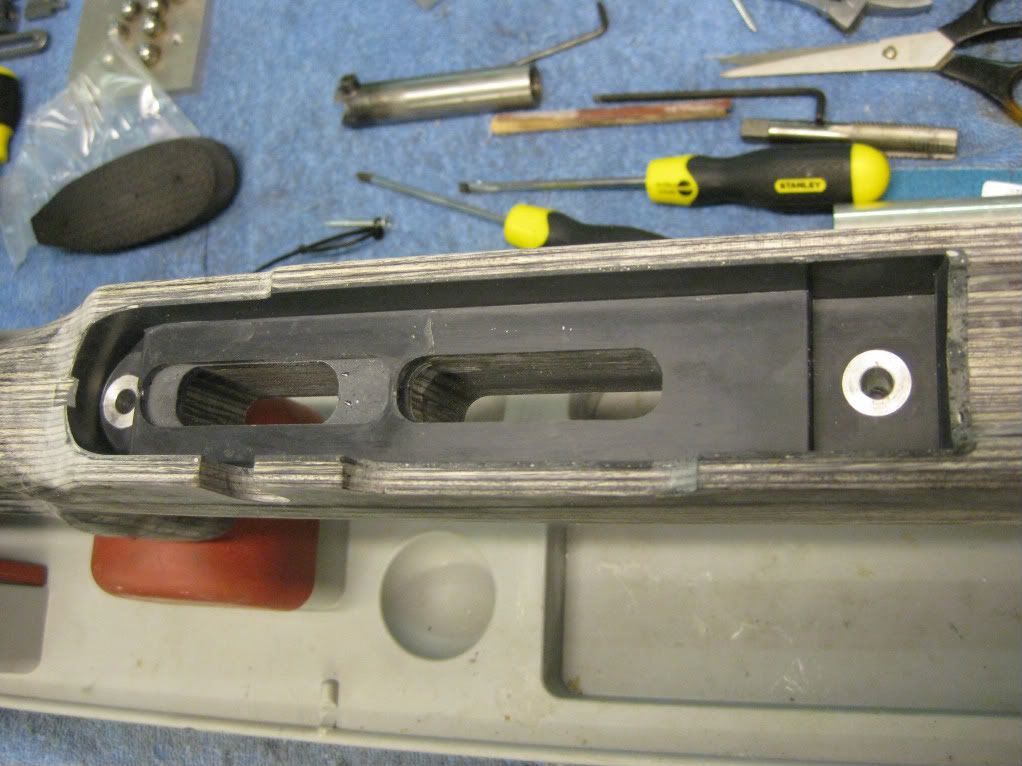
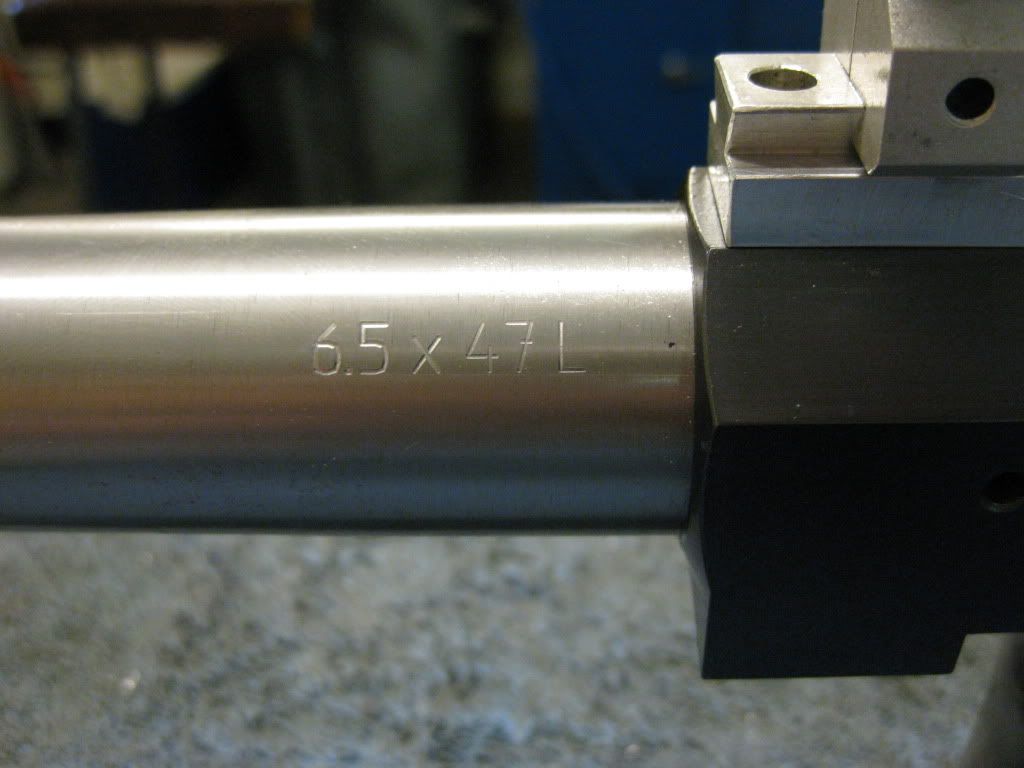
. I still have to drill and tap the mounting holes etc and over the next week i hope to get this done.

Sept09008.jpg

Sept09004.jpg

Sept09009.jpg

I have had some time to get the bolt shrouds started, turning work is finished and they need to now have a pocket machined in them for the cocking peice.

Sept09011.jpg


I have also had a little time to start the trigger hanger.
Rough milled from a block of MS.
Sept09006.jpg

Cut from the block. These need to be machined on the cut side and then the two 1/8 hols drilled and reamed for the trigger pins.
Sept09010.jpg


Cheers
Leeroy
 
Getting close now!

G'day Guys..

Well it's been a busy two weeks and i've realy made some progress with the actions. All the major parts are now completed and i've been able to assemble an action and actualy fire off a few test primers (No live rounds just yet. The drop port functions well and the spent cases dropped out the bottom of the action perfectly.
I initialy had some trouble with the ammount of cocking force required to lift the bolt from the fired position and had to add a stablising pin to the bolt shroud. I also hardned the cocking helix on the bolt which made quite a difference. I've also been able to cut several coils off the firing pin spring as my pin tip only 1.65mm dia and as such the force needed to set off a primer is greatly reduced compared to a larger pin tip. Bolt lift is now very smooth and requires just a little more force than my remington 700 but you would expect this with a 60 deg bolt lift.
However it wasn't all smooth sailing. I unfortunatly managed to completly wreck one of the bolts. :( 
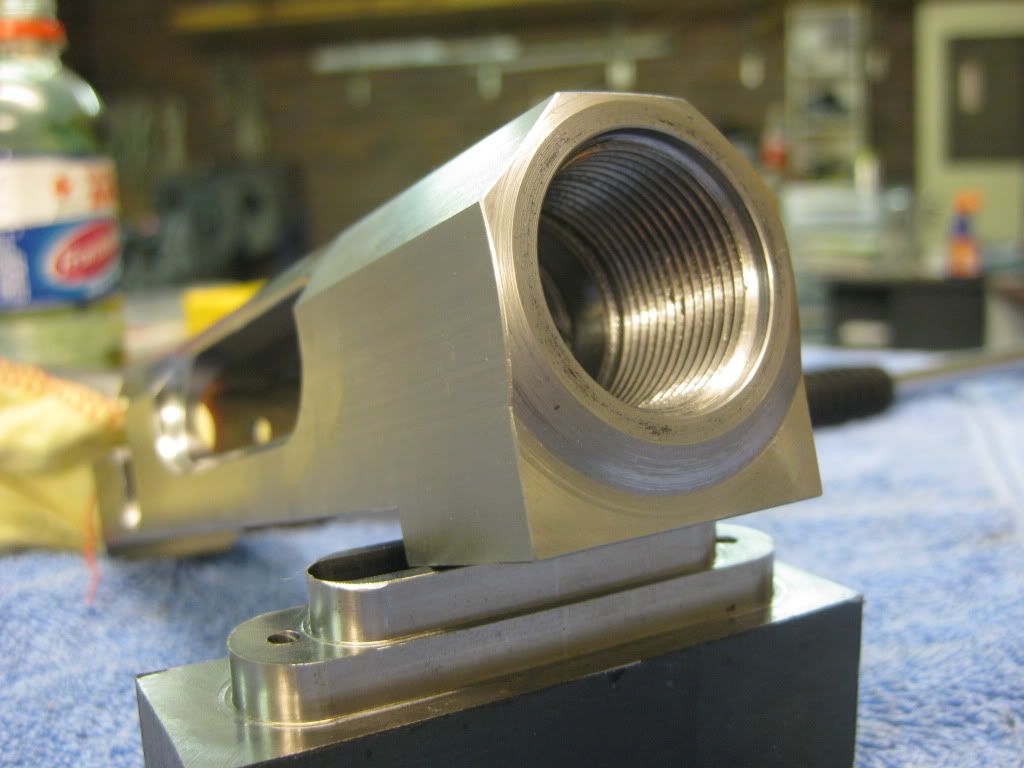
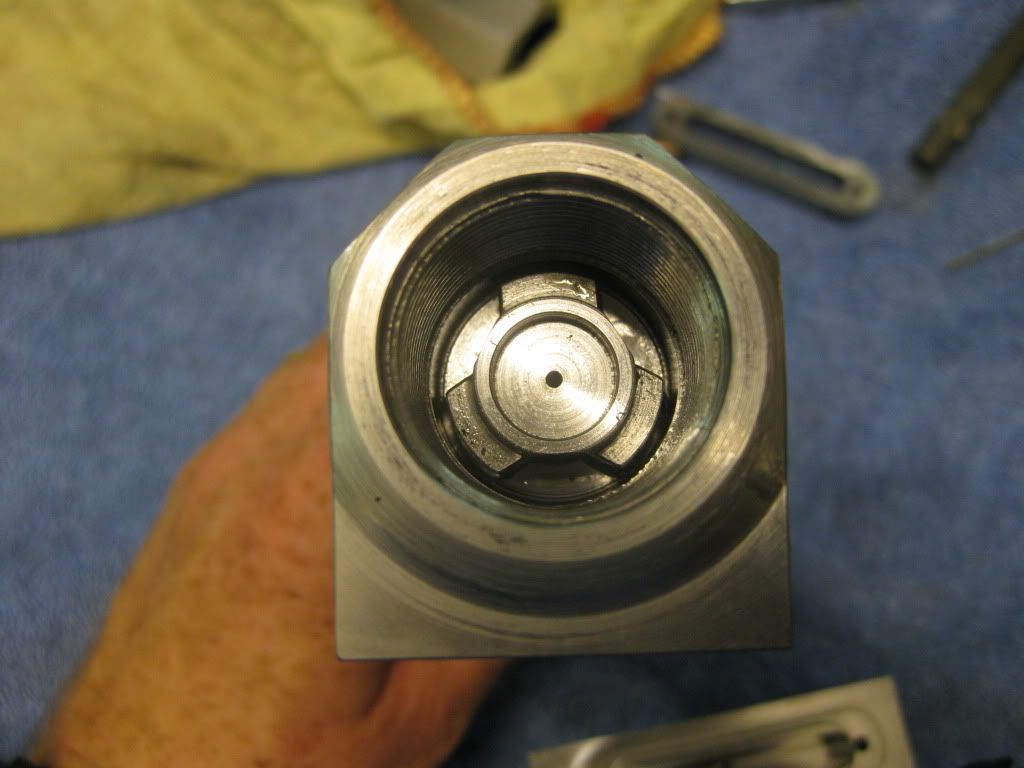
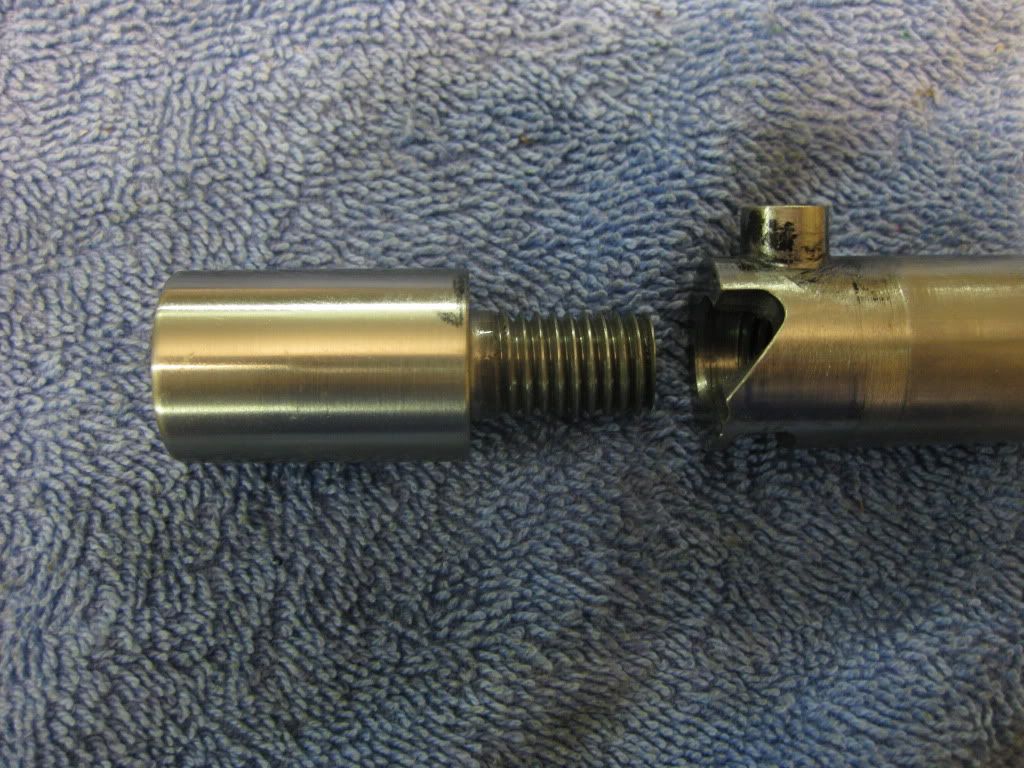
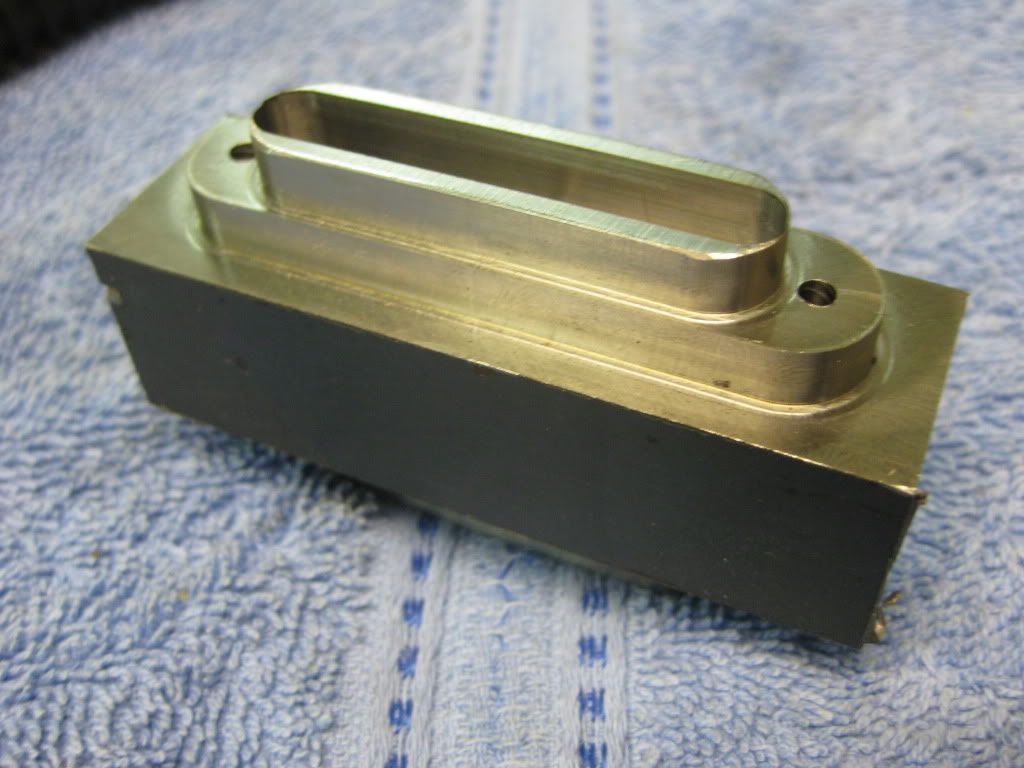
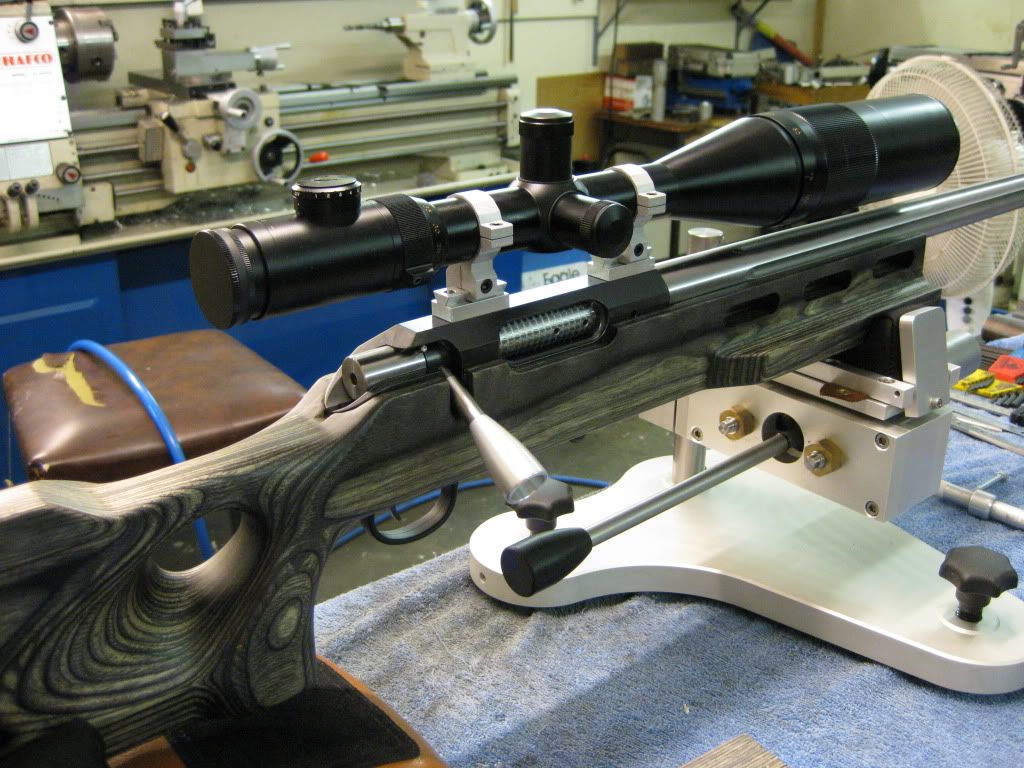
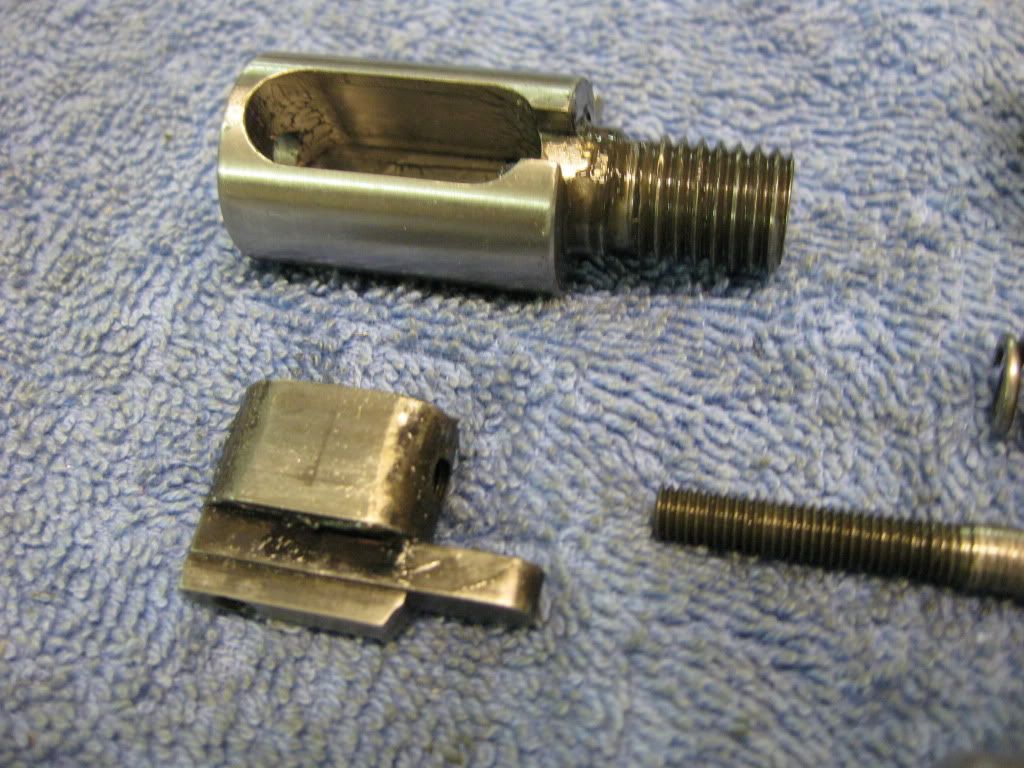
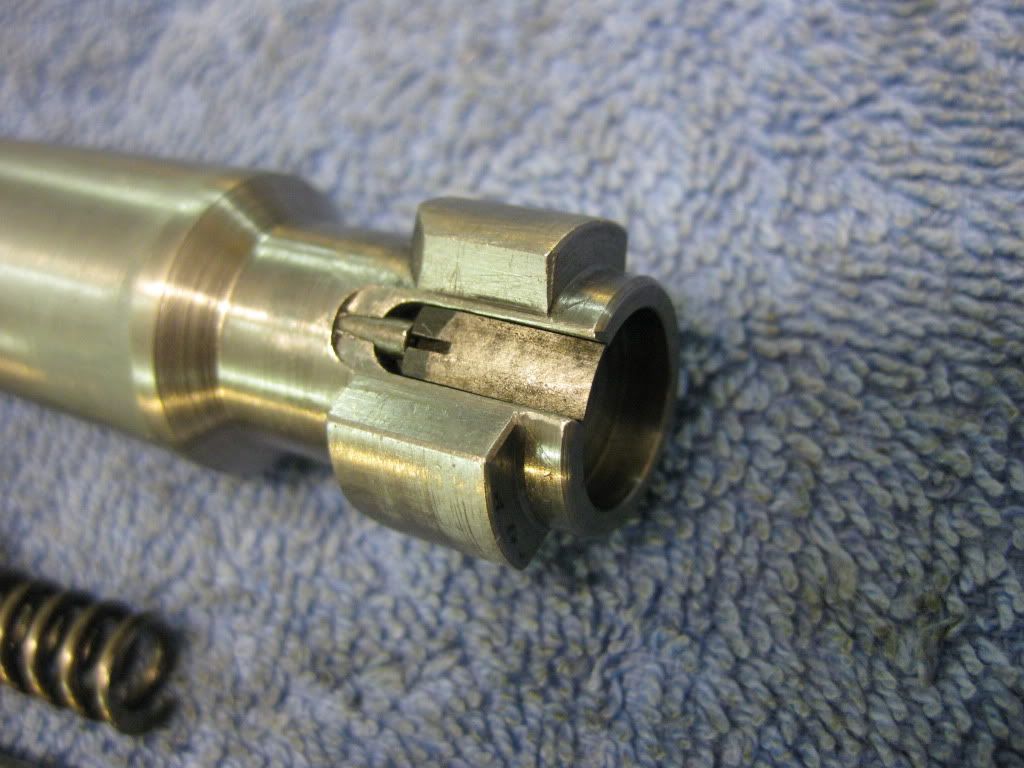
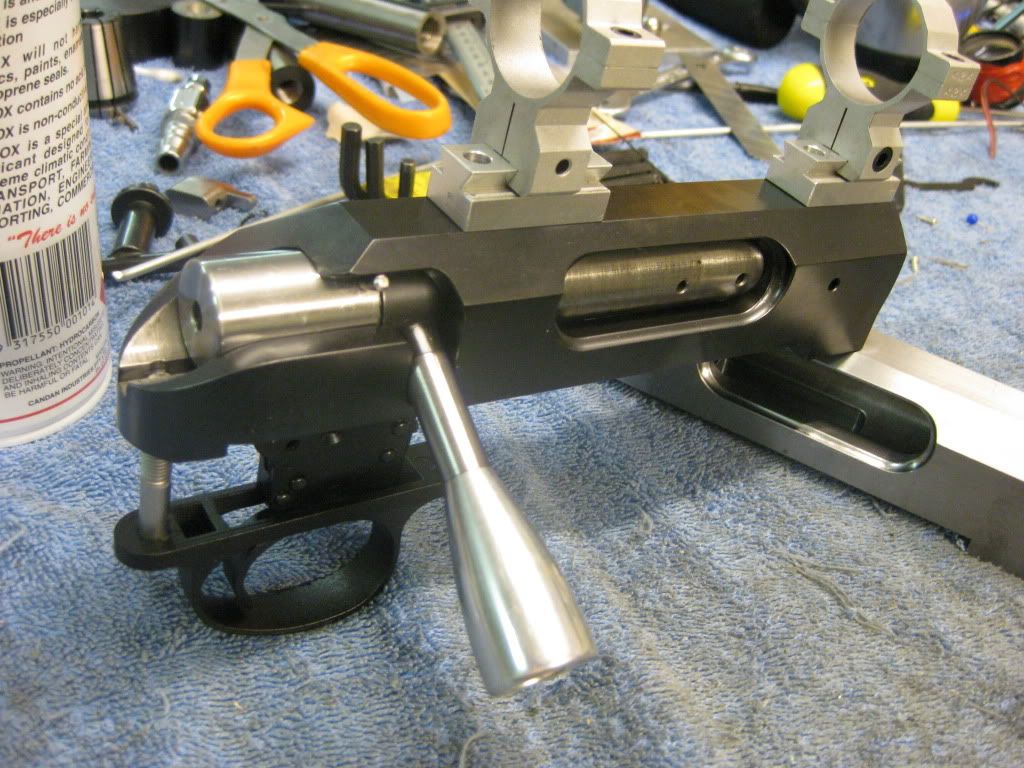
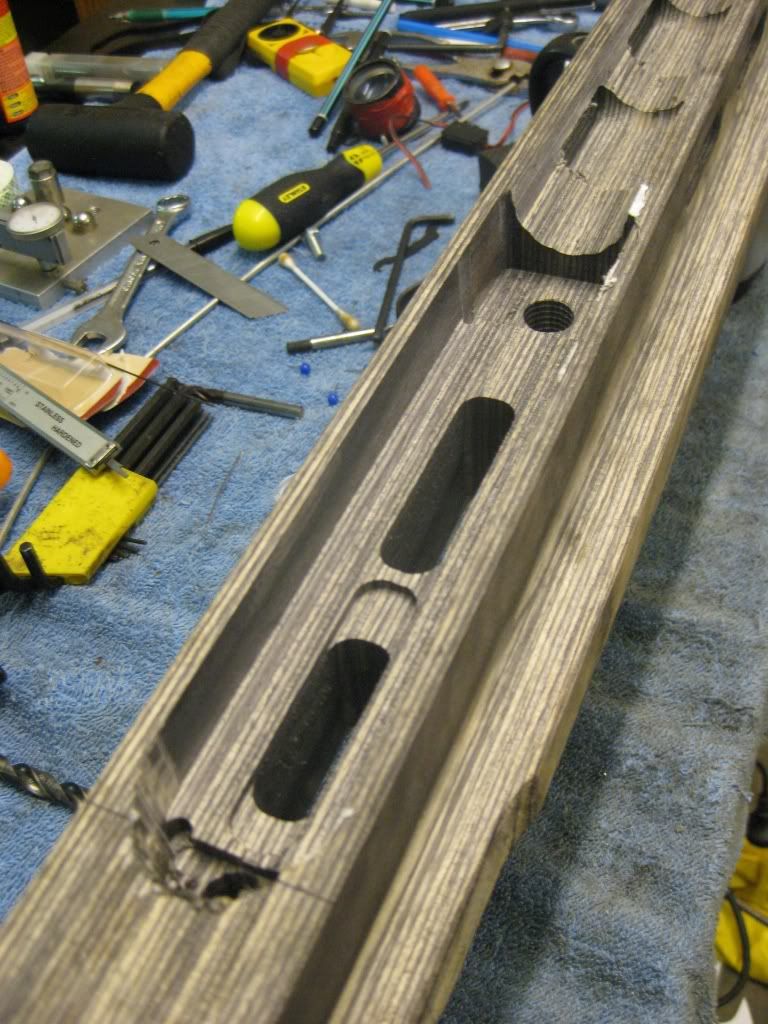
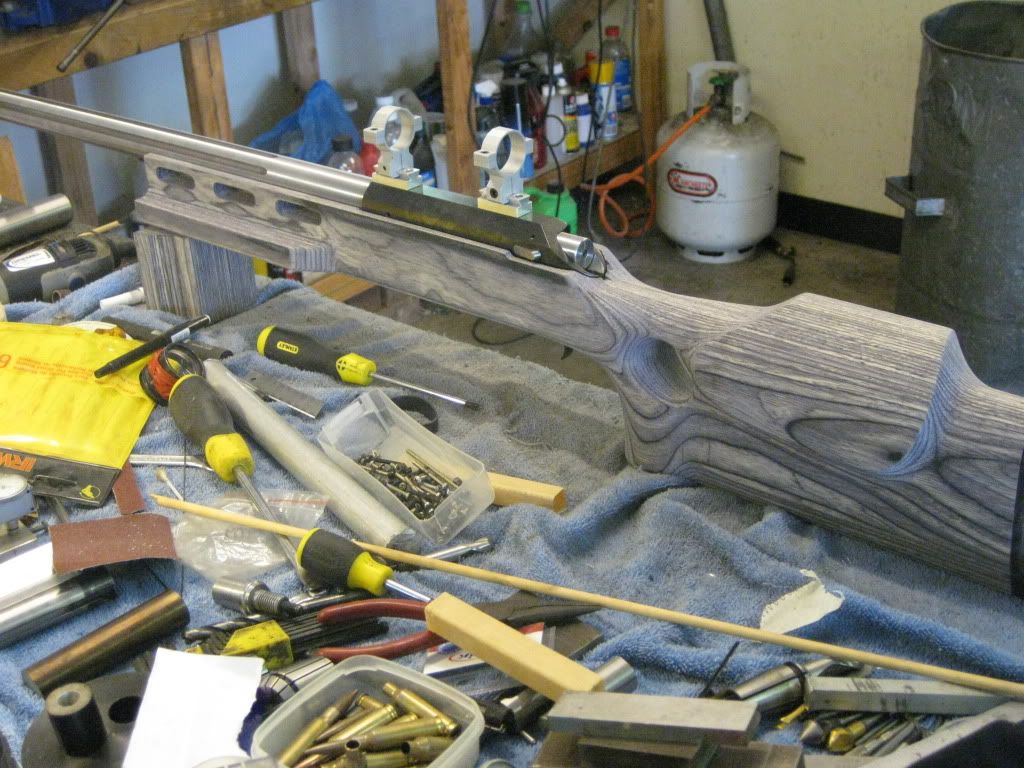
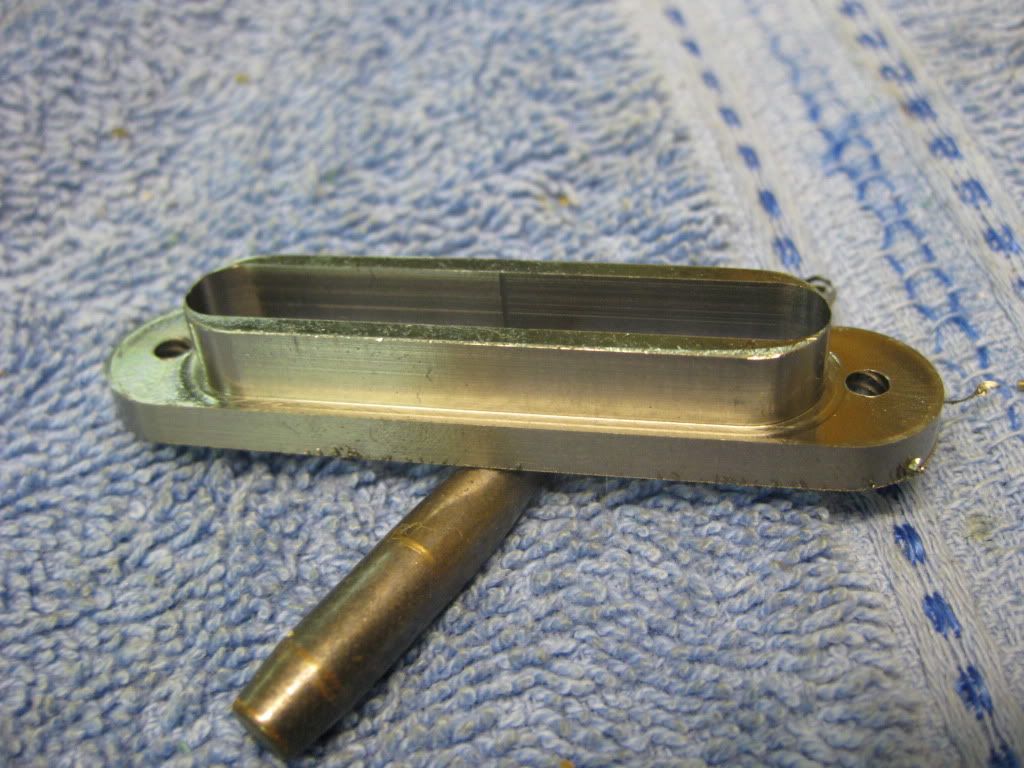
I was setting up to cut the extractor slot in bolt no 1 but i managed to get the numbers wrong by half the cutter dia and cut the slot 2.2mm too long. This ment that the spring and plunger had no meat left to support it. I tried to fix it with a small spot of weld but as usual when welding on high tensile steels the heat effected zone goes glass hard and i was not able to drill it. I then tried a carbide drill but it caught up and shattered and totaly chewed out the hole. :( :( Scratch one bolt!. I may be able to make just a new bolt head and screw it onto the bolt body and locktight it on but i will look into this a bit later as both receivers are dimentionaly identical and i can use one bolt for both receivers.
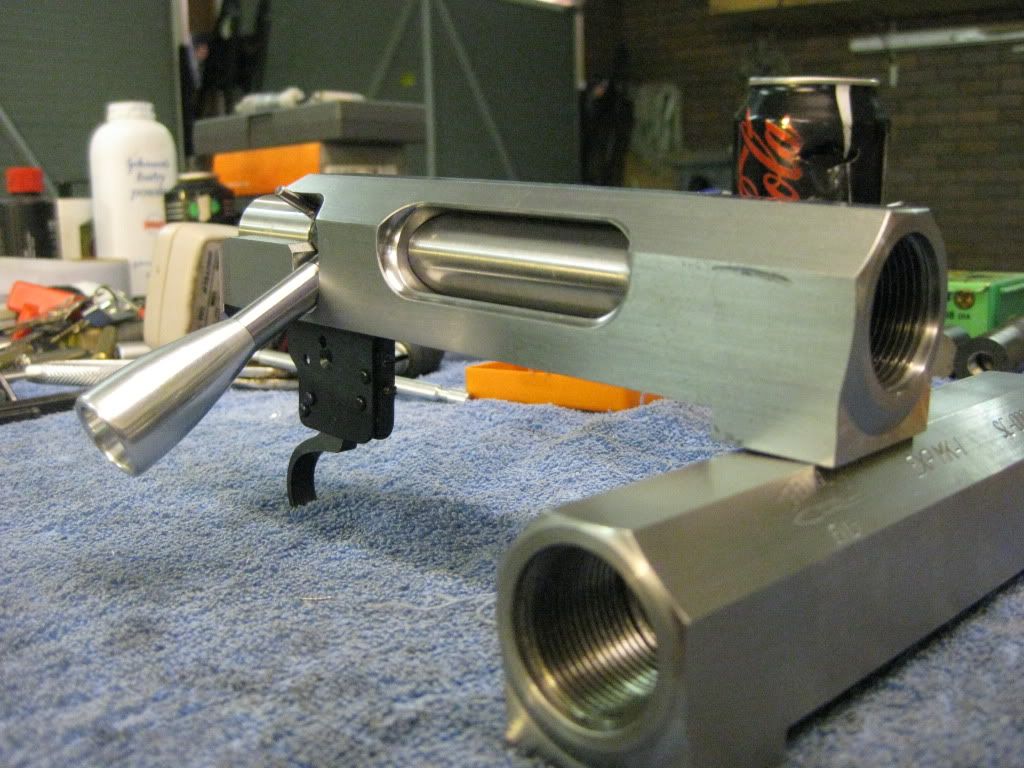
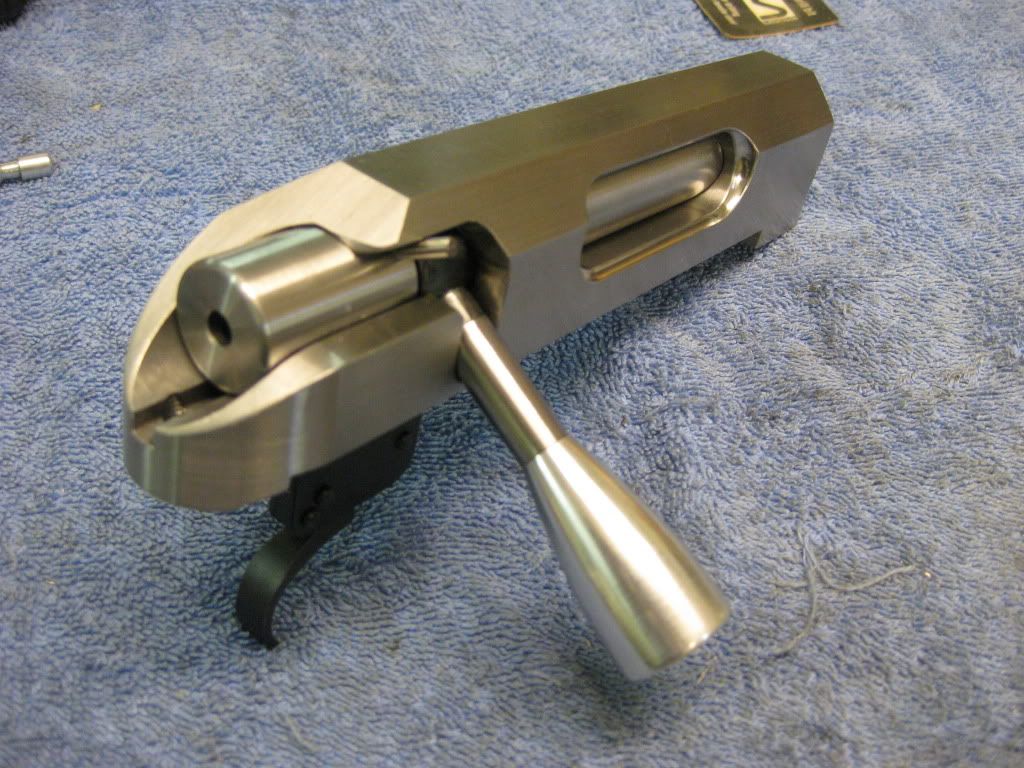
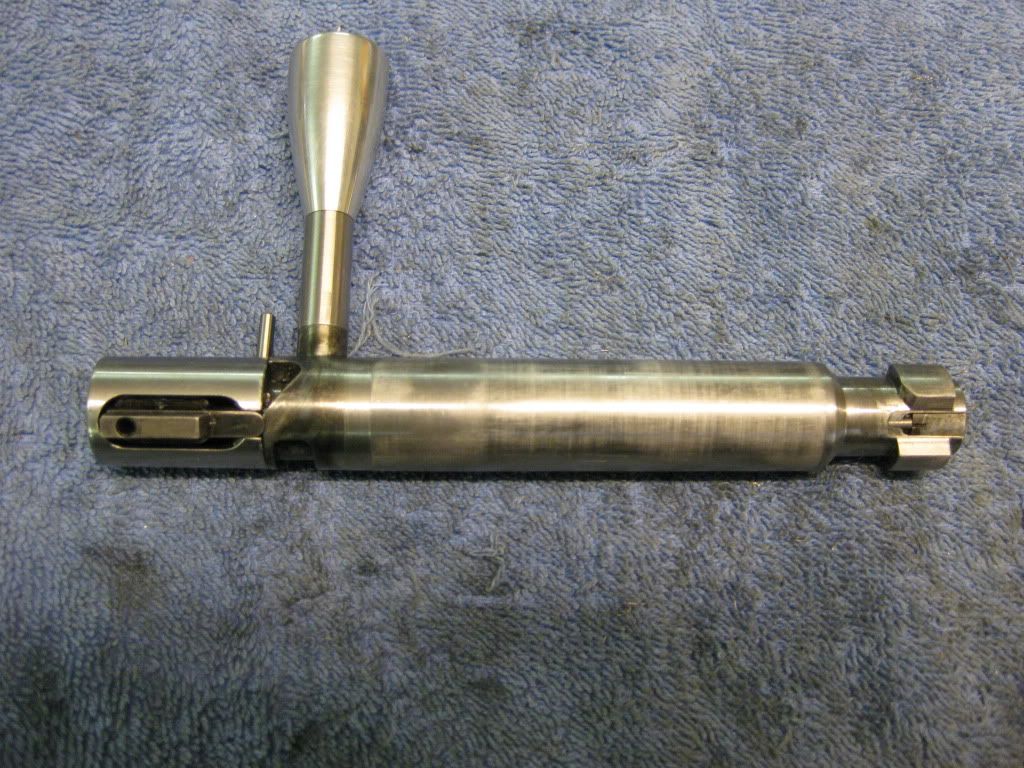
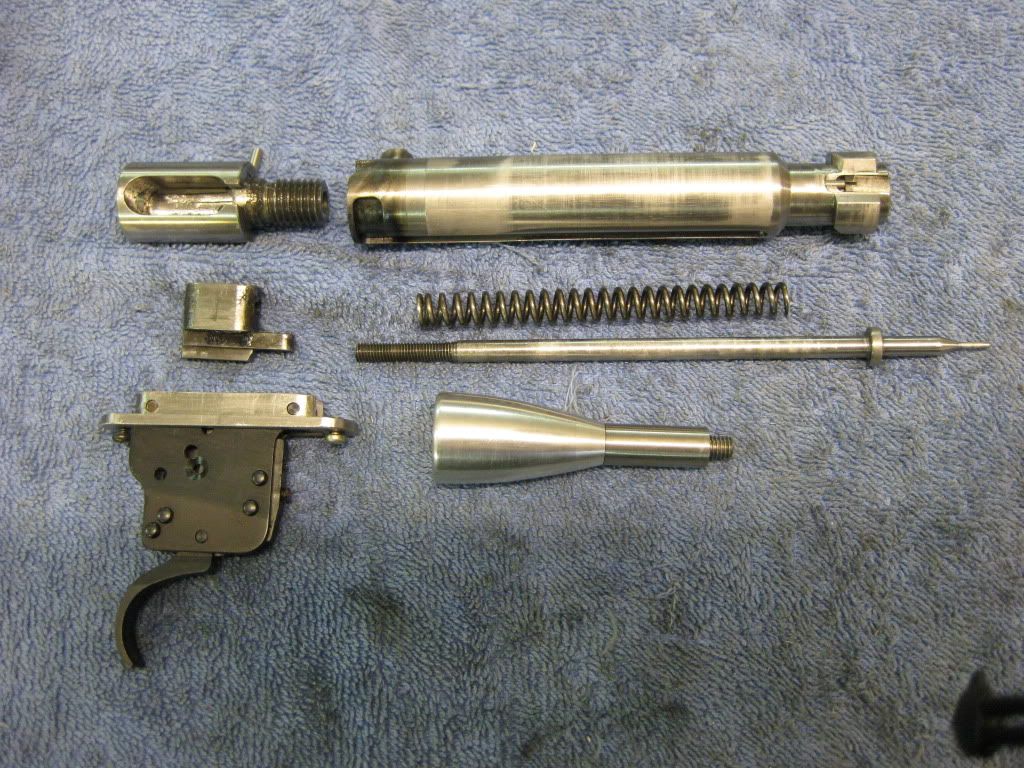
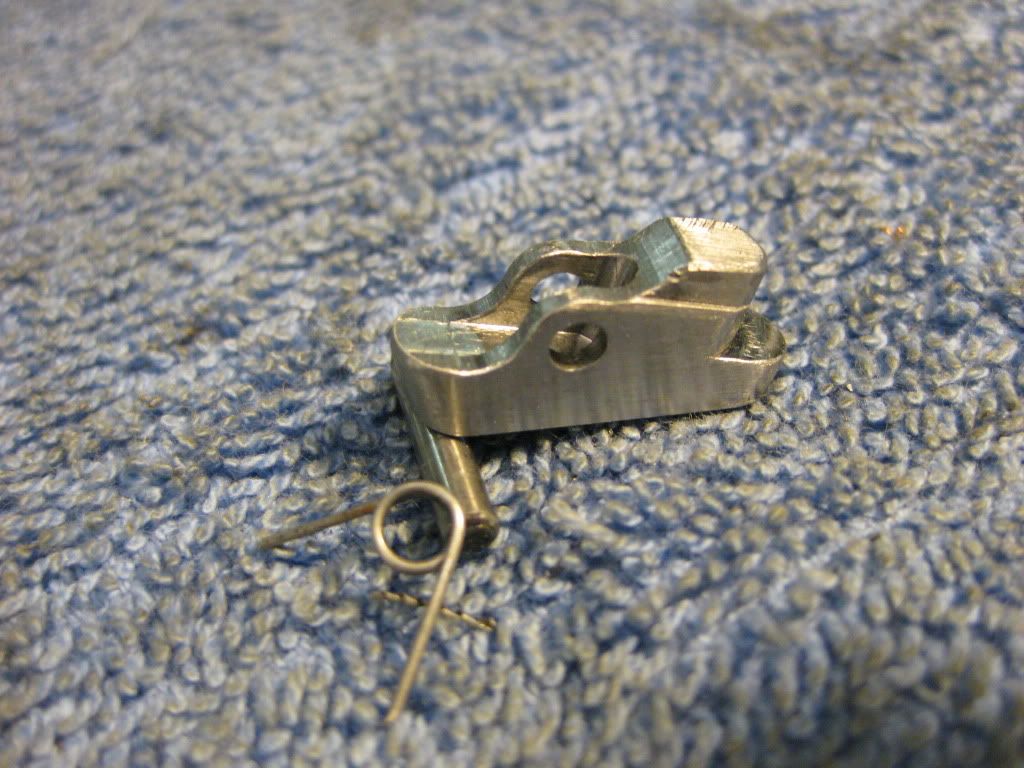
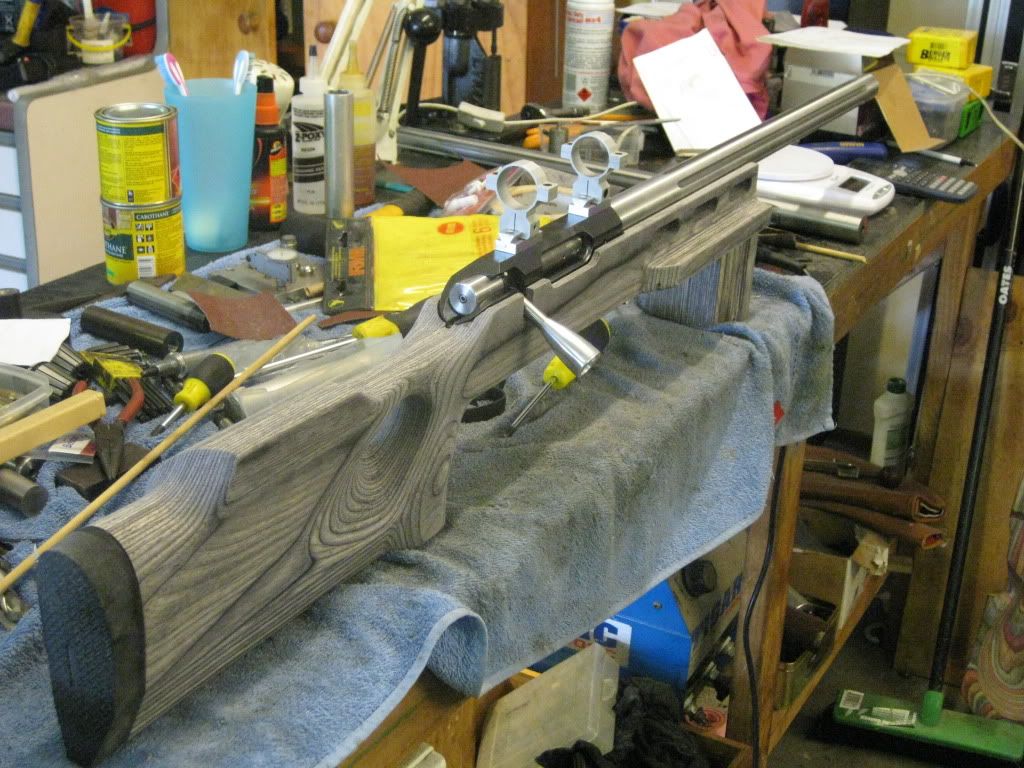
ll i have left to do is to drill the gas vent holes in the receivers and bolt and make the bolt guide/release clips.

Here's the pics.
Sept09012.jpg

Sept09013.jpg

Sept09014.jpg

Sept09.jpg

Sept09016.jpg

Sept09017.jpg

Sept09018.jpg


Cheers
Leeroy
 
Mr Leeroy you have built a very nice project.... has it been fun or tortue :eek:, lol ??? joe:)
 
Joe, it has certanly been frustrating at times. There ware a few time when i thought of scrapping the whole lot, especialy after the registration fiasco. I realy did think that they would be crushed by the police..:eek: This week has been good and bad as i now almost have a working action but one bolt has been lost.
So far though i am very pleased with the way it has turned out and as long as it dosn't blow up on the first firing i'll be a very happy camper.:D:D

Cheers
Leeroy
 
The finial part is finished!!

I managed to get the bolt release catch made today. Milled out of a sold bar of 4140, it will be probably finial polished and then silver nitrided. I am also considering adding some metal checkering to the top of the bolt shroud and the release catch. Any smiths out there done any proper metal checkering? Any tips?

Milled from a sold round bar in the rotary Axis.
Sept09019.jpg


Cut off with a slitting saw and debured and polished.
Sept09020.jpg


The fit in the receiver.
Sept09021.jpg


My stock has been shipped from the USA and should be here next week sometime. Once i get the stock i can set everything up and get the the position of the mounts and then drill and tap the holes in the top of the receiver.


Cheers
Leeroy
 
Leeroy,
This has been an excellent thread and enjoyable to see it come to fruition. I did not catch what material your bolt was made from but I did notice that you said your bolt catch was 4140. Have you thought about making it out of a milder steel so that peening won't occur to the bolt if it is run quickly? With a softer steel, the bolt catch will take the abuse and can be readily replaced if ever need be.
 
G'day Robert

Mate to be perfectly honest i hadn't realy given it any thought! But the bolt is already harder than the catch. The bolts are arround 44 HRC and i would suspect that the 4140 bar to be at arround 30-35 HRC so realy there shouldn't be a problem. If i decide to get the catch nitrided then this will increase to arround 40 HRC internal and about 60 HRC external. However there is pleanty of surface area to take the impact of sliding back the bolt.
I guess we'll see how it goes..

Cheers
leeroy
 
Some test firing

G'day Guys.

Well an oppertunity presented its self today to test fire my action.. I had decided to chamber up an old 6mm Barrel for the testing in 6x47 Lapua. Load data for this cart is a bit thin on the ground but i had some data from a "Gun of the week" on 6mmBR.com. A good mate had worked up the same loads in one of his rifles and they were about spot on. The loads listed were with Varget and some 70Gn bullets. Starting at 35.5 Gns to 40 Gns max. My mate had worked up the same loads using AR2208 (Equal to Varget) and got the same result, with 40 being max in his rifle.
So i loaded up;

1 @ 35 Gns
1 @ 40 gns
1 @ 41 Gns
1 @ 42 Gns (Compressed load)

I would have gone one grain more but 43 gns of 2208 just wouldn't fit the the case even with a drop tube..
I havn't got a stock yet so i lugged my large machine vice (25Kg's) to the firing point and clamped the barrelled action in the vice. Round was loaded and a towl followd by two sandbags were placed on top of the action. Fireing was done remotely with a 4 meter length of string.
Started with the 35 Gn load and well, it was all very anti-climactic as it went bang and the action did not fly apart. :boogie: :boogie:
Bolt lift was smooth and primary extraction was easy.
The same was repeated with the other three rounds all showing easy bolt lift and easy extraction.
All cases show no pressure signs at all except the last round which shows just a slight cratering but realy nothing at all to worrie about. Considering that the last round was 5% over the sudgested max i am very pleased with it.
Headspace was checked before and after firing all 4 rounds and as expected hasn't changed one micron. I am now totaly confident in the actions strength to handle even the largest cal in 308 boltface.


35 Gns on the far left and 42 Gns on the far right.
Sept09022.jpg


Cheers
Leeroy
 
Congratulations

Leeroy,

Congratulations on a very fine project and a successfull outcome. Your work is superb and I have enjoyed all the photos and coments, keep up the good work and continue to update us from time to time.
You inspire me to continue to work on mine.

Sam Duke
 
G'day Guys

Well i have finialy made some more progress with the action.
I had sent the action out to a local smith for a dose of good old fassioned rust blueing.. I got the Action back from him late last year and he did a surpurbe job on the blueing. The pictures don't do it justice at all.. Realy first class work and i am very happy with it.
Pretty much the only things to do now on the action are to fit and chamber another barrell in 6.5x47 Lapua, and i also want to Jewel the bolt. I recon it'll look real sexy then... The barrell is an 8 twist select match Shillen with "Ratchet rifling".. Should shoot like stink..

A few pics of the action.
Picture006.jpg

Picture005.jpg

Picture004.jpg


I didn't get to use the CNC mill to do the inletting as it is busy working on some other large jobs and wasn't avaliable. So it's back to the manual mill to the work.
I was a little dissapointed in the stock from Richards. They took just over 8 MONTHS from placing an order, to me opening up the package.. The stock was very rough and i had to spend a lot of time setting it up and cutting every surface square and true. I've just about got it right but there is still quite a bit of material to come off yet, i'm still 300 gramms over weight..

The stock as received..
Sept09025.jpg


And after most of the shaping and inletting done.

Picture008.jpg

Picture009.jpg

Picture010.jpg


Cheers
Leeroy
 
Leeroy,
Please keep working on this and keep posting.
I really enjoy it.

This week I made an improved co-ax shell holder jaw housing with ~20 cuts on the mill.
That was a challenge for me.
I am never going to get to your level, but I can live vicariously though your posts and pics.
Clark
 
More Pics

Mock stock fit up was pretty good..

Picture015.jpg

Picture014.jpg

Picture011.jpg


Pillar bedding...

Picture020.jpg

Picture018.jpg

Picture022.jpg


And finialy added some bling..

Picture026.jpg

Picture024.jpg

Picture027.jpg

Picture030.jpg


So thats it for the action it's finished! :D:D:D 
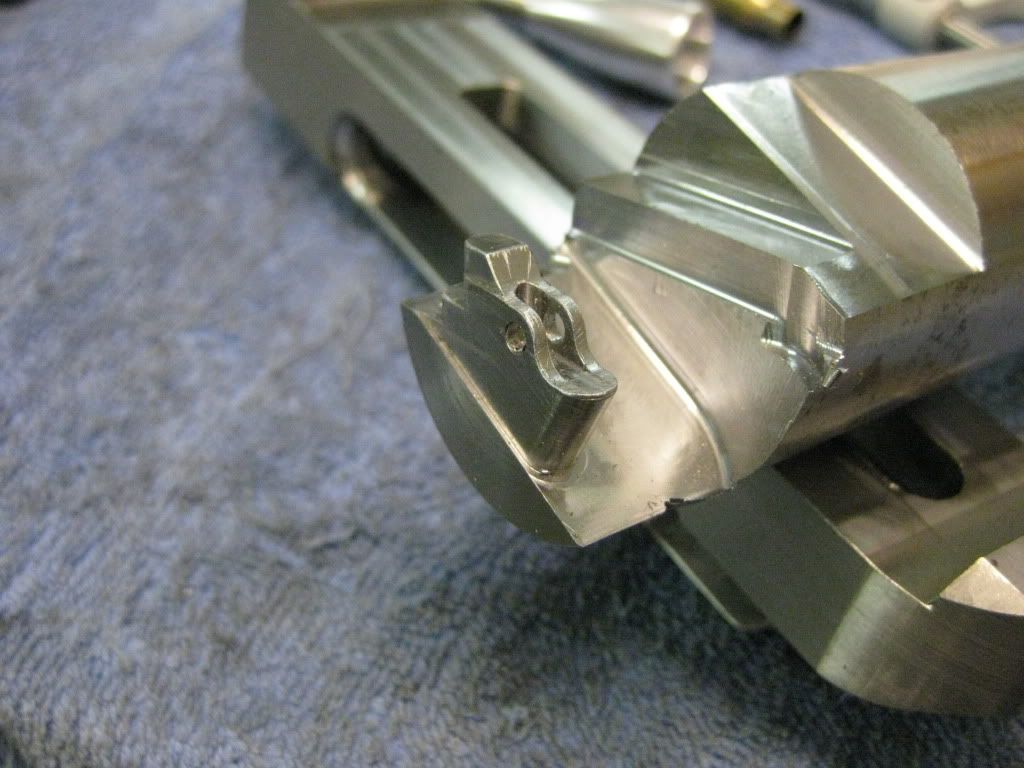
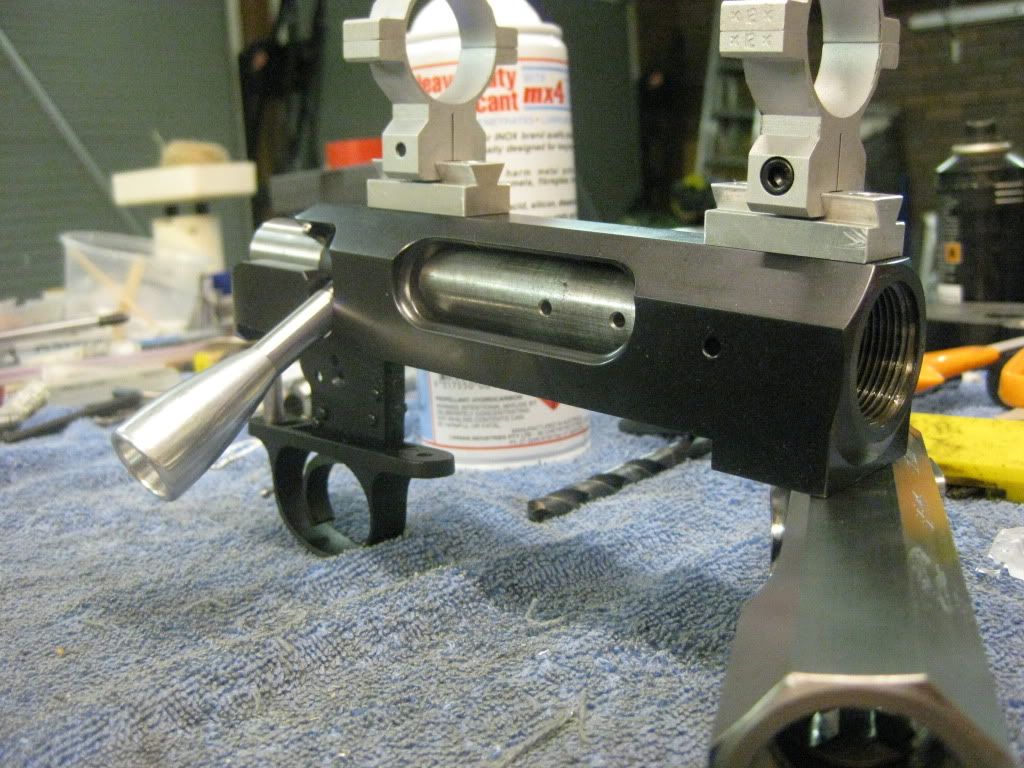
Hell it only took 18 months..
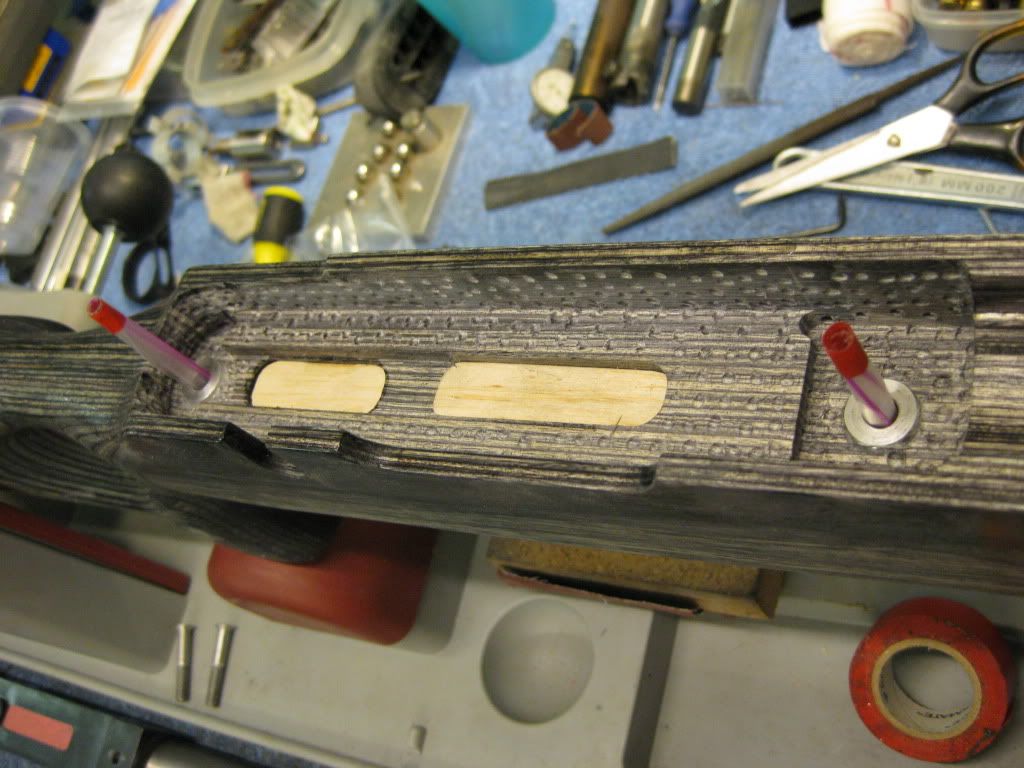
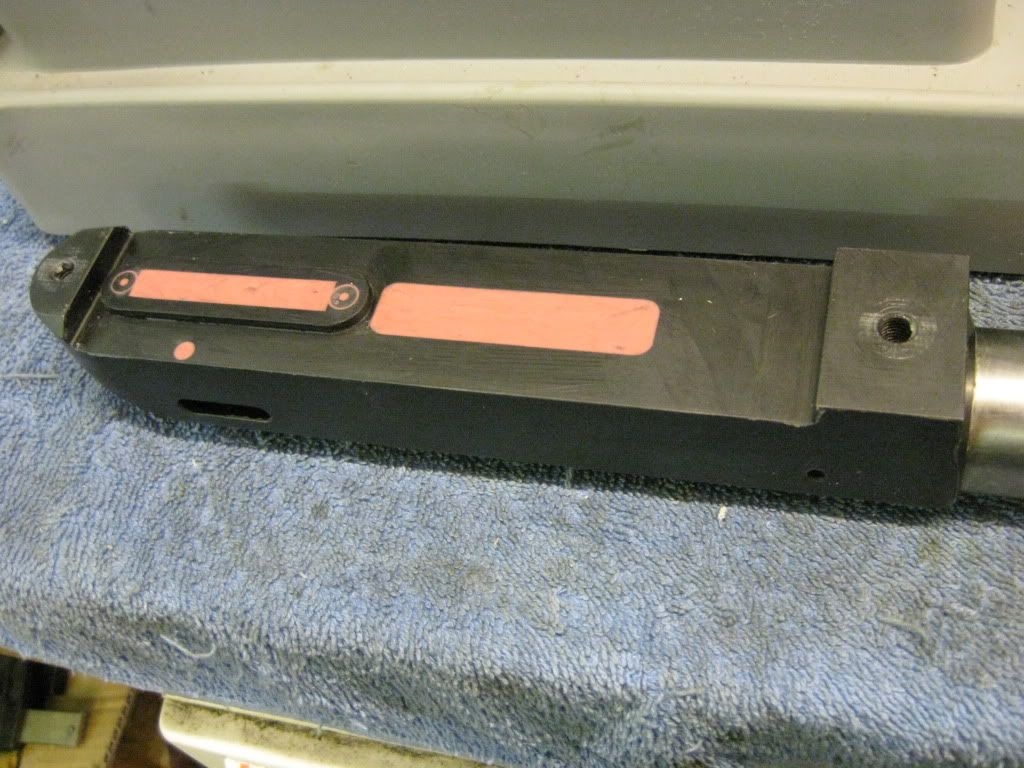
The stock has had 5 coats of clear gloss polyurethane with a final coat of satin. I've rubbed it back with some 1200 paper and it looks great. It's still a little soft though as we have had some realy wet weather over the weekend. A few days for it to harden up and it's off to the range!!

Cheers
Leeroy
 
It's ALIVE!!

Well after a little over a year and a half i have finialy finished this project.. The last week and a bit i have been busy coating the stock. I had a major set back last week when the finial coat of matt urethane didn't fully set. I'd had the half tin of matt for about 6 months and it looked and sprayed on just fine but even after 3 days in my 30+deg gararge i didn't set. So out with the paint stripper and it all came off! Second time arround went much better with some new stuff from bunnings.

I have just finished making 40 rounds of 6.5x47 for Load devlopment, and with the weather permitting i'll be at Bellmont SSAA bright and early on Sunday..

Pics..

Picture031.jpg


Picture033.jpg


Picture035.jpg


Picture044.jpg


I'll post up the first round of load devlopment targets on Sunday..

A mate came over thismorning with his video camera and took these vids..
http://www.youtube.com/watch?v=QjPPxR92loY

and this one.

http://www.youtube.com/watch?v=pfT9hYyiPJA


Cheers
Leeroy
 
Back
Top