A little cocking cam mod. advice please

Boyd Allen

Active member
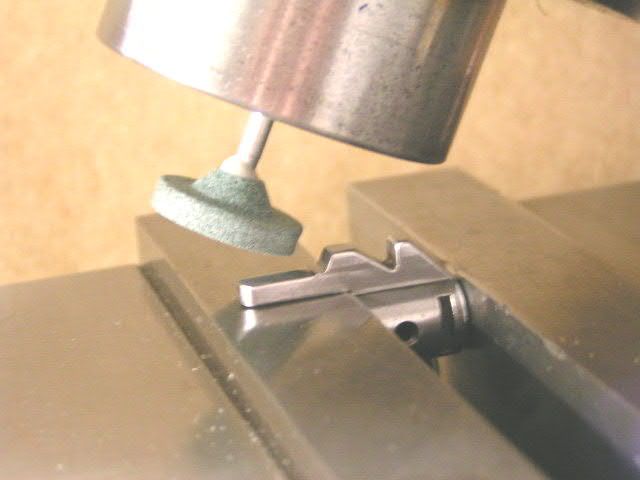
I have a custom benchrest action that is very smooth on cocking, but has a noticeable hitch in its bolt closing. I believe that it happens when the cocking piece is coming out of the depression that is just past the top of the cocking cam (going in the closing direction). It seems to me that as long as I leave a small bump, between this dip, and the cam, that no harm would be done, particularly since the cocking piece continues past the dip as the bolt is fully opened. I was thinking that a cylindrical stone, chucked in a Dremel tool might do the trick, followed by some polishing with fine wet and dry and some IOSSO on a little felt wheel. Comments? Suggestions? Warnings?


Thanks,
Boyd
 
Common thing to do actually. The idea is to remove a sharp edge or an excessive notch not simply make it easy to close the bolt. On a 700 the material is fairly perpendicular to the bolt body but on a Savage the cocking piece pin runs at an angle due to play between pieces.
 
Boyd, just sneak up on it a bit at time until you're satisfied with the results. With the notch so configured, they can also uncock easier. You may want to carry a f.p. tool with you to the line, just in case. -Al
 
Couldn't this be done with a different trigger hanger timed to the bolt?
 
No, it is a different issue. As you cock the action, by raising the bolt handle, the cocking cam rides up the cocking cam to its top, where there is a slight depression to keep the bolt from coming uncocked too easily when the bolt is in its rearmost position, or out of the action. If this depression is a little too deep, which they typically are, the cam has to go over a bump as the bolt is closed , that increases the effort, and more importantly to a benchrest application, torques the rifle on the bags more than it would be if this were not the case. This all takes place before the hand off to the trigger, unless there is a fair amount of cock on close, due to bad timing, in which case, the cocking piece if forced to the rear, and lifted off of the top of the cam, before the bolt handle is turned down. For me, this would be an undesirable solution, since I am looking for the smoothest possible bolt operation that is consistent with maintaining full firing pin travel, and reliable function.
 
Boyd,

Remember that when you change that divot, you change the "relaxed" position of the shroud when the bolt is open. If that isn't where it's supposed to be, the sides of the shroud that bear on the base of the action, will now be cocked to one side and will drag, causing undue force needed to slide the bolt. I would be really careful about what I was getting into on that. While removing material is easy, putting it back, ain't. Removing too much will end up adding to the amount of cocking motion you have when you close the bolt. This then ends up placing the bolt lugs in a pull situation while the firing pin is fighting them as you close. You'll see what I mean...
 
4Mesh,
Went back to the rifle, after reading your post. I see what you mean. Upon further study, and some thought, it seems to me that what I have is the result of flipping my trigger bracket around to gain some striker fall. In the process I traded off some timing so that the trigger picks up the cocking piece while the lugs are still slightly on their closing cams. That is the source of the momentary increase in effort after the bolt is turned. In effect, I have a little cock on close. This is exacberated by my trying a heavier striker spring. Ideally, the location of the cam relative to the leading edges of the bolt lugs, would be such that the cocking piece would start to come off the top of the cam just slightly after the lugs leading edges cleared the closing ramps,and were just onto the flats of their abutments. I am glad that I asked. For now, and probably forever, I will leave this alone. The important thing is that it is shooting very well, with this being more of an annoyance than a real problem.
 
The divot is not what you change normally, just the amount of climb to get into or out of the divot.
When you lower the handle, you must climb out of the divot before you hand off. The position of the divot is timed lengthwise and rotationally from factory and is not normally altered when I do a truing or timing or a tune up but the little tit that must be climbed over can be altered. I have done many but truthfully I have found no real benefit because cocking effort is much greater and much more disturbing to the bag than closing. It is a quick and easy process and it does fell better to the shooter so I continue to reduce them.
 
My opening is like butter, even with what is supposed to be a 25# spring. Reanalyzing the problem, after 4Mesh's post, (going back to the rifle) I discovered that my trigger bracket reversal had taken the action more out of time, handing off to the trigger before the bolt was fully forward in the action. The momentary increase in effort is caused by some amount of cock on close. Since there is no other way to arrive at my target amount of striker fall, I will live with this. The rifle shoots well in its present configuration, but is makes me think about just how smooth an action could be if it handed off to the trigger just after the bolt was fully forward. That would be really slick. Thanks to all of you, I have learned quite a bit. As it turns out, actions that have a surplus of striker fall, stand a better chance of their timing being corrected, having some room to make adjustments with trigger bracket configuration. or in the case of actions that do not have brackets, cocking piece modification. It seems to me that getting the cocking cam, bolt lugs, and bolt handle timed to each other so that the trigger picks up in the right spot, and the lugs are fully engaged when the bolt is in the closed position is a tricky bit that is best handled by the manufacturer with trigger in hand. For those of you in the know, what actions tend to have the best timing?
 
Every action I own gets this area reworked, see pics. With careful work it is normal to make the bolt lift very nice. When you grind off the excess material on the bolt you now are able to reprofile the last portion of the cocking ramp to a less steep angle. Another benefit is that you are not compressing the firing pin spring as much which also reduces the bolt lift. You can see in the pics that I do leave the original factory full cock notch so the nose of the cocking piece 'parks' in same exact spot at full cock as it did before removing the 'bump'.

The hand off is affected because the cocking piece is closer to the trigger as you start to close the bolt. This may make it seem like it is harder to close the bolt since the nose of the cocking piece doesn't have that extra bit of ramp to use the fp spring to add impetus to the bolt closing. This is a bit hard to explain in less than an epic length post.

In your case I think you could use the stiffer fp spring with the trigger hanger in it's normal orientation or use the lighter spring with the trigger hanger turned around. There is also the option of adding mass to the striker.

I probably obsess over bolt lift and bolt closing but I like my machines to work as smoothly as possible and there is not much more pleasurable than a rifle with a super nice bolt cycle. On my rimfires I often shorten the extractor springs to reduce the force needed to close the bolt.

rem40xsilhouetteriflereworkedfullcocknotch1.jpg

40xcockingrampone.jpg

Cockingpiecegrindingcloseup.jpg
 
Ahh! If only I had the mill! What angle do you have the head at? Thanks for the pictures. In my case, the action has a shallower cocking cam cut than a Remington, which have pin fall to burn, by comparison. I have some measuring to do, perhaps later today. As much as I like a smooth bolt close, if I think that the heavy spring and bad timing (partially self induced, to get the fall I want) shoot better, I will leave it alone, but I an really glad that I asked the question that started this thread, because I have learned a lot, and hopefully others that have read it may have as well.
 
What got me started messing with this area was an Anschutz 64. This action has a very pronounced, shape edged detent which I detested. Reworking it made the action much more to my liking and after that I would rework every new action I bought.

As for grinding the cocking piece. I forget the exact angle although it might be in my notes and I will look later. My 40x centerfire project rifle had a terrible bolt closing. I also had a Viper at the same time so I had something to compare and know that something was not right with the Rem. I measured the firing pin fall on both actions and discovered that the Rem had something like .300" and the Viper had .230". I ground .070" off the cocking piece and the bolt fall was now superb. I recently read a 1955 article on the 40x rimfire and it said that the designed fp fall was .225 { iirc } and assuming the CF has the same fp fall then all my .070" removal did was put the action to the blueprint spec.

Now the nose of the cocking piece rides down the cocking ramp for a few degrees of bolt rotation before being taken up by the trigger [ the Viper is the same way ]. This means that the bolt almost feels like it closes itself. You don't want to carry this too far or else the cocking piece will have too much velocity as it contacts the trigger.
 
Boyd,
Just a bit ago I thought of an aspect that should be interesting. Measure the ACTUAL firing pin travel. By 'actual' I mean how much the firing pin travels with a cartridge in the chamber. You could resize a case but leave the expended primer in it. I have heard that the firing pin only travels about .020 or .025" into the primer. Most actions have .040 to .050 of firing pin protrusion but if the fp only indents the primer .025 then you actually have way less travel that what we are measuring.

If you had extra room on the cocking ramp you could cut back the part of the firing pin that contacts the inside of the bolt body when the striker assy is at rest on an empty chamber. You would then have to recut the tip of the fp to get the protrusion back where you want it. Then you could grind the cocking piece as shown in my picture to arrive at the fp fall that you desire. This should then make the hand off a bit later in the bolt rotation improving the feel of the bolt closing cycle.

Another thing, in the pic of the two [ PTG ] bolts you can see that the detent portion has sharp edges. One of these edges is just as the cocking piece nose comes off the cocking ramp. The other is right at the full cock notch. Putting a small radius on these two edges would improve things.

You can see that the Remington bolt would have had a very deep full cock notch.

In the future I am going to try a new idea. Firstly I will measure the FP fall. If this measurement is at a minimum then I will not cut down the detent height. Instead I will profile it so that it is an extension of the cocking ramp with a nicely radiused section that drops the nose of the cocking piece into the full cock notch [ the detent ]. This would give the bolt some spring loaded closing assistance before the hand off.
 
To measure firing pin fall, cock the rifle. Measure the distance from the back of the firing pin to the edge of the shroud. Or do some variation thereof, depending on how the firing pin is accessed from the rear of the bolt. Like with a Bat, you'll have to measure the little nub sticking out. Now after dropping the firing pin (on an empty case if you wish), measure again. Again, say with a Bat, now you measure inside that little hole in the shroud. Add the two figures (absolute values of each) and you have the real fall. This includes any amount of cock-on-close you've picked up. Me personally, I think 5/16 is about a minimum. Basically, everything you can do by whittling reduces this.

Best way to make it work smoother.... IMO... Hard weld the ramps and then re-finish them so they are smooth as a babies bottom. Stellite works wonderful. I also change the profile of the ramps, but that's another story.

Whatever I do, I attempt to not reduce the amount of fall.

Also Boyd, that sear, you probably won't machine one of them in a mill. Least not very easily. They're pretty hard.
 
4mesh,
I measured the fall the way that you described. It seems to me that I had none to spare, which is why I reversed the bracket. One issue, that has not been discussed, sort of a tangent to a tangent, is that with a smaller firing pin tip, mine is an .062, it may be that less kinetic energy is required to do the deed optimally, in which case, my estimation of is needed may be...let me see...the exact technical term escapes me...oh yes...all screwed up. I guess that it will take some time and a few targets to tell me if the change made any difference. It shot pretty good with the light pin and the heavy spring. It may be difficult to see an improvement. Hopefully, time will tell.
Boyd
 
I don't know the perfect combination of fp weight, spring weight or travel for optimum ingition [steel pin, 25 lb spring and .270" - .280" travel] but I can tell you that after the primer is set off, pressure drives the dent back in significantly.
 
The next time that I go to the range, where I do virtually all my loading, I will deprime and prime a fired case, and fire the primer, and without opening the bolt, measure the where the back of the cocking piece is relative to the shroud. Then I will extract the case, drop the pin remeasure and do the math. I will come back, probably tomorrow, with the information. Oh, and come to think of it, I can take the same measurement after firing a loaded round, come up with any pressure induced reduction of depth of the firing pin dent in the primer. That should answer a couple of questions in a short time.
Boyd
 
I intend to use a fired (unsized) case, as to the deactivated thing, how would you do that and retain the resistance that the pellet provides? I have not had much need to learn that trick.
 
Back
Top