Mark,
I’ll try not to get too technical, but there are several very important concepts that come into play when trying to use your type of camera with a telescopic sight. If you already understand these please note my terminology.
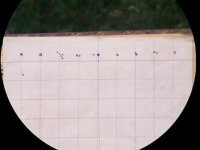
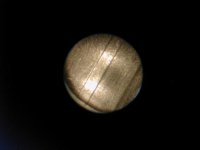
The technique you are attempting substitutes your camera and its lens for your eye/brain visual system and is called Afocal imaging (in astronomy) or Digiscoping (in bird watching). As applied for our purposes, we are attempting to take a picture of the real image formed by the scope optics at the eye relief image plane.
1. Optical versus Digital Zoom – Optical zoom moves lens elements to make a longer focal length lens which will in turn make the image cover a larger part of sensor [your lens is a 5.8-23.2mm (35mm film equivalent: 35-140mm) focal length for 4x optical zoom/magnification]. Digital zoom processes the sensor image to make everything (including the pixel size) larger [up to 4x in your camera] before saving but does not provide any more detail (essentially the same as cropping the image and increasing the size in your image software). NOTE – the best picture quality and maximum usable image size will be obtained by turning off the digital zoom. Maximum optical zoom may not produce the largest usable image (see 3. below).
2. Spotting scope versus Rifle scope – The eyepieces of these two significantly different designs. The spotting scope eyepieces typically have very short eye relief (15-20 mm), short depth of focus (1-2 mm) and wider angle of view (>45 deg) while the rifle scope has longer eye relief (3-4 inch), longer depth of focus (0.5-1 inch) and narrow angle of view (<20 deg). This means that the image plane for the rifle scope (and your camera) is about 5 times further from the eyepiece but focusing will be a little easier.
3. Minimum lens to image plane (eye relief distance) – The closest that your lens can be to the real image plane (eye relief distance) corresponds to the minimum distance from the lens front that will provide an in-focus image on the sensor. From your camera specifications and user guide this is 2 inch (50 mm) in the “Macro Mode”. NOTE – for your camera this will produce a full sensor size image that corresponds to an area of 44 x 59 mm at that 2 inch (50 mm) in front of the lens at minimum close focus.
4. Real image Size – The real image diameter at the eye relief distance corresponds to the exit pupil diameter which is equal to the objective lens diameter divided by the magnification your scope. For most scopes this will be in the range of 1 – 5 mm and for your 14x scope probably 3-4 mm. This then means that the image size from your scope will be from 7.1- 12.6 sq mm at the minimum close focus or 0.27-0.48 % of the sensor area (21,783 – 38,725 pixels). Therefore for maximum image quality you will need to use the “large” image file option for the maximum useful number of pixels.
5. Auto Focus and Auto Exposure – Since your desired real through the scope image size is so small at the sensor, both the Auto Focus and Auto exposure spot sizes may be larger than the key portion of your image. Therefore, you may get better results using manual focus and manual exposure by viewing the results on that nice “true image” LCD view screen.


