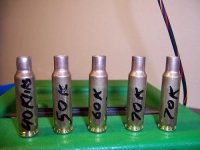
6PPC case forming process

adamsgt

Jerry Adams
I'm trying to make a detailed step by step process for forming 6 PPC brass that will work for me. I've gotten a lot of data from this site. I also have Tony Boyers book, Mike Ratigans book and the Precision Shooting Reloading Guide as references. One statement in the Reloading Guide has me a bit puzzled. It states: "1. Full Length Size - You must run our brass through a full size die to ensure that the neck walls are parallel." There is no mention of what die to use. A 6PPC sizing die isn't going to touch the neck of a .220 Russian case so I'm not sure what the intention is here for the first step.

When I place a virgin .220 case into my Bat action the bolt will go forward to a point where the bolt handle is a little short of the slot in the action. Alinwa says that doing a crush fit for fireforming will require palming the bolt to force it closed. A year or so ago I ripped the handle off a Grizzly II bolt so I'm leery of applying a lot of force to a bolt handle. My thoughts are that I should use the 6PPC sizing die to size the .220 case just to the point that the bolt will go forward enough for the bolt handle to align with the slot in the action but not start down.

Comments Please


Jerry Adams
 
Last edited:
Use your 6PPC sizing die and bump the old 220 Russian shoulder back to where you get the same feel that TB describes in his book. Forcing the bolt closed, especially on a SS action like the BAT is asking for a case of bolt lug galling!!
 
I take care of the situation that you describe, when I turn the necks. The angle on the leading side of the cutter cuts on the shoulder just a little. It is not easy to catch a finger nail where the cut ends. At first I was concerned about weakening the case with this sort of cut, so I sectioned a case that I had turned that way. The brass is plenty thick in that area. Remember that your cut will get heavier just before you get to the shoulder, because when you neck up, part of the thicker shoulder brass becomes the bottom of the neck. Another thing, if you decide to bump the neck shoulder junction, you will need to use a different die setting than you use to bump formed cases. Back the die out a little and reset it using the rifle for your gauge. You want to feel the case without having to force the bolt. This is the only situation where I recommend setting a die by feel.
 
The thing about "ensuring that the neck walls are parallel" is both a pipe dream and unrelated to what you're doing, but the idea that you must resize every case prior to fireform is sound. The REASON is to make them all fit or 'feel' the same. The REASON is to reset all the bearing surfaces to the same spec.

As far as what Jerry says, you'll have to choose your poison here. I set them fairly tight. I learned this from Jim Borden and since then have tested it extensively. You will have to decide what you want to do, "who you want to lissen to" if that's how you make your choices.


The problem exists...... how you decide to deal with it is up to you.

At least 6 of the people I can think of on this board will tell you to grease your chamber..... Ratigan advocates it also, that's carte blanche for most people......your call. Know this that while these stop-gap measures will work fairly good for the PPC (except that cleaning impregnated grease out of your chamber is harder than you may think) you WILL run into problems if you decide that anything else on the planet is worthy of consideration.

al
 
Here is a link with 3 different styles of fireforming cases.
http://www.accurateshooter.com/guns-of-week/gunweek041/

I have almost always used the pistol powder with a WAX cap. I tried it the conventional way once and was not as pleased with the results as when I use the pistol powder with WAX.
I may or may not expand before fire forming. The reason I do it this way is the neck shoulder junction moves after fire forming but when you turn the necks first you turn to a junction point that changes.
By fireforming first I can then turn the necks to the point where the neck junction actually is.
I even discovered a way I can do this at home quietly but I am not going to share that one here. My fire suit is still at the cleaners.
 
Last edited:
Use your 6PPC sizing die and bump the old 220 Russian shoulder back to where you get the same feel that TB describes in his book. Forcing the bolt closed, especially on a SS action like the BAT is asking for a case of bolt lug galling!!

I agree with Jerry 100% on this.
Maybe I missed something in your earlier thread. Are you blowing out .220 cases without a bullet and turning them afterward? I think most of the advice given on your earlier thread assumes that you are expanding the necks and turning first. If you are using fast powder with no bullet, then just bump the shoulders the minimum amount so they are tight on bolt closing, but not so tight as to risk galling the lugs or separating the handle. If you expand and turn first (or use Pre prepped brass that someone else has expanded and turned) Just check the fit in your chamber and set back as necessary. How much resistance you like to feel with your bolt handle is up to you.
 
Scott, Vern, etal

I'm considering the Bullseye w/wax plug option as I don't, as yet, have any fireform barrels. My dentist was good enough to give me a box of wax sheets to use for this. I used this process a little over a year ago to make a few additional cases. I seem to recall that the cases formed well but the shoulder wasn't quit as sharp as it became later. I had considered what Vern said about the neck shoulder junction moving. I somehow acquired four or five expander mandrels and will use one to expand the necks before fireforming if I go this route.

One of the problems of buying used guns is not having the reamer used on the barrel. I did buy a 6Beggs .269 reamer that PTG had on sale and got the dies from Gene about 16months ago. The Shilen swap meet should be coming up soon and I'm only an hour away so maybe I can pick up some practice barrels from them. The Bat firing pin removal tool should be here tomorrow so I'll have most of what I need to proceed. All the ideas and suggestions that I've received from so many knowledgeable people on this site are spinning around in my head. Fortunately they are staring to coalesce into a workable process. I have a good feeling that this will sort out after I start implementing the steps in the process.

Got to thinking a little more about the bullseye/wax method. Has anyone tried making a fixture that would hold a piece of barrel and use that for fireforming this way. That way you wouldn't have to put the fireforming barrel in the action. If you have the reamer, that's doable. Maybe design and make a delayed pressure release/blowback mechanism that could momentarily increase the pressure sufficiently to get good forming. Of course that could end up being a pipe bomb, but maybe not if you knew what you were doing. Obviously I won't attempt that any time soon, if ever.
 
If you don't have any wax, a bar of soap works just as well.

You will have the cleanest barrel around!

Get you a roll of fiberglass insulation material (The big one), stick your barrel into the center and fire. It's just like a very big suppressor and makes very little noise. It will make your neighbors unaware of what's going on.

Brad
 
I'm considering the Bullseye w/wax plug option as I don't, as yet, have any fireform barrels. My dentist was good enough to give me a box of wax sheets to use for this. I used this process a little over a year ago to make a few additional cases. I seem to recall that the cases formed well but the shoulder wasn't quit as sharp as it became later. I had considered what Vern said about the neck shoulder junction moving. I somehow acquired four or five expander mandrels and will use one to expand the necks before fireforming if I go this route.

One of the problems of buying used guns is not having the reamer used on the barrel. I did buy a 6Beggs .269 reamer that PTG had on sale and got the dies from Gene about 16months ago. The Shilen swap meet should be coming up soon and I'm only an hour away so maybe I can pick up some practice barrels from them. The Bat firing pin removal tool should be here tomorrow so I'll have most of what I need to proceed. All the ideas and suggestions that I've received from so many knowledgeable people on this site are spinning around in my head. Fortunately they are staring to coalesce into a workable process. I have a good feeling that this will sort out after I start implementing the steps in the process.

Got to thinking a little more about the bullseye/wax method. Has anyone tried making a fixture that would hold a piece of barrel and use that for fireforming this way. That way you wouldn't have to put the fireforming barrel in the action. If you have the reamer, that's doable. Maybe design and make a delayed pressure release/blowback mechanism that could momentarily increase the pressure sufficiently to get good forming. Of course that could end up being a pipe bomb, but maybe not if you knew what you were doing. Obviously I won't attempt that any time soon, if ever.

I use a hunk of barrel whacked off just in front of the chamber and threaded for a hunk of pipe. I also turned the threads thru ALA Savage barrel nut system so that you can tweak the fireforming headspace. I commonly fireform with this setup, no stock, or just use a fireform barrel outside the stock and hold onto the barrel with a rag.

As far as a 'fixture,' I've clamped my fireform barrel in my shop vise ;) just so's I din't have to hold it.

I'm lazy, plus this makes it easier to get the brass out without dinging it.

based on my hunka' pipe I don't think backpressure enters into it but don't count on it. I haven't actually tested for it. But I use 3/4-case of shotgun powder, no wax plug.

al
 
Al

I see that you vigorously embrace the "KISS" principle. Guess there's nothing really new under the sun. Now I'm really encouraged to try it. :eek:
 
I see that you vigorously embrace the "KISS" principle. Guess there's nothing really new under the sun. Now I'm really encouraged to try it. :eek:

I may have been unclear, I've only got ONE hunka' pipe thing.... a 6BR, the rest are all old barrels.

I've recently fireformed maybe 200 blown out 338 Lapua cases using shotgun powder and a barreled action, the more I use this method the more impressed I am.

Also, I was remiss in saying "3/4 case of shotgun powder." This is incomplete. I actually use Ken Howell's method where you start with 1/2 case and work up just like working up a load. This workup is for a case which holds 45gr water and the notations indicate "Kliks" on a Harrell BR powder thrower.

30 HBR ff cu.jpg


I've attached this pic which kind of shows the progression. Using this method one can get exact results. I set them so the case goes in hard, they drop out into your hand.

al
 
On 6mmBR.com, someone opined said that they set the shoulder back and necked down 6.5 Grendel brass. Seems like a long way to push a shoulder back.

In your opinion, if it possible? What would be the issues?

Greg J.
 
Wilbur

Much thanks for posting that link. I see now that I was searching at the wrong level for the FAQ file. I was searching in the forums rather than at the Home page.

That said, I get an error message when I click on "Articles", which is left of "FAQ". Error: An error occured while trying to login to your MySQL database: 'Access denied for user 'root'@'localhost' (using password: YES)'.
 
As far as I'm concerned, all the wax/soap/tissue paper etc. does is to keep the powder from dribbling out. I think it was my shirt-tail cousin, Ken Howell, who remarked that if you hold the rifle upright, you don't need anything.

Since I'd find a way to spill the powder, I used a cotton ball. Since I'm cheap, I tear them in half -- unless I have to go & rob my wife's supply, she uses big ones, which can be ripped into even smaller pieces.

BTW, if you use Cream 'O Wheat or other filler, you'll need less powder. If you're going to be as exact as Al, you'll have to measure the filler, too. Cream 'O Wheat does have one plus. If you're dealing with a new chamber, firing it will take off (at least some of) the wire edge left in the neck by the reamer. By the time you've finished fireforming your cases, you've halfway got the barrel broken in. If you're using COW, don't let it cake up -- get wet, sit a long time, etc.

None of this is rocket science, bit it isn't something to do slap-dashedly, either.
 
....................
That said, I get an error message when I click on "Articles", which is left of "FAQ". Error: An error occured while trying to login to your MySQL database: 'Access denied for user 'root'@'localhost' (using password: YES)'.

Thanks for reminding me. Been meaning to fix that link for years now. Slipped through the crack over a hunnert times I would guess.
 
As far as I'm concerned, all the wax/soap/tissue paper etc. does is to keep the powder from dribbling out. I think it was my shirt-tail cousin, Ken Howell, who remarked that if you hold the rifle upright, you don't need anything.

Since I'd find a way to spill the powder, I used a cotton ball. Since I'm cheap, I tear them in half -- unless I have to go & rob my wife's supply, she uses big ones, which can be ripped into even smaller pieces.

BTW, if you use Cream 'O Wheat or other filler, you'll need less powder. If you're going to be as exact as Al, you'll have to measure the filler, too. Cream 'O Wheat does have one plus. If you're dealing with a new chamber, firing it will take off (at least some of) the wire edge left in the neck by the reamer. By the time you've finished fireforming your cases, you've halfway got the barrel broken in. If you're using COW, don't let it cake up -- get wet, sit a long time, etc.

None of this is rocket science, bit it isn't something to do slap-dashedly, either.

I quit with the Cream of Wheat (and others....) some time back. All fillers had problems but with COW the problem manifested itself as a ring of crud up in the body/shoulder junction on some cases. I fireform hot, I gener'ly shoot 35* shoulders and .010/inch taper cases so's I've a wicked crease up in there.........the ring could be peeled out using a piece of wire,


nasty.


al
 
The Bat firing pin removal tool arrived and I easily removed the firing pin. I think I'm going to try the "expand then fire with pistol powder and wax" method first. I'm going to do a few and see what the results are, measuring and documenting as I go. Right now I'm doing those activities that don't require a lot of walking. I have back problems that cause a great deal of pain when walking more than 20-30 yards. Been in physical therapy for some weeks now with no results. Next is an MRI to see what that shows. First thing I do in the morning, before coffee even, is to swallow 4 200mg ibuprofen gel caps to get a head start on reducing the pain. Tried a Vicodin the other day and it nearly put me into a coma. I put those away real quick. Hope I don't end up needing one of those "free" scooters. Anyway, one of the shooting clubs I belong to is set up so you can back up close to the benches. I'll go there to do the fire forming.

Jerry Adams
 
Jerry,

since you're blowing them out with pistol powder anyways....... try skipping the "expanding up" step. Blow 'em up. Take notes both ways.

For your back, get a better bed. Or shim the one you've got with towels..... :)

al
 
Back
Top