P
psient
Guest
PM lathe is now mounted
Hi All:
I now have my new lathe mounted on the bases. This was an interesting exercise. I used the assembly manual that Matt and his crew created. The document was very useful but anticipated I'd done this before.
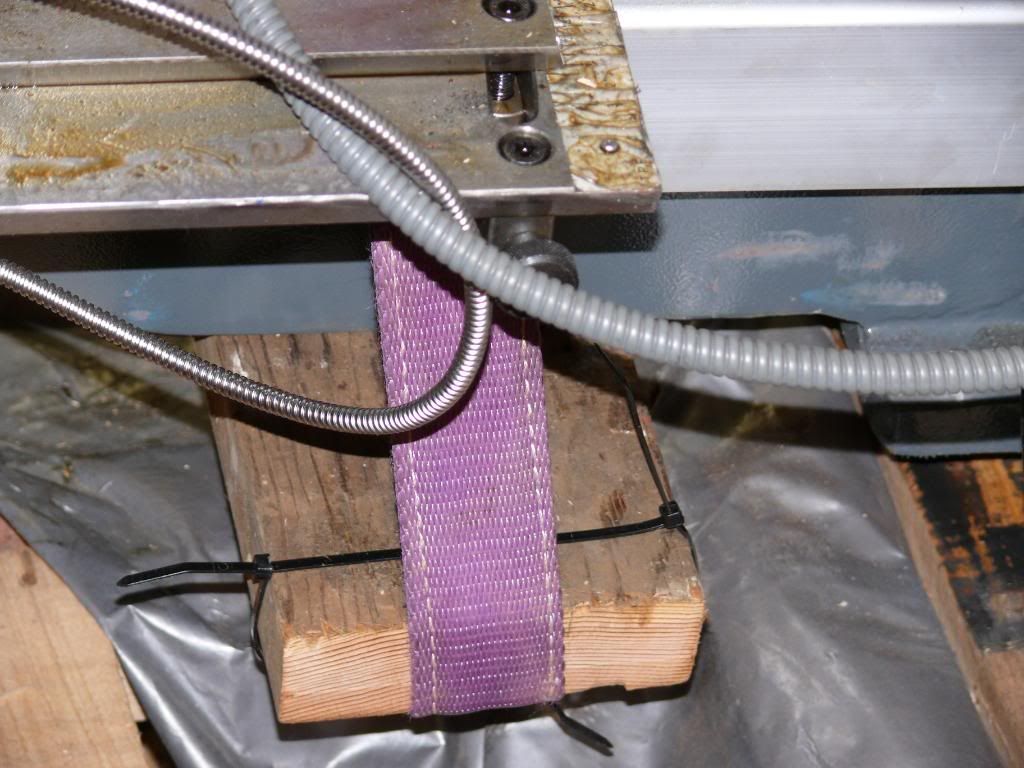
As a result it was more a general interpretation of what Matt would do than the specific information I'd need to assemble and install the lathe. For instance, there was no info about the specific Center of Gravity. Nor was there any indication that you could sling directly to the bed casting going under and behind the leadscrew and other rods. I followed the manual and used a 2x6 block. This was unnecessary and caused about 1hr of additional work. Why? because the block had to be just the right length to allow the sling to miss the traversing rods AND not hang me up on the chip pan.
Anyway, it got done with the help of my wife and the horseshoer.
To start with I had to position the sling and hoist after raising the pallet high enough to get the hoist base under the pallet.
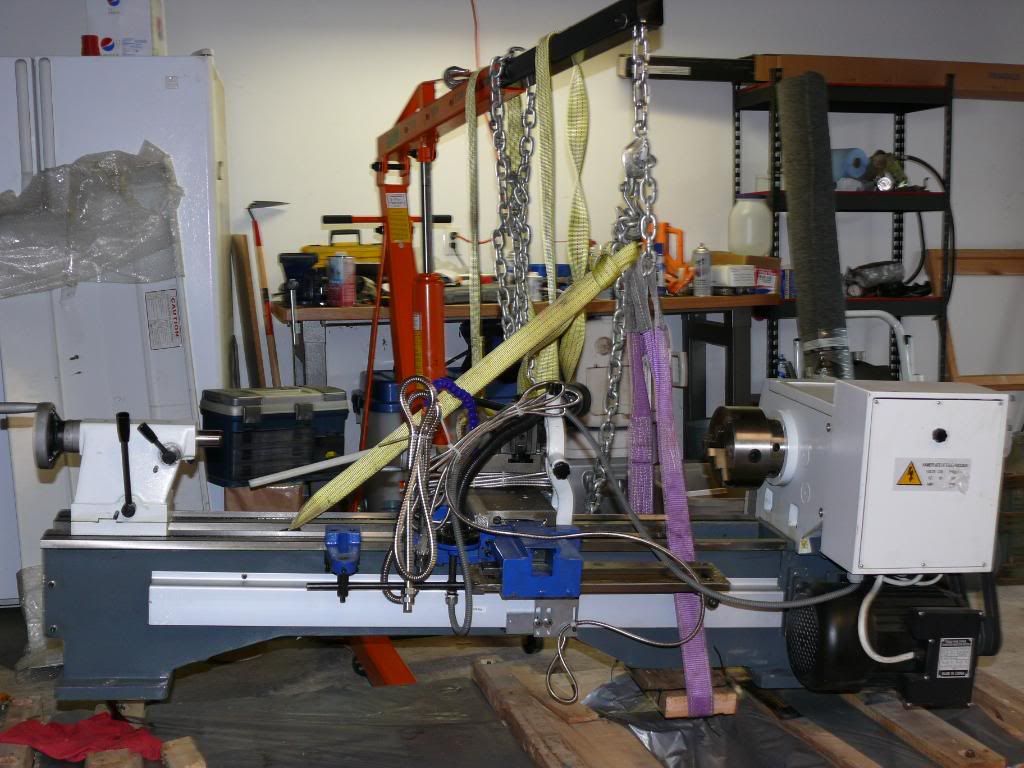
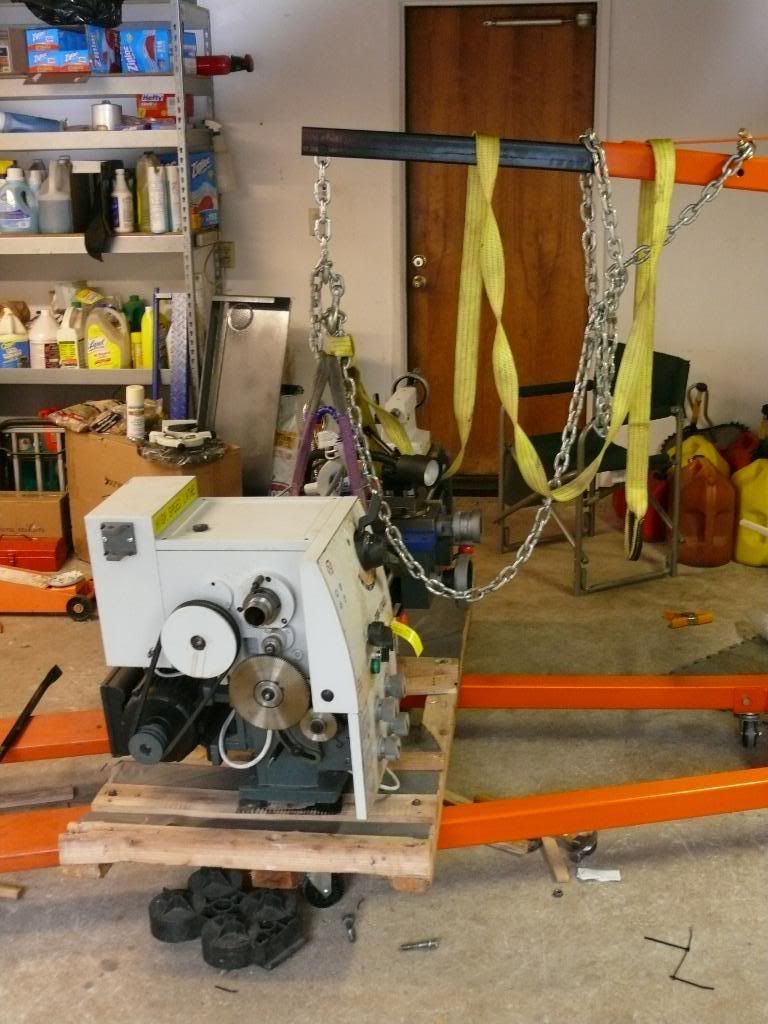
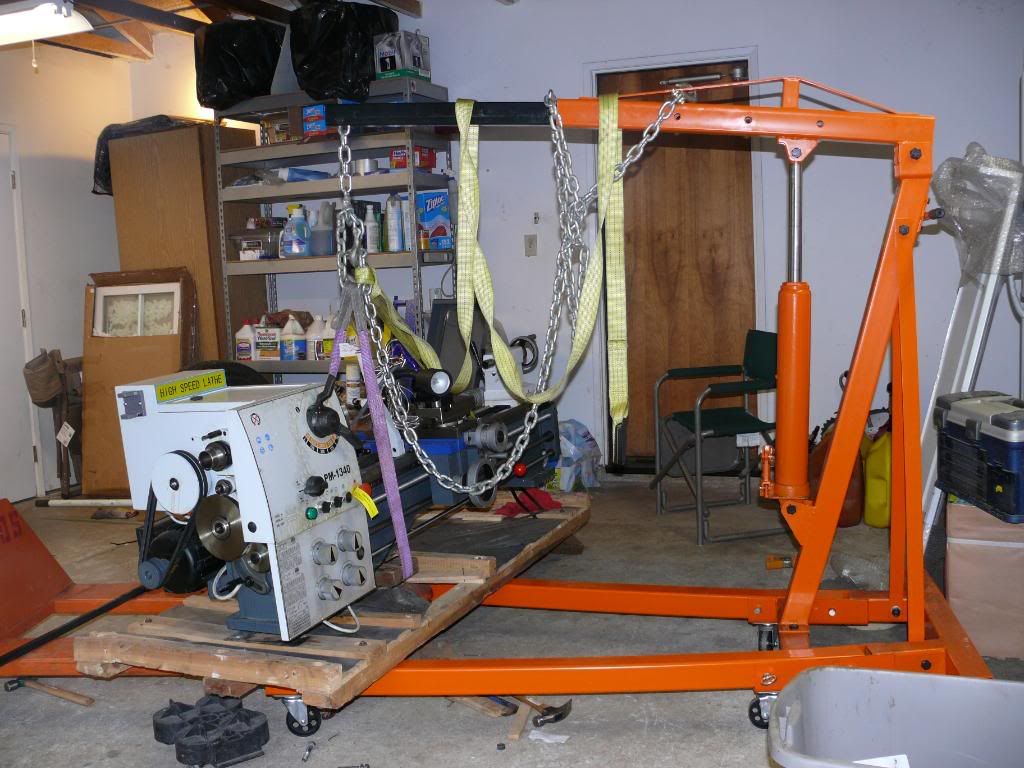
Below is a detail of the block of wood with the sling positioned away from the lead screw.
Now I began to hoist, dropping and repositioning the sling as needed to locate the CG. When this was done I started hoisting . . . only to realize the hoist would not elevate the lathe high enough to clear the chip pan.
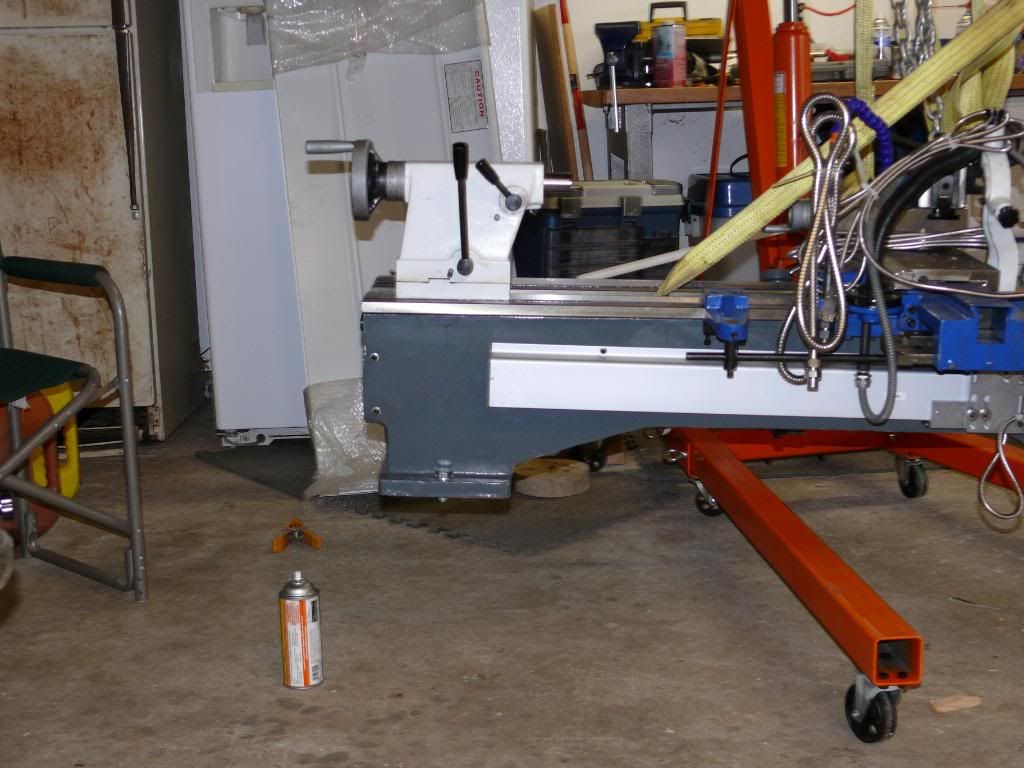
note the length of the chain and hook. This needed to be eliminated and the sling was bound directly to the hoist boom. This permitted the hoist to raise the lathe high enough to mount.
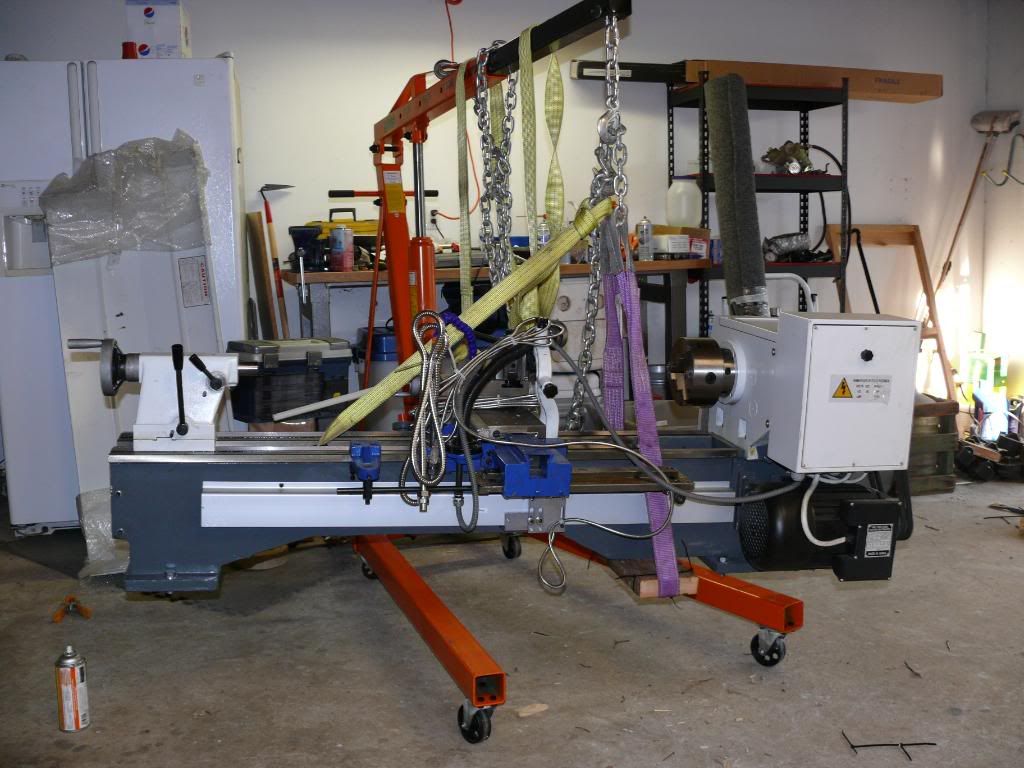
THe next problem was with the lathe slung in this way, the hoist could NOT be maneuvered directly over the bolt holes of the bases. It was about 6" away (in the horizontal length of the bed) from being directly over the bolt holes. Thus, with the lathe slung in the fashion dictated by the manual, I could not get the hoist base around the lathe base with the lathe positioned correctly!! I either had to move the sling towards the tailstock and find a way to balance it (as that would put me off-center) or make a tool that would allow the hoist to directly attach to the lathe.
In the end my wife and her horseshoer and I got the job done and the lathe was sealed and mounted to the bases. This process took me from 5am until 10am to accomplish. In the end everything went fine.
I have now completed the sheet metal below the chip-pan, the coolant pump installation and the beginning of the brake installation. I must have misplaced the actuator arm that links the brake shaft with the mechanical brake in the headstock. However I phoned Matt and he's sending me a replacement free of charge including shipping. No big deal just great customer service and progressive attitude about how important customers are!!!!
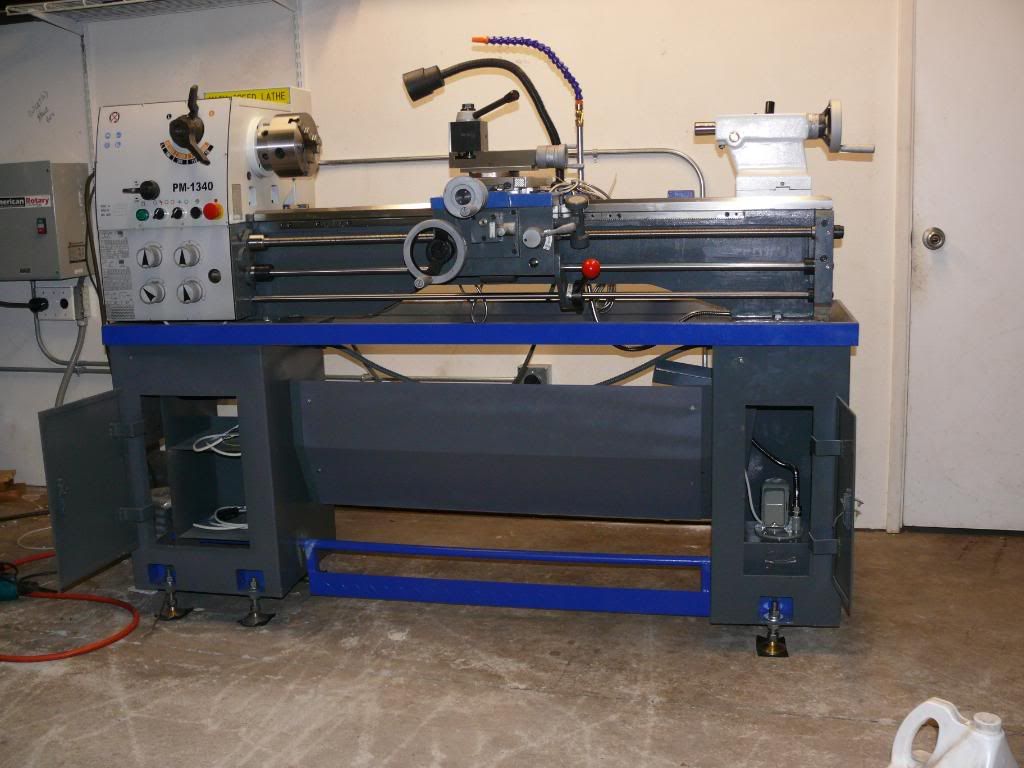
OK. That's where I am now. I have to learn how to use the taper attachment. Any one have experience with these? Below is a picture of mine that was included with the purchase of the 1340.
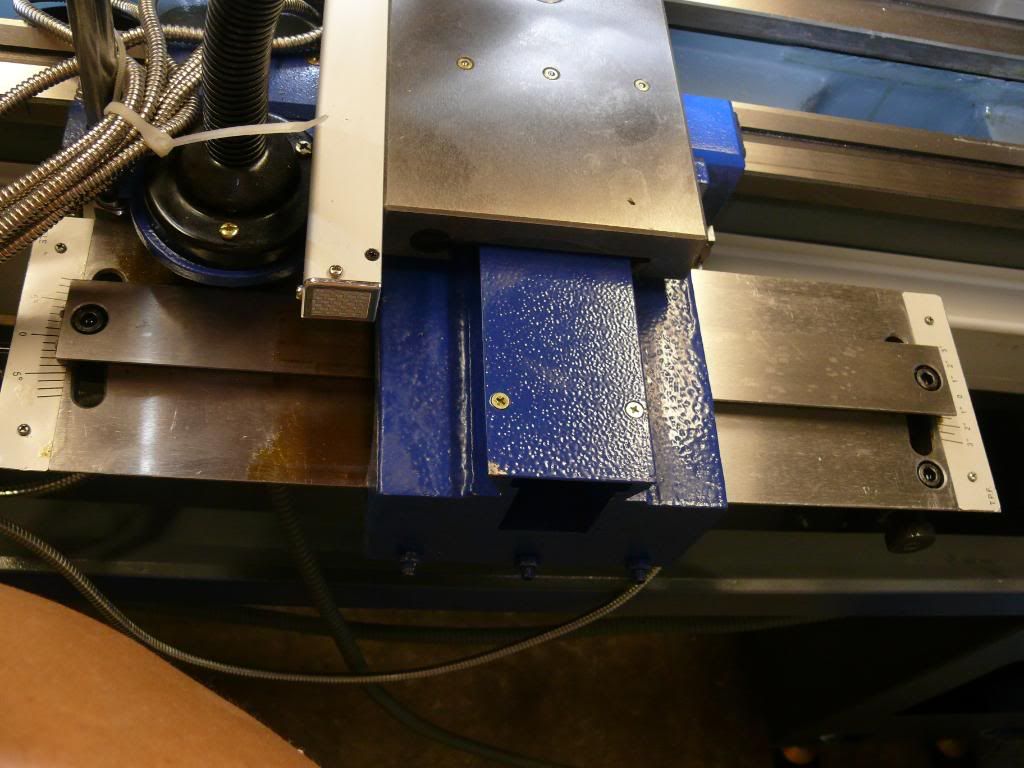
In closing a word to the wise . . . look carefully at this procedure and compare it with the procedures outlined in other threads. I will eventually move this lathe out of the garage into a shop. When that day comes I will fabricate a tool that allows me to position the hoist correctly. I'll post pictures when that day comes!!
Please give me feedback on what you think and any advise about finishing the installation
Thanks and God Bless.
Jon
Hi All:
I now have my new lathe mounted on the bases. This was an interesting exercise. I used the assembly manual that Matt and his crew created. The document was very useful but anticipated I'd done this before.
As a result it was more a general interpretation of what Matt would do than the specific information I'd need to assemble and install the lathe. For instance, there was no info about the specific Center of Gravity. Nor was there any indication that you could sling directly to the bed casting going under and behind the leadscrew and other rods. I followed the manual and used a 2x6 block. This was unnecessary and caused about 1hr of additional work. Why? because the block had to be just the right length to allow the sling to miss the traversing rods AND not hang me up on the chip pan.
Anyway, it got done with the help of my wife and the horseshoer.
To start with I had to position the sling and hoist after raising the pallet high enough to get the hoist base under the pallet.


Below is a detail of the block of wood with the sling positioned away from the lead screw.

Now I began to hoist, dropping and repositioning the sling as needed to locate the CG. When this was done I started hoisting . . . only to realize the hoist would not elevate the lathe high enough to clear the chip pan.

note the length of the chain and hook. This needed to be eliminated and the sling was bound directly to the hoist boom. This permitted the hoist to raise the lathe high enough to mount.

THe next problem was with the lathe slung in this way, the hoist could NOT be maneuvered directly over the bolt holes of the bases. It was about 6" away (in the horizontal length of the bed) from being directly over the bolt holes. Thus, with the lathe slung in the fashion dictated by the manual, I could not get the hoist base around the lathe base with the lathe positioned correctly!! I either had to move the sling towards the tailstock and find a way to balance it (as that would put me off-center) or make a tool that would allow the hoist to directly attach to the lathe.
In the end my wife and her horseshoer and I got the job done and the lathe was sealed and mounted to the bases. This process took me from 5am until 10am to accomplish. In the end everything went fine.
I have now completed the sheet metal below the chip-pan, the coolant pump installation and the beginning of the brake installation. I must have misplaced the actuator arm that links the brake shaft with the mechanical brake in the headstock. However I phoned Matt and he's sending me a replacement free of charge including shipping. No big deal just great customer service and progressive attitude about how important customers are!!!!

OK. That's where I am now. I have to learn how to use the taper attachment. Any one have experience with these? Below is a picture of mine that was included with the purchase of the 1340.

In closing a word to the wise . . . look carefully at this procedure and compare it with the procedures outlined in other threads. I will eventually move this lathe out of the garage into a shop. When that day comes I will fabricate a tool that allows me to position the hoist correctly. I'll post pictures when that day comes!!
Please give me feedback on what you think and any advise about finishing the installation
Thanks and God Bless.
Jon


![PM1236 lathe configuration for 12 TPI needs to be 48....127....Z [24].jpg](/forum/data/attachments/3/3254-fe362d7d8f657ee2087642ff57ce307f.jpg)

