Any/Any Iron-Palma Build thread

Thanks again.

As much as I'd like to be, I'm not a sponsor here and the site has clear lines drawn regarding such matters. (I hope to soon become a sponsor)

It wouldn't be very cool of me to talk money as I think it would be kind of a smack to those who do pay to advertise/recruit business here.

If you'd like to discuss things then it's best to contact me offline.

Thanks for understanding.

C
 
Palma build

Chad:

As a longe range prone and Palma competitor, I am inspired by your work. Your metal and wood craftsmanship are indeed works of art. And, your ability to memoralize your progress reminds me of Doan Trevor's web site.

Keep up the great work.

Jim Hardy

P.S. As you probably know, the Gamboa reamer is the one now specified for the U.S. National Development Team and the team that will eventually shoot at the Palma Championships in Aus in 2011. I am new to Palma, and will be making my first trip to Canada this Summer with the U.S. Team. I hope to meet you there.
 
Last edited:
Chad,

I too have been a big fan of your post and hope you continue.
I am curious as to your background.
Were you trained in machining, or gunsmithing?
I agree with other post who state you are not just a smith but an artist. I am just curious how this came to be.

Just coming from a guy who really, really wishes he had a job like yours.

Tim
 
I've never been to school for either. While in the Marines I began loitering in race engine machine shops. Eventually this turned into a few different part time jobs working for some fairly heavy hitters on the west coast (Richard Conley, Paul Rossi, Bill Craddock) building everything from NHRA Comp E. engines to cylinder head work for John Force. For the most part I was a maggot and wasn't allowed to do much in the way of cool stuff. I was allowed to run a broom though. These were some really, really difficult people to work for, but I learned a lot by watching so I'm grateful. It's amazing how much cars/guns have in common. (seriously)

This is where it started. From there I just started working in machine shops doing everything from medical stuff to nuke reactor parts (about 6 years or so) until I one day literally got fired from a job for making a table/vise stop. There's more to it, but that's what broke the back. The owner and I didn't see eye to eye on quite a few things. I didn't come to work as a machinist to run a paint roller. . .

Guns came next and I've stuck with it since. Neal Johnson hired me as a machinist. A year later I was the floor manager of the gunsmithing side of the shop. This is where/how it all started. I owe that old man everything.

I was really struggling financially back then. (Divorce is expensive cause its WORTH IT) A good friend (very talented machinist) gave me a student copy of MasterCam 7 software. I scrounged and saved till I could afford a computer (486!) and while room mates were chasing girls on weekends I "nerded up" and taught myself how to run it. Wasn't really sure why at the time as I wasn't allowed to do any programming at the jobs I worked. Just wanted to know it.

Funny what becomes entertaining when all you have is a bus ticket!

I didn't really start programming CNC's until I got to Nesika. Glen, Mike, and Cyle just turned me loose and said "figure it out." Lots of late nights. . . I'd of stayed with Nesika till the day I died had the company not gotten into the financial yeast infection that it did. The "Vulture" capitalist that bought it from Glen really made a mess of things. I popped smoke in 06 shortly before the bankruptcy filing. The writing had been on the wall for awhile. So obvious that Ray Charles could see it. I had applied for a security contractor position 15 months earlier with a company operating in the Middle East and it came none too soon. I left 2 weeks before the big layoff and court nausea.

3 years of irritating muslims for the DoS and here I am back home with a pretty nice little spread. I don't have much to complain about these days.

Some say the American Dream is dead. I'd have to disagree, it just takes more effort. The most committed always wins. . .

Thanks for asking.

All the best,

Chad
 
Last edited by a moderator:
Update:

I finished the bulk of the machine work today on the inlets. Just a few items left to do.

I ended up bedding this over again. Wasn't satisfied with the first time around. Sucks when that happens, but if it's not right, it's not right. (right?)

Much better the second time. Now just have to chew on it some more to finish off the ejection port and other remaining features/inlets. Almost there. . .

DSC_0047.jpg


DSC_0048.jpg


DSC_0051.jpg
 
A little off topic

Part of my business these days is machining vintage motorcycle parts. There's an old man that works here part time who has a son that was recently laid off.

He owns a garage full of pretty nice wood working equipment. I asked him to whip up some cradles for me as finding a place to put stocks has become a challenge as of late. (things have picked up quite a bit!)

10 days later this is what he showed up with. I've got six of the buggers now and plan on ordering a dozen more. I paid $60 a piece for them. Nothing fancy, but they are well built. There's no padding on them. He offered but I told him not to worry about it since I just use them basically for storage of stocks as they are moving through the shop. A finished gun will never go in one of these.

I'm throwing this out there cause he's a good kid (early 20's), has a new baby, and has been out of work for a few weeks now.

If anyone is interested, shoot me a PM. I'm not making a dime off these. Just trying to help a guy out a little.

Thanks.

C

DSC_0052.jpg


DSC_0053-1.jpg


DSC_0055.jpg
 
Great Post!

Chad, I always enjoy your posts. Great photos, great equipment and superb workmanship! :D

Thanks for sharing.

Gene Beggs
 
Well, thought I'd include a few more updates of this bugger.

Disclaimer: Photobucket for the most part SUCKS IMO. . . Half the time when I resize photos it doesn't work for some reason. Never used to be this way. I don't get it. . .

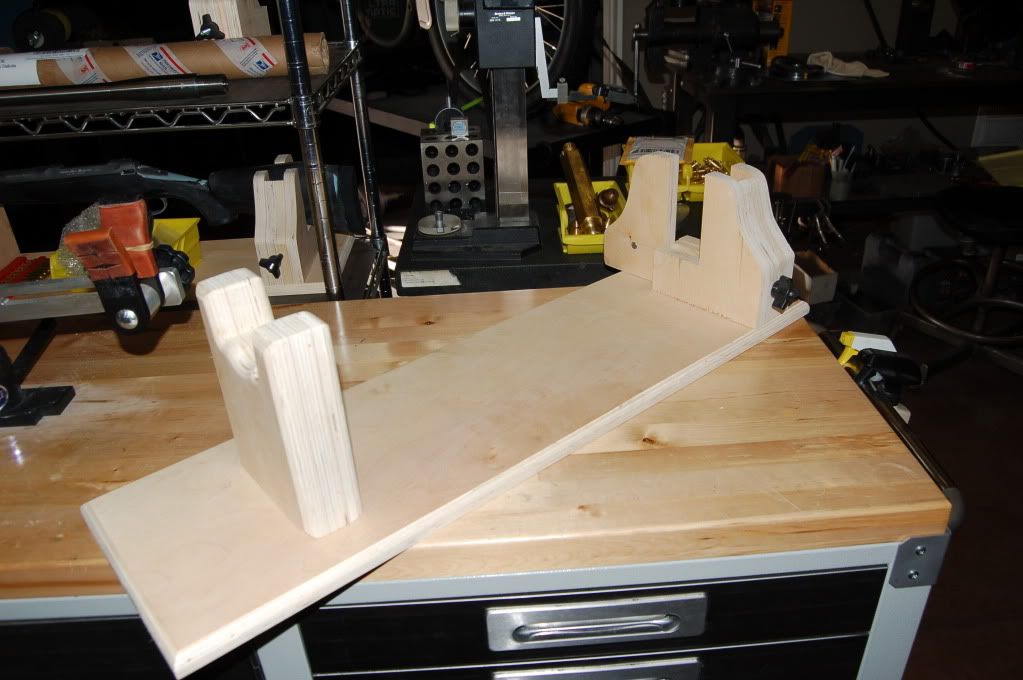
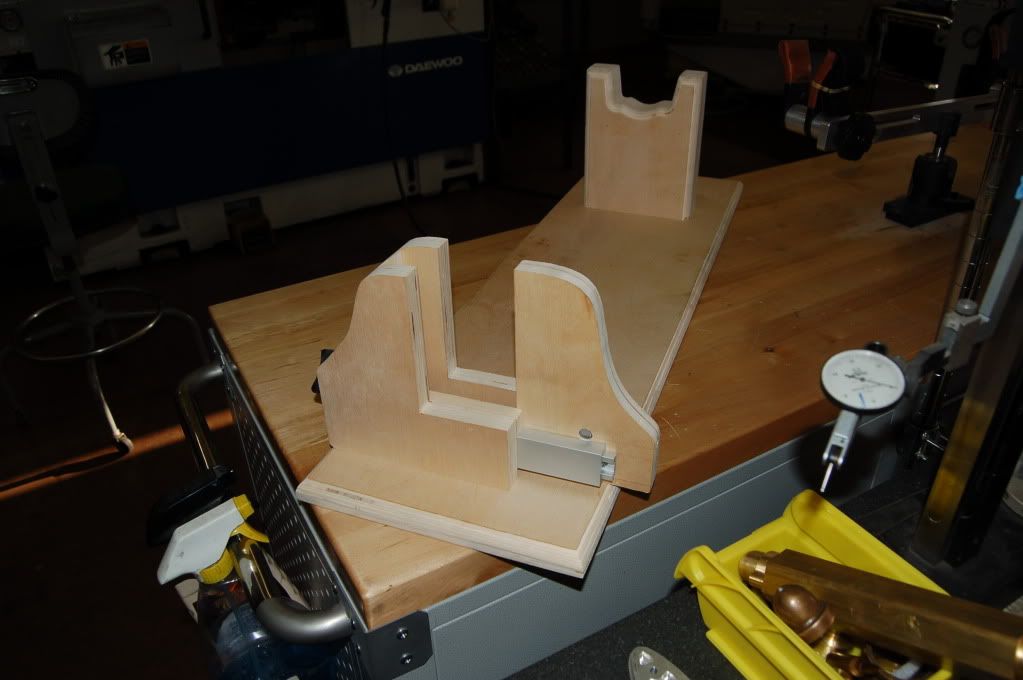
This rifle is now completed. The customer wants to apply the finish himself. So, here's a medley of photos showing the finished work and some processes. They aren't in any particular order.

You'll notice many pics of the trigger guard. I went through about ten of these damn things to get what I wanted. I made some "bold" decisions on this rifle. Being with the US Team in 2003 taught me a few things. Like benchrest, a prone shooter hopes/looks for a particular condition that he/she finds favorable. When it does it's to their interest to sling as many rounds down range as the guys in the pits can keep up with. That being the theme I wanted my customer to be able to manipulate the bolt, clear the fired round, load and fire without having to break position. This required opening up the loading port a bit and moving the entire action towards the rear. The trigger shoe on the Barnard is able to be located in different positions so moving the action to the rear didn't hurt this. What it did do however was complicate the trigger guard. The standard Sunny Hill that I'd normally use wasn't going to work since the back half would have been buried in the pistol grip by a ridiculous amount.

So I turned (once again) to the Swiss boys at Grunig/Elmiger for guidance and ideas. Specifically, the G/E FT300 CISM rifle that I used to service once upon a time. Years ago I built a 6X47 Swiss Match NRA Match rifle for a guy. The trigger guard on that gun also emulates the G/E FT300.

By and large I like the way it came out. I went through several revisions getting it to look like something. Finally resorting to grinding a contour on a carbide endmill to make a form tool to get the radius I wanted on the bow and tongue. When it was just flat it looked "8th grade shop class" if you know what I mean.

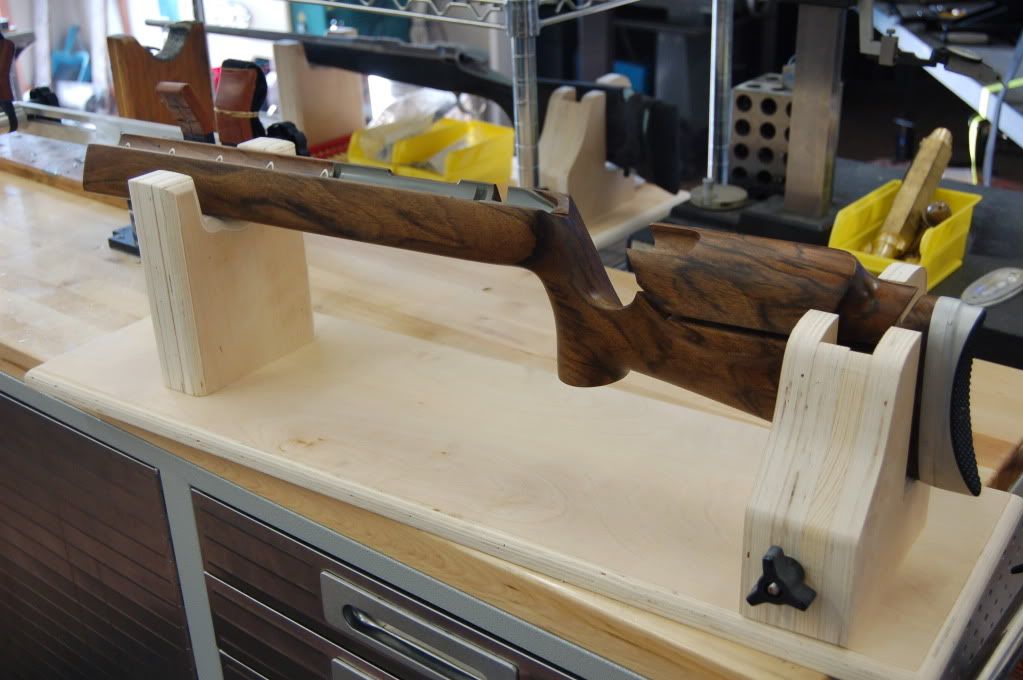
The cheek hardware is also my stuff. Machined from aluminum with brass bushing inserts pressed in, finish machined and then honed to fit the pins. This design is like the Warner Tool Company version (I'll never be guilty of having an original thought) where the jack screw stays in the piece so that the height setting is retained when the cheek piece is removed to pull the bolt. (per the international rules as this is a "safe gun". Al Warner is a sharp ol cat. I always learn something when looking at his stuff and try to emulate it.

And yes, that is a recoil lug on the front of this thing. I know Barnards don't use this. I made my own. (actually my girlfriend helped design it as I've been "learnin" her on the software.) Years ago (2002/2003) when the CG Millenium action came out I had the experience of dealing with an action that didn't use the conventional lug system. That rifle was a horrible experience that cost a very good friend of mine a great deal of money and frustration. A well respected smith built it and it wouldn't hold 3" groups at 200 yards. It was minute of 8 ring at 1000. I slaved over that damn gun and in the end he sold the B/A and gave me the stock.

SO I put lugs on these types now. I know it may not be needed but its certainly not hurting anything either. That's my story and I'm sticking to it.

Again, sorry about some of the pics being so big. If nothing else you can see all the little details this way. Keeps me honest!

All the best,

Chad

DSC_0036-1.jpg


DSC_0035.jpg


DSC_0010.jpg


DSC_0007-1.jpg


DSC_0006-1.jpg


DSC_00512.jpg


DSC_00094.jpg


DSC_00012.jpg


DSC_00213.jpg


DSC_00343.jpg


DSC_00333.jpg


C
 
Here's a few more. I think I got the camera thing sorted. I just reduced the file size in the camera so that I don't have to dicker with PB anymore. We'll see if it works. . .

Pardon the pistol. (blech!) It's my "beater" carry gun. It's bike rally time here. One never knows what might walk through the door. . .

C

DSC_0007-2.jpg


DSC_0006-2.jpg


DSC_0005-2.jpg


DSC_0004-1.jpg


DSC_0003-1.jpg


DSC_0002-1.jpg


DSC_0001-3.jpg
 
OK Chad,

Now I officially hate you.
It wasn't enough have the coolest shop and do the coolest work.
Now you have a girl friend who designs gun parts and programs your machines to make them.
You are really disgusting.


That is a fine looking rifle!

Henry
 
Last edited by a moderator:
Yessir, sure makes for some tough days. . .

DSC_0023-1.jpg

DSC_00173.jpg


This is our other little project together. Fuel/Smoke oil "dots" for giant scale RC planes. (my other addiction) Sold the snot out of these buggers.

DSC_0022-1-1.jpg


DSC_0035-1.jpg


An RC website has a little contest. Perform a high rate snap roll close to the ground. If it meets the "coolness" criteria one of the moderators sends you a "Snapasaurus" sticker to put on your plane. This is my 85cc Yak 54 about three weeks ago. Snap roll to hover. Would have been better if I'd of kept the hover closer to the ground, but it got the job done. (he was so impressed he sent me TWO!! Woo Hoo)

Nothing like twisting a $3000 dollar plane 10' off the deck!


This was back in 07 when I was fartin around in Baghdad. My Trexx600 heli at the cross swords memorial. Just a short clip.


I never really got the hang of flying heli's. They're fun but a maintenance intensive biche too. I just like to fly. Ended up horse trading this for

THIS: 42% Kelly F-1 Pylon Racer!! Properly let up these'll do around 240mph.

IMG_1318.jpg


PA276312_Large_.jpg


FormulaONEKELLY.jpg
 
Last edited by a moderator:
Chad,
Just curious as to why you decided to go with the Remington style recoil lug instead of the Barnard bedding block or using the slot on the bottom of the action to install a recoil lug there?
 
I have some questions about setting up the barrel in your CNC lathe. It looks as though you're holding it in a 16C collet, and if you have a flat spindle nose I can see how you'd get the radial runout down to next to nothing (with super human patience) but what do you do if the bore itself isn't pointed in the right direction? How do you support the other end of the barrel and do you let the machine completely finish the chamber, or do you do the last bit manually? I have a couple of Okuma CNC lathes in my shop and would love to be able to chamber my barrels with them. I very much enjoy your posts and I think the rifles you build are works of high art.
 
Quandary,

You'll have to snoop around on this site for previous threads/posts regarding this. I broke down one day and explained it in detail. I'll just give the cliff notes.

I use a Dunmore 16c indicatable collet chuck. I do this for maximum surface contact (work holding). Much better than a four jaw IMO. It allows a turning center to do what a turning center is supposed to do. Run fast and use insert carbide tooling. Since you have Okuma centers I have to assume you understand surface footage/feed rates, etc.

I hold the barrel at 200lbs of chuck pressure.

As for supporting the opposite side. I've done it both ways. I've left it unsupported and also supported. From an accuracy standpoint I saw no difference what so ever. I support it now only because it allows me to run higher RPM during the turning/threading portion. Better surface finishes are the result here. It's so simple its stupid. I use a 5C collet rigged inside a tool holder adapter for my Daewoo turning center. Then I made a sleeve to fit over this with two rubber O rings that allow it to just slide inside the draw bar tube of the spindle. Cinch down the collet around the outside of the barrel and shove it up the butt of the lathe. It's that simple and HURTS NOTHING. I don't care what anyone says. There's too many rifles out there in gun land with smiling customers.

The Landy rimfire BR gun was done just like this.
So was Cyle Leibertrau's Palma Gun rebarrel that "shoots like it always has"
The list goes on, to include the 243 barrel that started the whole pissing match on this site about a year ago. That guy has nothing but good things to say.

Now all this conflicts pretty heavily with conventional barreling doctrine. Believe me, I had long and heated debates in my little brain on whether or not to even try it. I validated it to myself by conclusively showing that it hurts nothing and may even IMPROVE (dare I say that?) accuracy to some degree. I then spoke with two brilliant mechanical engineers who make good livings running large shops in the Seattle aerospace community. Both have over 25 years experience and I trust their word as gospel. If he can design and build a custom transmission for a 4000hp unlimited offshore hydroplane racing boat I have to think he could/can chamber a dumb gun barrel.

You have to take a step back for a moment and forget everything you've read about putting a barrel on a receiver. (not an easy pill to take considering the names and reputations of folks that frequent this site) But just for the moment jump off the deep end and humor me.

Get a sheet of paper and draw a banana. Now put a hole down the middle of it from one end to the other. The hole runs tangent to the exaggerated arc from one end to the other. The center of the hole when qualified off of a fixed centerpoint (in this case our spindle) varies in location as we progress along down the bore. So now what? Bend the barrel straight enough to indicate the bore? I've never stomached this well. I chose to pick my battles instead. I indicate where the bullet is going to engage the twisties down the bore. If I'm tangent and concentric at that point and my threads are concentric and parallel to that point I'm satisfied. It took a bit of work to build a setup tool to do this but it happened and I'm very pleased with the results. Folks like to snicker about my claims of indicated runout. I realize surface finish and what not plays into that. I also appreciate that a hand lapped barrel better have a good internal bore finish because its one of the things we pay for when buying them. That being said I have to think that I'm not too far off of what my indicator is telling me.

From there its the same fundemental machine work that anyone reasonably competent uses. I choose good insert tooling, I run the right speeds/feeds, and I give it hell. My G92 thread cycles are nothing fancy. There's two ways to approach this. Start with a big positive tool offset and just run it over and over with a bump on the offset till you get the thread fit your after, or just write a "roughing" pass G92 with an M00 at the end. Then repeat about 10 times with a .001" depth of cut increase for each pass. If you really wanna get fancy put in block skips so that once you get what you want, you just hit the block skip key and it pulls out and goes to the next operation.

Once you do a few you'll wonder why you hadn't done it this way forever.

If you have the funds/resources, rig up a high pressure through barrel coolant delivery set up. Dumore hydraulic couplers are the chit. Carbide seals and good to 1800rpm. They are also about a thousand bucks. I can pump up to 2400lbs of coolant pressure through the barrel while chambering. THAT is chip evacuation!

I don't claim this better than the traditional methods. I'm saying its better for ME. I like the way they come out, the customers like the way they come out, and the guns shoot well. Very well.

Hope this helped.

Chad
 
Last edited by a moderator:
Back
Top