Action Build Log.

Leeroy

Machinest / Gunsmith
Action Build Log Updated. (Large pic content)

G'day Fellas.

Some you you will remember mid last year i was asking questions about building my own action from scratch. Well after 6 odd months of research, drawing, several false starts and a severe shortage of "Spare Time" work has finialy commenced. :D

Sorry for not posting the log here on BR Central forums but anyone interested can check it out here..

http://www.australianhunting.net/index.php?topic=41763.0

Also wanted to sincerely thank everyone who offered advice and info on the subject.. So thank you gentlemen..

Time on the machines is still an issue so updates may be several weeks in between but i'll do my best..

Cheers
Leeroy
 
Last edited:
Would be interested in viewing that Leeroy but need to register. I started to but ran into this.

Note: we do not accept the use of any free web based e-mail address such as Hotmail, Yahoo, MSN or Gmail, please use your ISP (Internet Service Provider) address or your account will not be activated without prior reason/approval. Your email address must also be a valid, active account, if it isn't then you will not receive your activation email and your account will not be activated. Any account not activated after 30 (thirty) days will be deleted. Using a proxy server to try and hide your IP and or online ID (without express permission from the admin) will also result in your account not being activated. Please contact the Admin for permission to use a web based address.

I have no idea what my ISP email is because it sucked hard 7 years ago and I never used it.

Cheers,
Rob
 
Would be interested in viewing that Leeroy but need to register. I started to but ran into this.


I have no idea what my ISP email is because it sucked hard 7 years ago and I never used it.

Cheers,
Rob


Pal, it wouldn't be Australia if it wasn't overcomplicated by the bunch of brainless apes, just like everything else in Australia.Rad
 
Rob,

Here in Australia, we've found that requiring a real mail address or an ISP gets rid of most trolls right at the start.

Check out which of the nuisances on this forum don't have an email address. QED.

John
 
Pal, it wouldn't be Australia if it wasn't overcomplicated by the bunch of brainless apes, just like everything else in Australia.Rad

Well Rad clearly the action won't be real good if it's built by a "Brainless Ape" like me.. So i would sudgest someone as obviously intelegent as your self shouldn't even bother reading about it.

OOH OOH OOH AAH AAH AAH..

WANKER!

Leeroy
 
Last edited:
G'day guys..
Sorry about that.. I didn't realise that you needed to sign on to AHN to ready my Build log thread. Unfortunatly thats the rules of that forum, one must have an ISP e-mail account which helps to weed out people like the Clown above..

At any rate in the interests of national diplomicy i'll duplicate the thread here on BCF for everyone who's interested to have a look at..
Should get it up later tonight..

Cheers
Leeroy
 
Update!

G'day all

Well some of you may have read about my plans to build my own action (Cuz I’m too damn cheep to buy a ready made one :D). So I thought I’d post a log of my progress as I go along.

So where to begin... Well I won't bore you with the 3 odd months of evenings I spent in front of the computer designing and drawing my action. Significant time was also spent researching materials and heat treatment etc.
I got lots of advice on the best steels and what hardness (and hence tensile strength) to heat treat it to. Of course most of it was contradictory and in the end I made up my own mind based on the requirements of the task.
I really like the looks of blued steel so I decided to steer away from the stainless steels and go for a chrome molly steel.
Lots of actions are made from the ubiquitous 4140 chrome molly steel. It's strong (Once heat treated) and it's relatively cheep.
The only drawback was it needed to be heat treated. Now I’ve worked as a machinist for a long time and the number of jobs I’ve seen come back into the workshop to be re-done because of bad heat treatment would surprise you. So for me heat treatment was to be avoided if possible. That ruled out 4140 as I couldn't get it in the right hardness for the job.
So what is the right hardness you ask? Well depends on the steel in question but for 4140 or similar low alloy steels somewhere around 37 to 45 HRC is about right.
Next up on my list of steels is 4340. It's a little bit stronger than 4140, mostly due to it's higher hardness in it's as supplied state but is also a little bit tougher than 4140. I checked with our steel suppliers for a piece at 37+ HRC but no luck, all there stock was around 32 to 35 HRC. I then enquired about some EN26 which is even stronger again than 4340. I finially got a length of 66 dia for the Receiver at 38 HRC and a length of 32 dia at 40 HRC for the bolt. I had the stock independently hardness tested and the results were all good.

So now I have materials out of the way what about the design? Well I wanted an action to build a new long range / BR rifle on. So it’s going to be big and beefy full bridge design able to take a long heavy contour barrel easily. I looked at a lot of other actions and picked the features I liked from each...
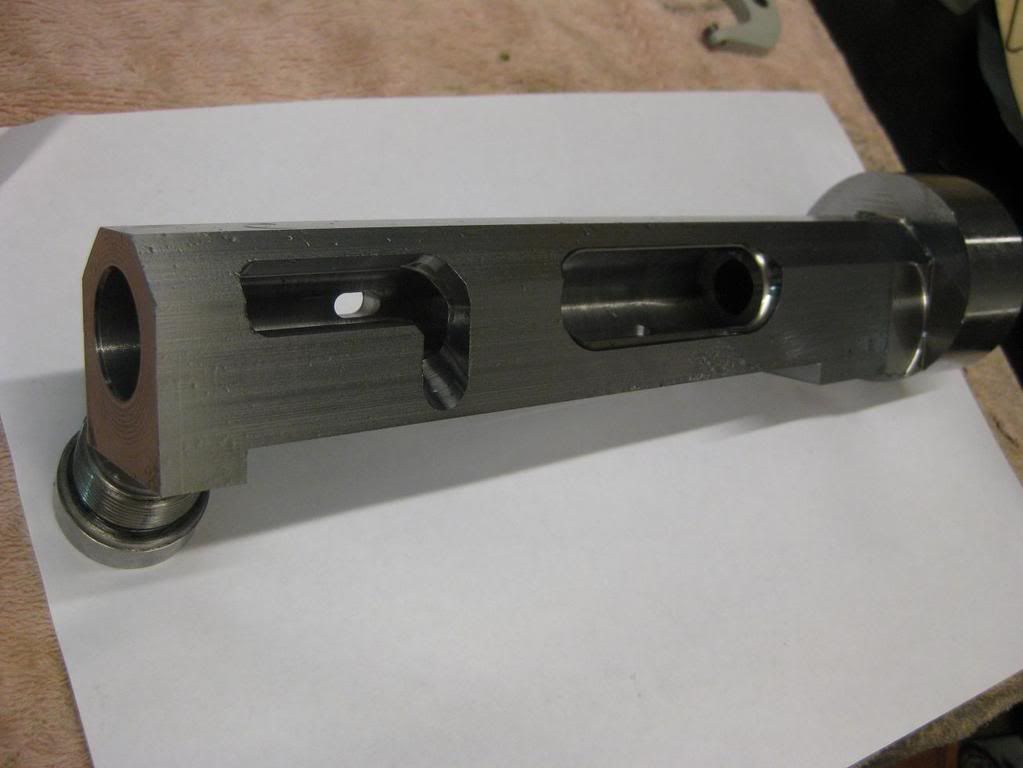
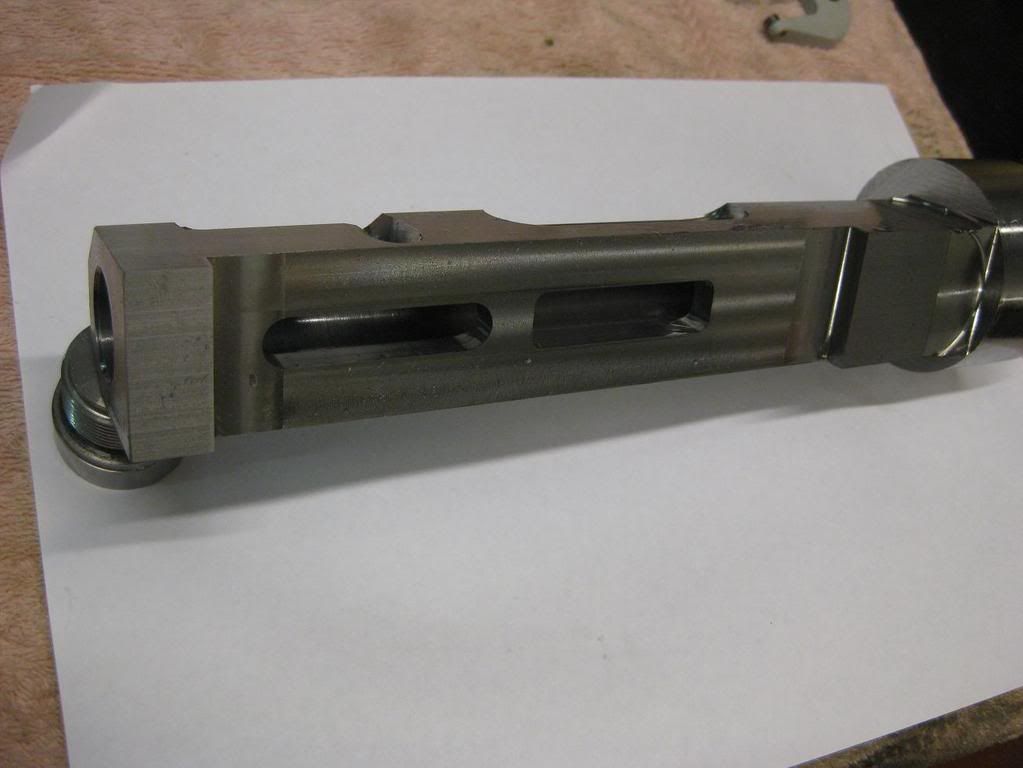
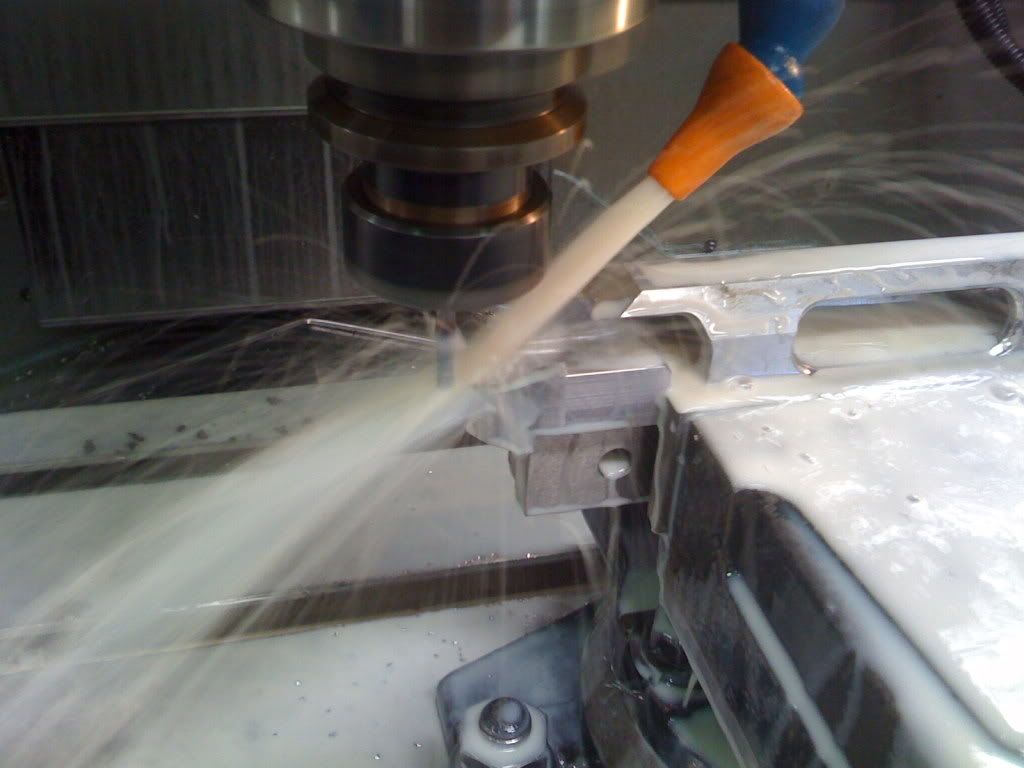
It’s basically a 3 lug “fat bolt” design. Like the new TC Icon action. This was chosen as I didn’t have access to the right equipment to cut or broach action raceways. Everything had to be able to be done by me with the equipment I had access to. I have a manual lathe and mill at home, but at work I have access to a 4 axis Extron CNC mill. This machine makes life much easier so most of the hard work would be done on this.
It finished action will look something like this…
http://www.roedale.de/epages/roedale.htm

Some of the design features;

• 3 lug “Fat Bolt” with 60 deg bolt lift and fast lock time.
• full bridge design with flat bottom and sides for better bedding
• built to suit up to 308 sized cartridges (Prototype to be 6mm BR)
• Remington compatible trigger
• Easy bolt disassembly ala sako “Insert and twist”.
• Flat top for easy scope base mounting.
• Designed to safely use a Sako extractor

IMG_0116.jpg


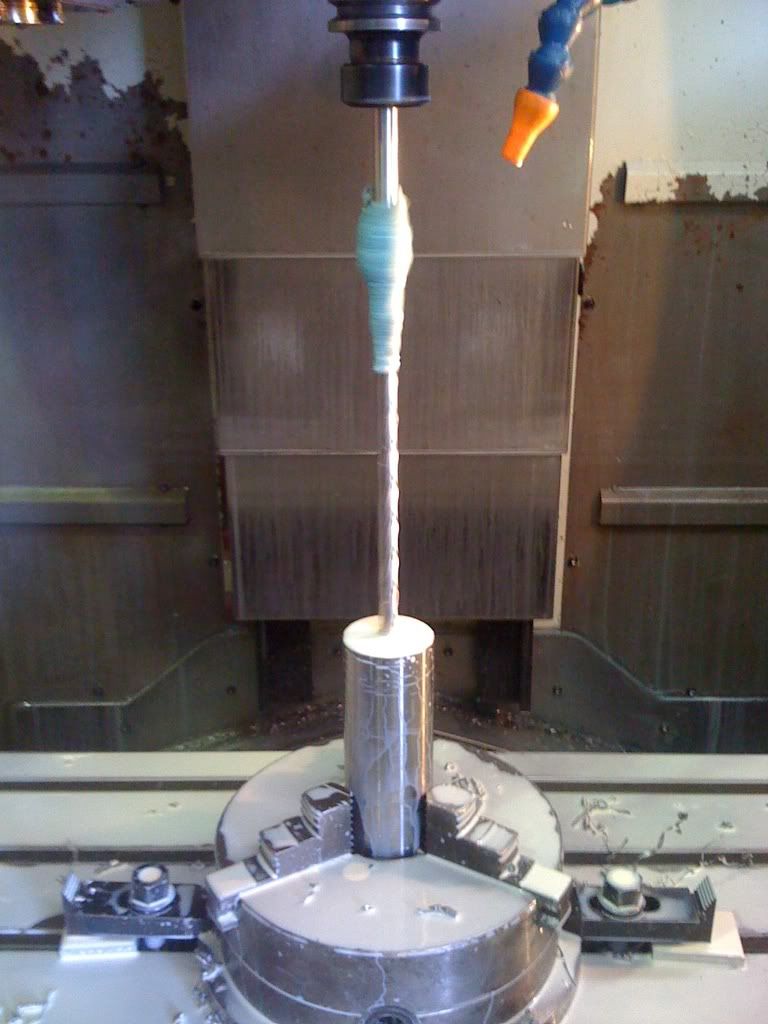
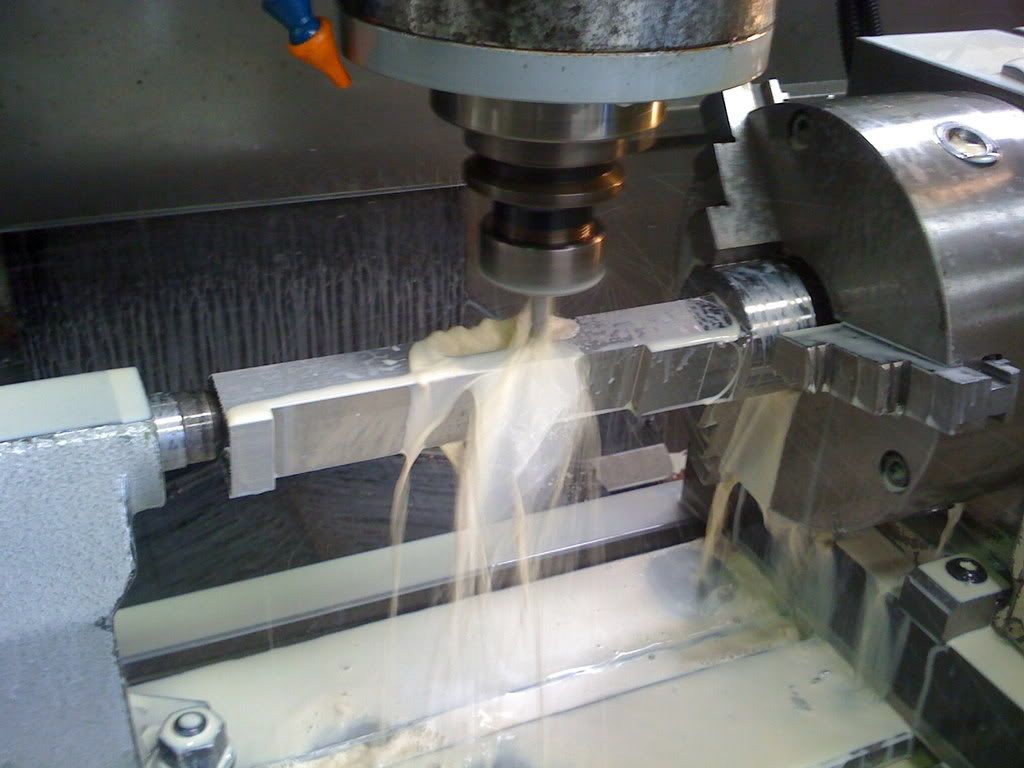
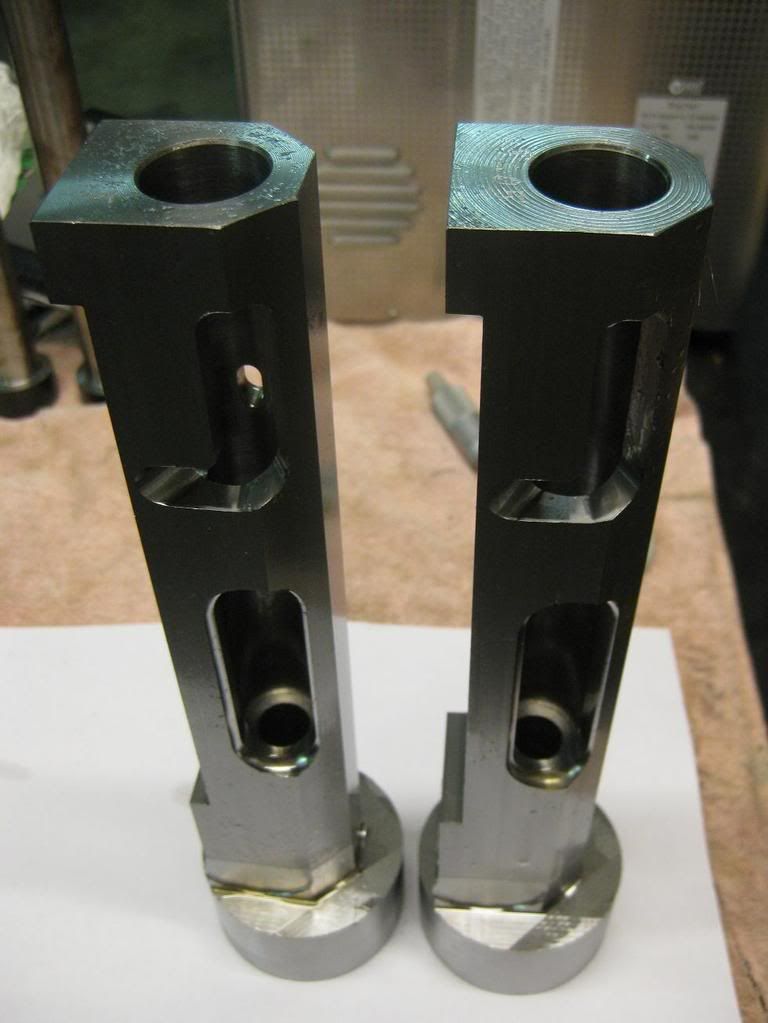
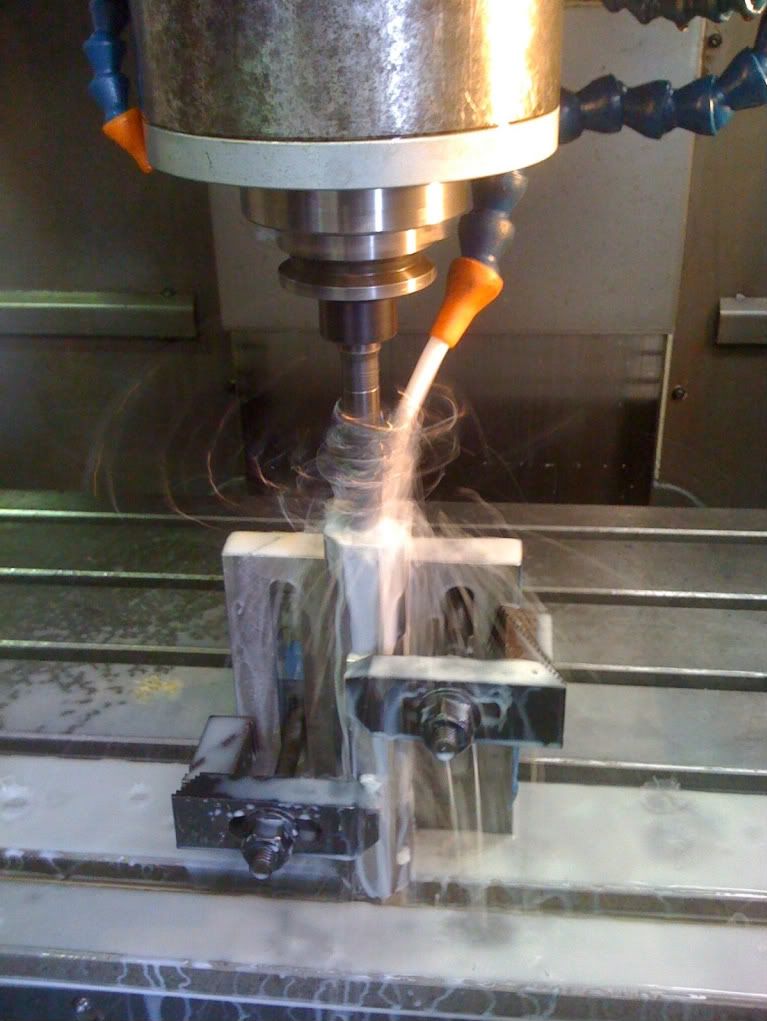
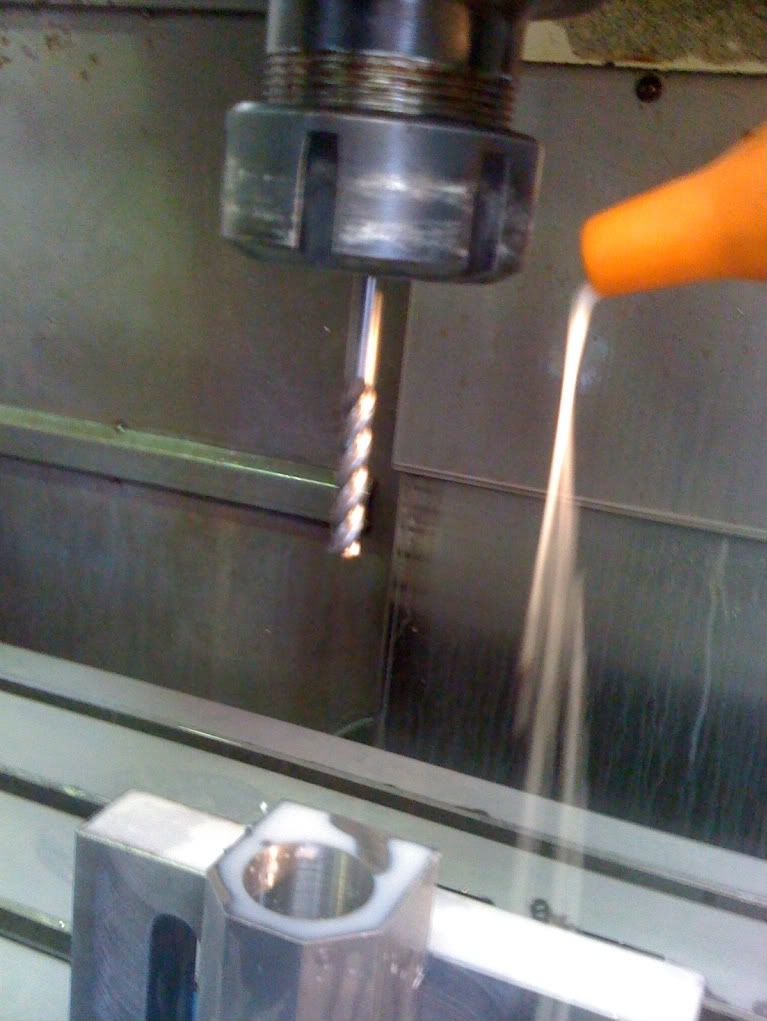
Here is the action blanks being “Pilot” drilled with a 400mm (16")long CoHss drill. The machine allows an automatic “Peck” drilling cycle and it runs at about 300 RPM and feed only 2.5 (0.1")mm before retracting to clear the chips. Due to the hardness of the material this took almost 45 minuets to drill the 250mm (10")blank. The only problems encountered was that sometimes not all the swarf would get out and would then be chewed up at the start of the next cut. (A bit scary as it makes a terrible noise and that drill is worth $220!) In case you are wondering the green rag arround the drill helps to stop it chattering untill it's is deep enough in it's own hole.

IMG_0117.jpg

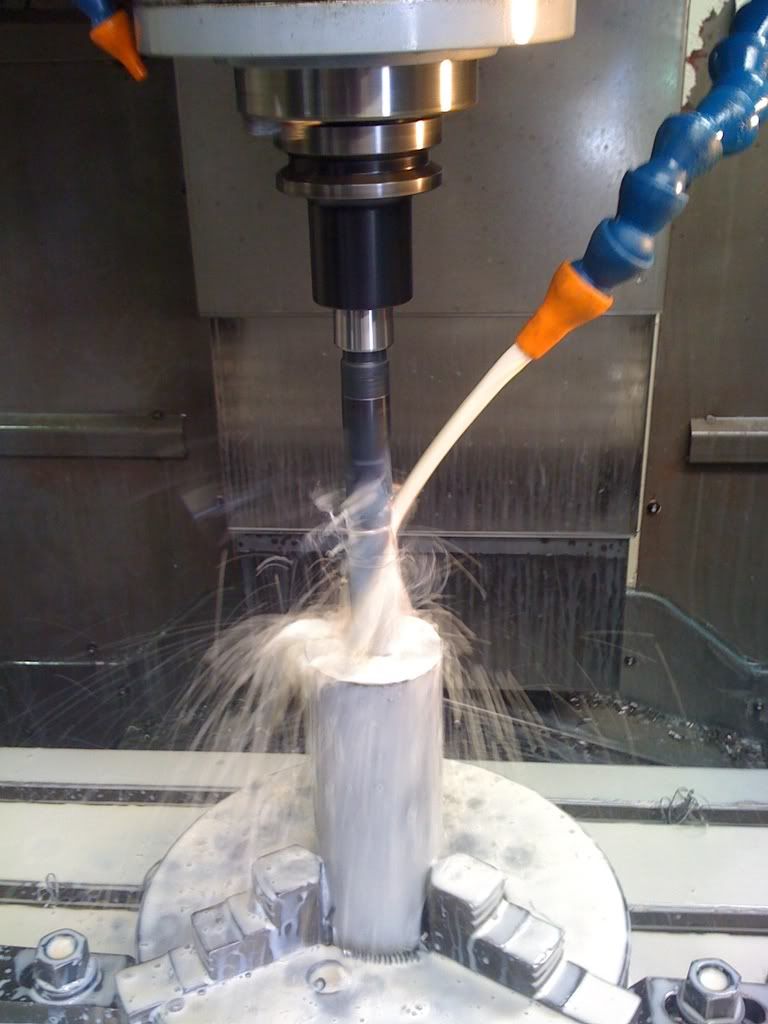
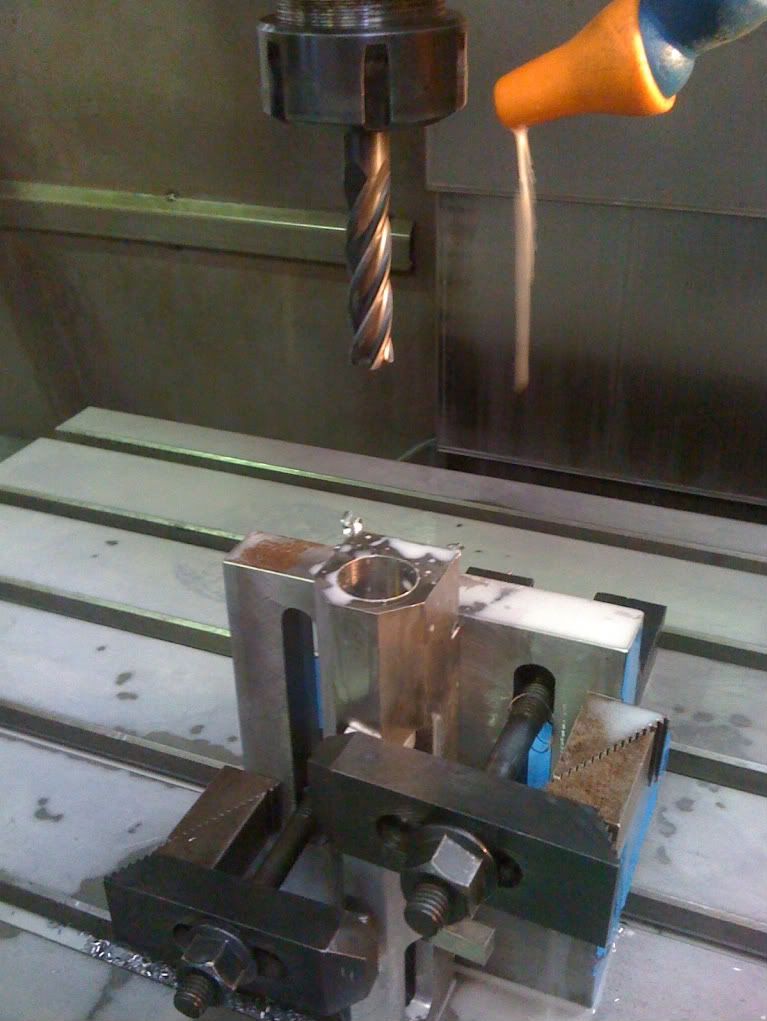
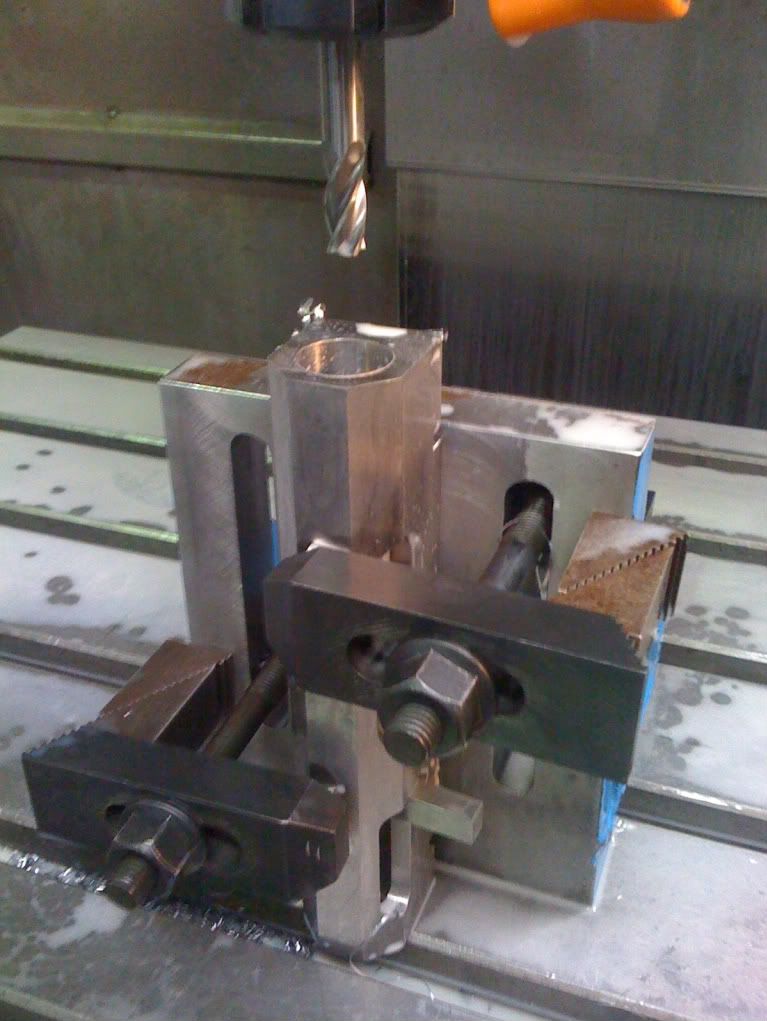
Next is rough drilling to 20.5 (0.807") dia and then finial step drilling to 21.5mm (0.846")(Finished size is 22mm (0.866")).

IMG_0118.jpg

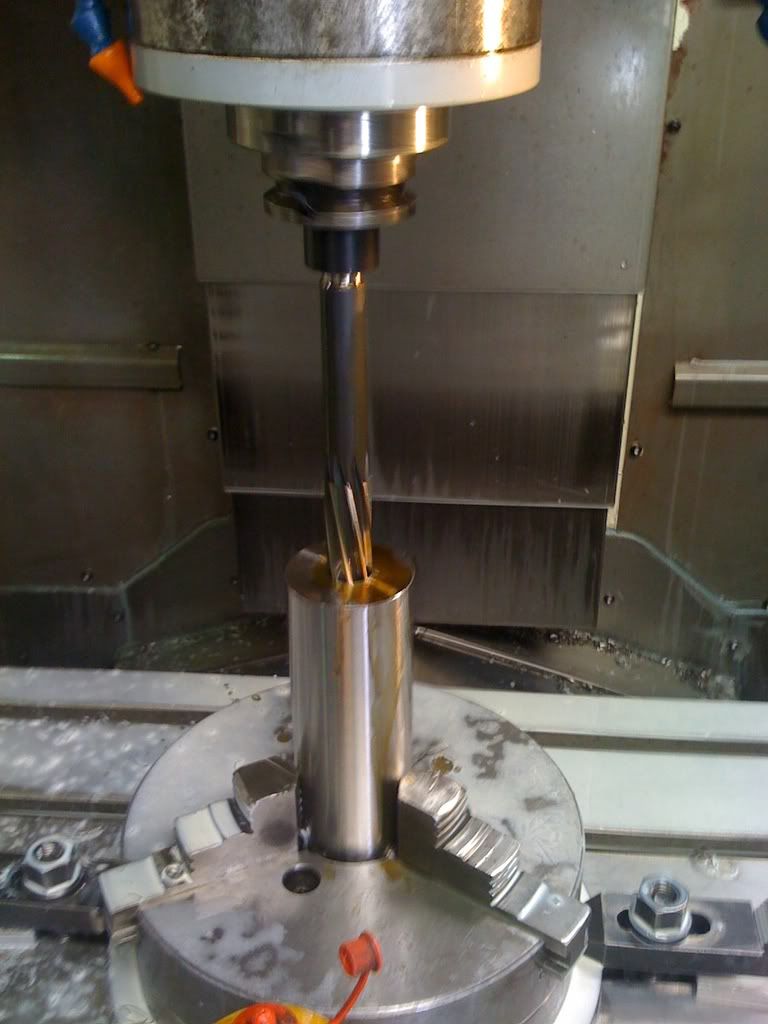
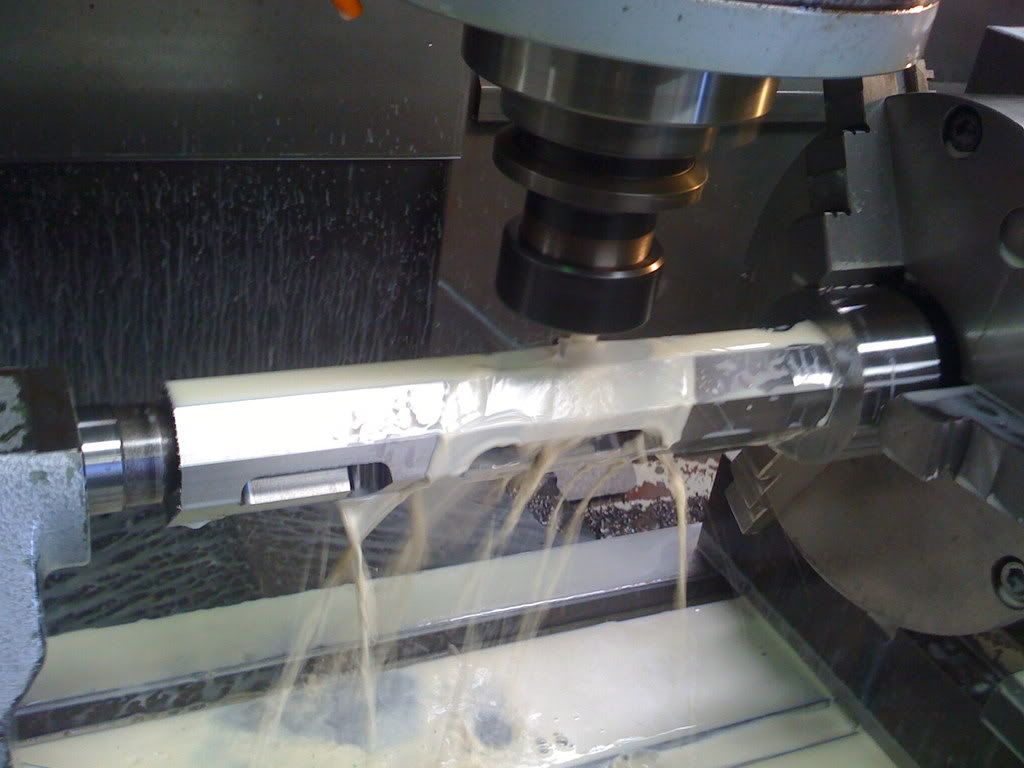
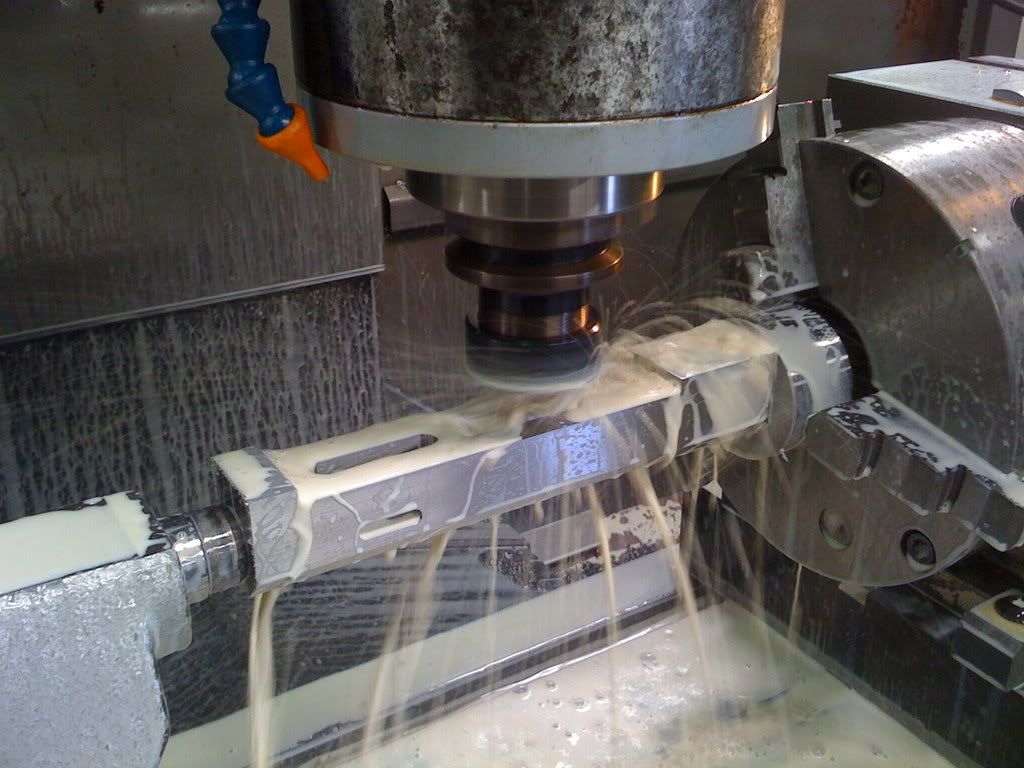
And finialy finish reaming.

IMG_0119.jpg

The 22 dia hole was then given a honing. This makes the hole uniform in dia allong it entire length and gives a better smoother surface finish. Finished dia ended up being 22.06 mm(0.8685").


IMG_0120.jpg

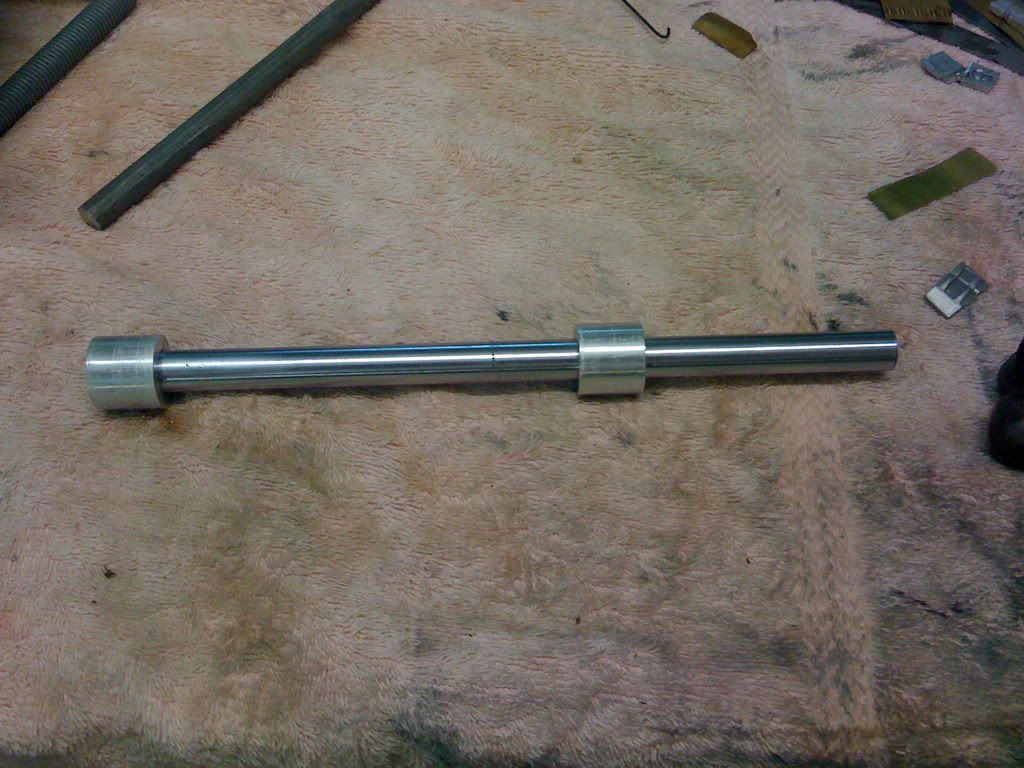
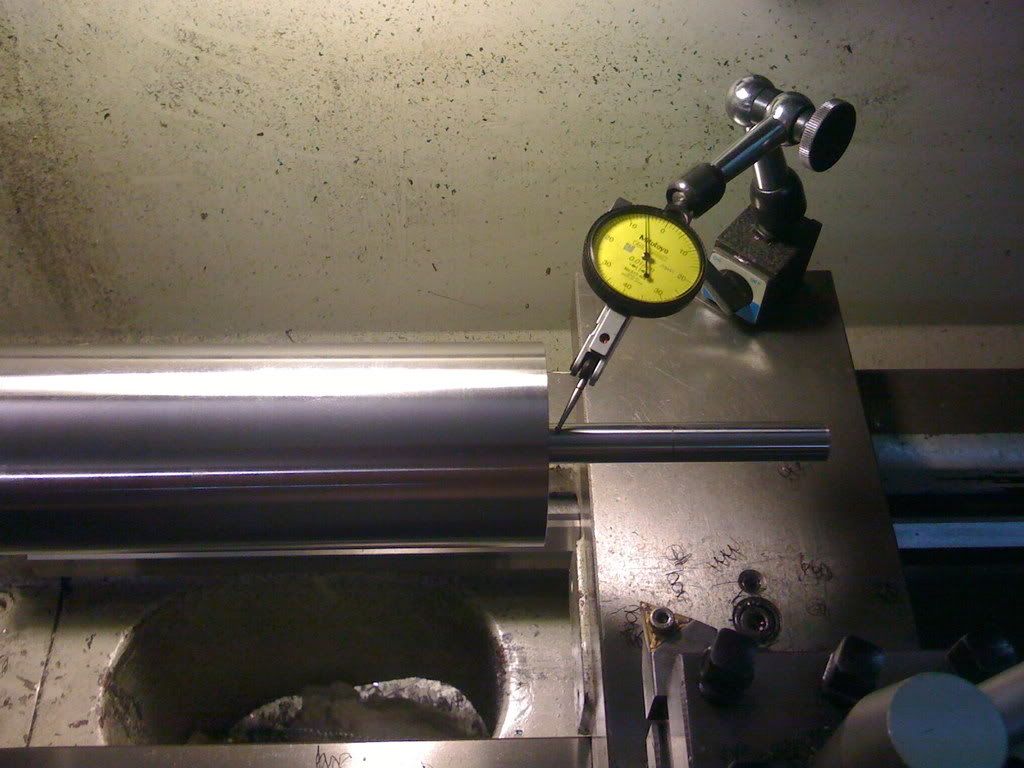
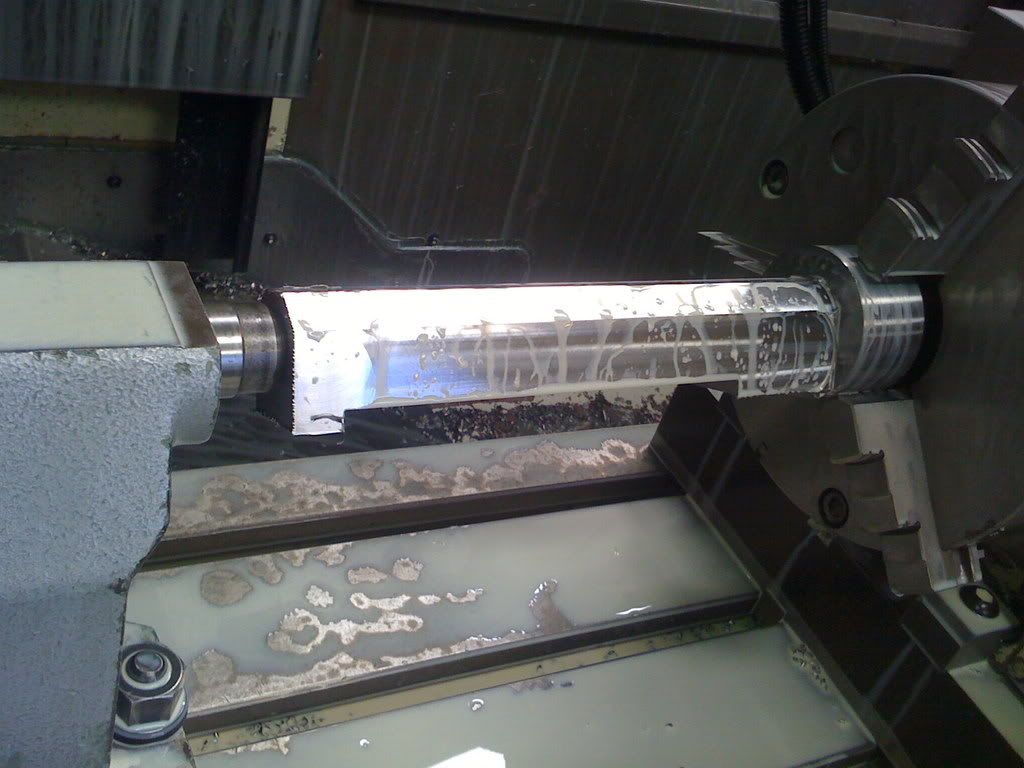
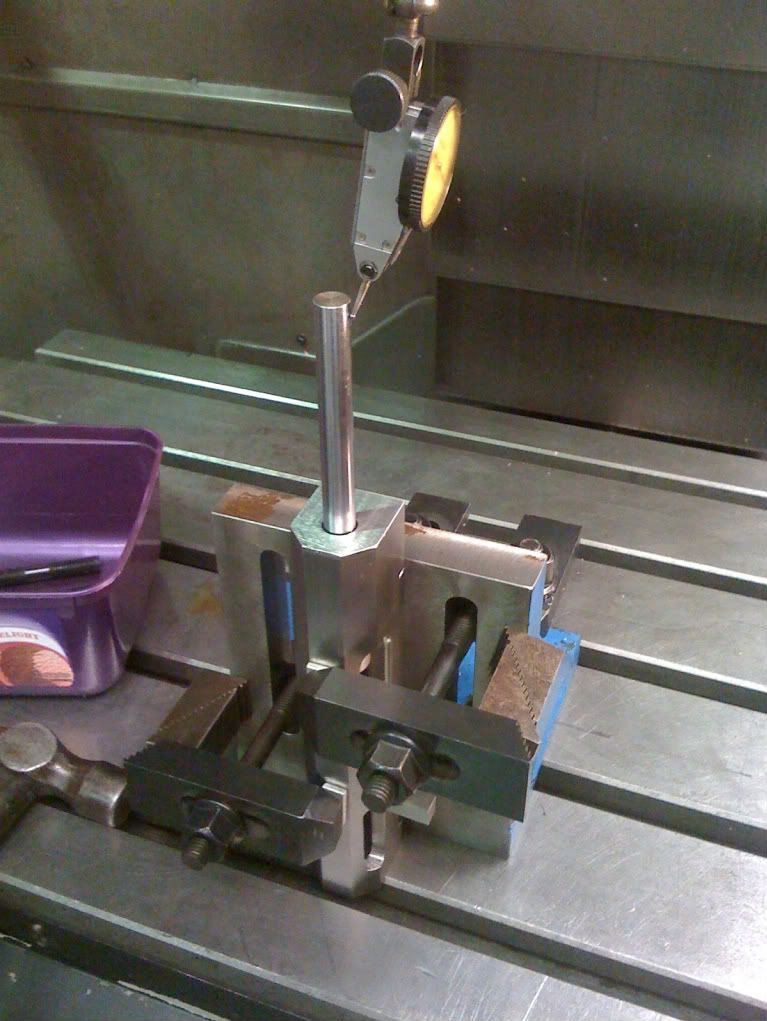
Now because of the depth of the holes (250mm- 10") some run out is very likely and in fact the pilot drill ran off almost 0.2mm or 8 thow. So before the next step I needed to get the outside of the blank running true with the newly drilled, reamed and honed hole.
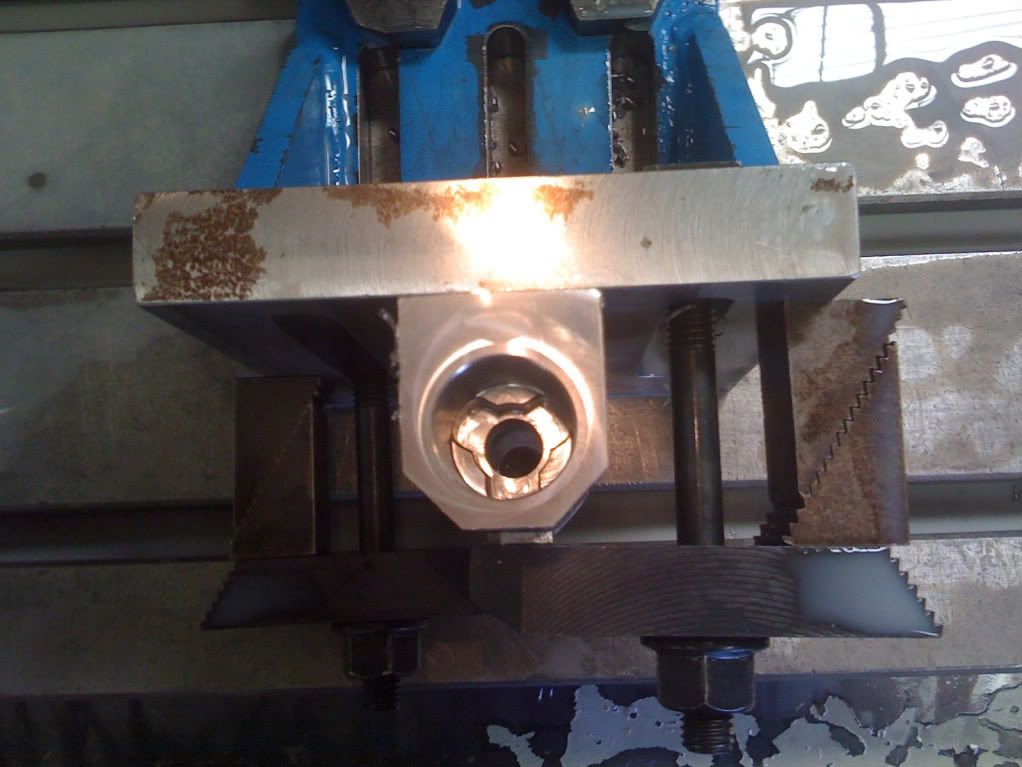
This was done by making up two bushes to suit a ½” test bar I have. They were made to be a tap fit in the 22 (0.866")dia hole.

IMG_0121.jpg

[The whole assembly then placed in the lathe and dialed up to run true.


IMG_0122.jpg

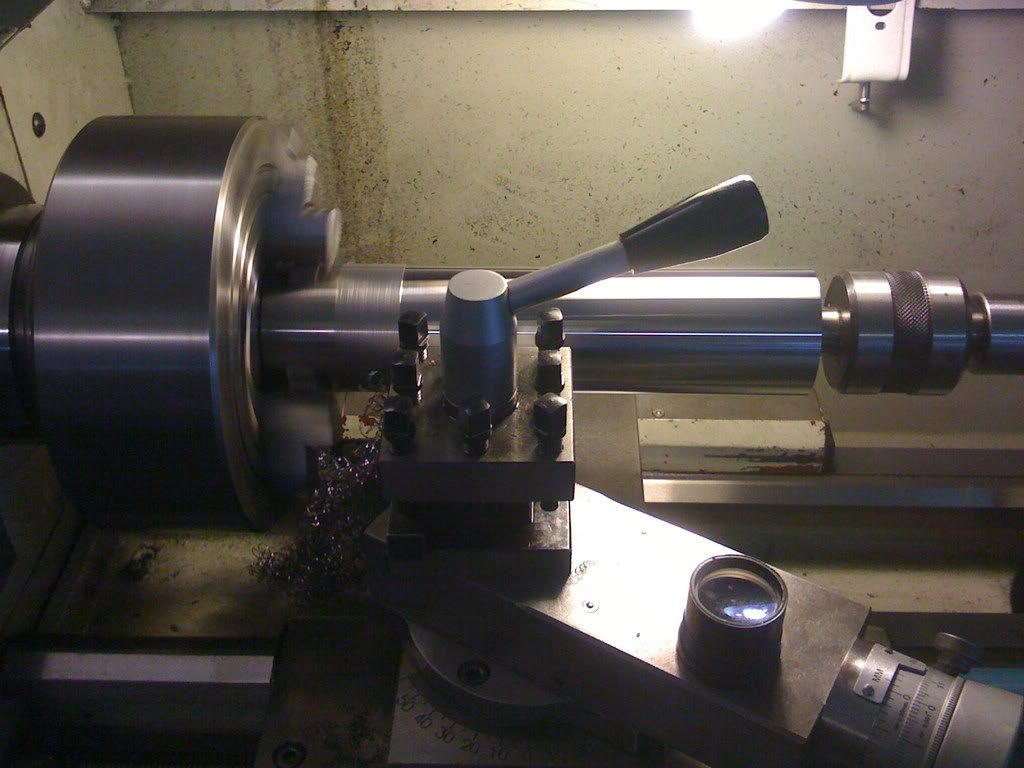
Once true a chamfer was cut at 60 deg on the hole and the live center placed in. A truing cut was then taken over most of the length of bar. It was then turned around and dialed up again and the remaining end was trued.

IMG_0123-1.jpg

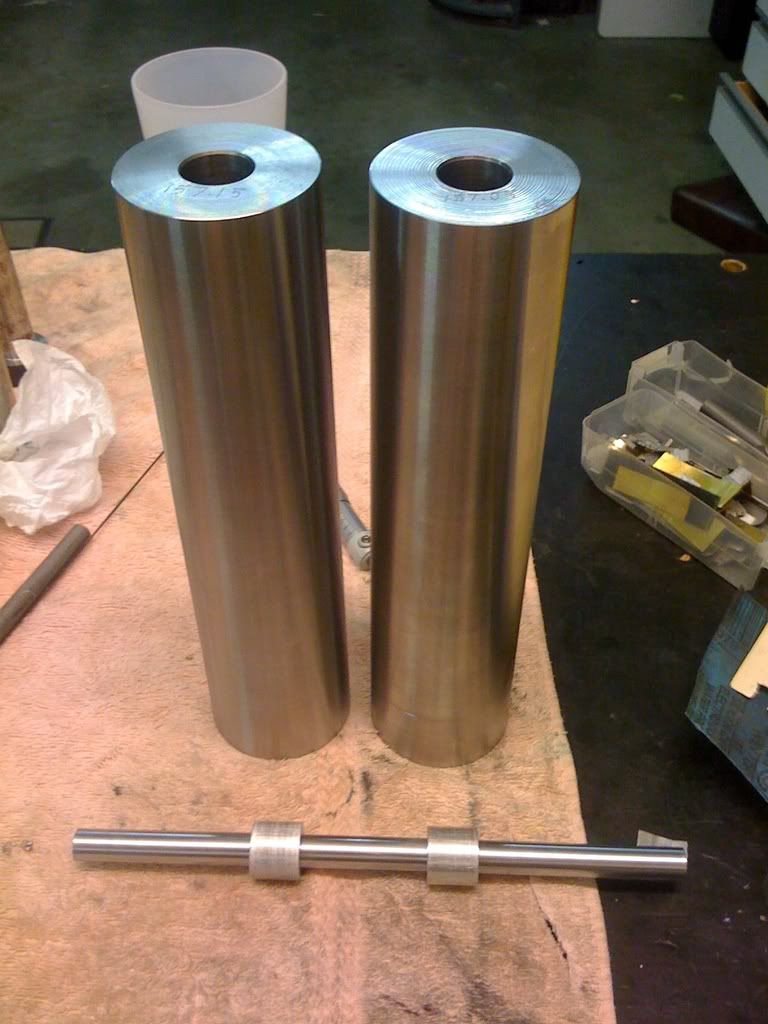
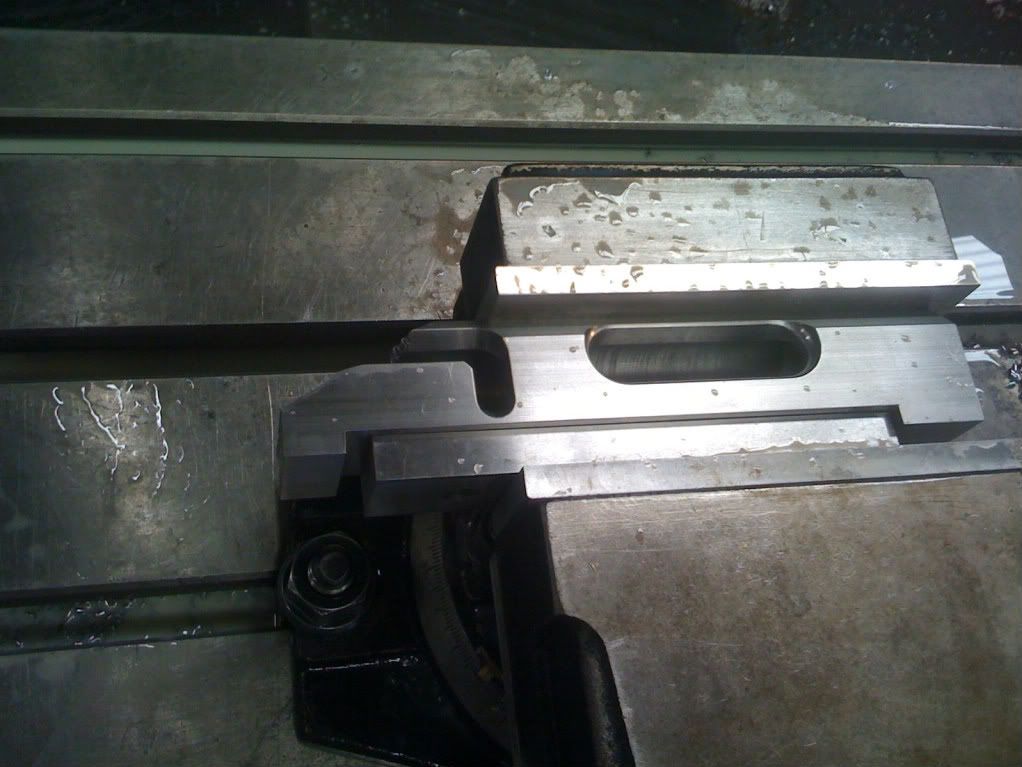
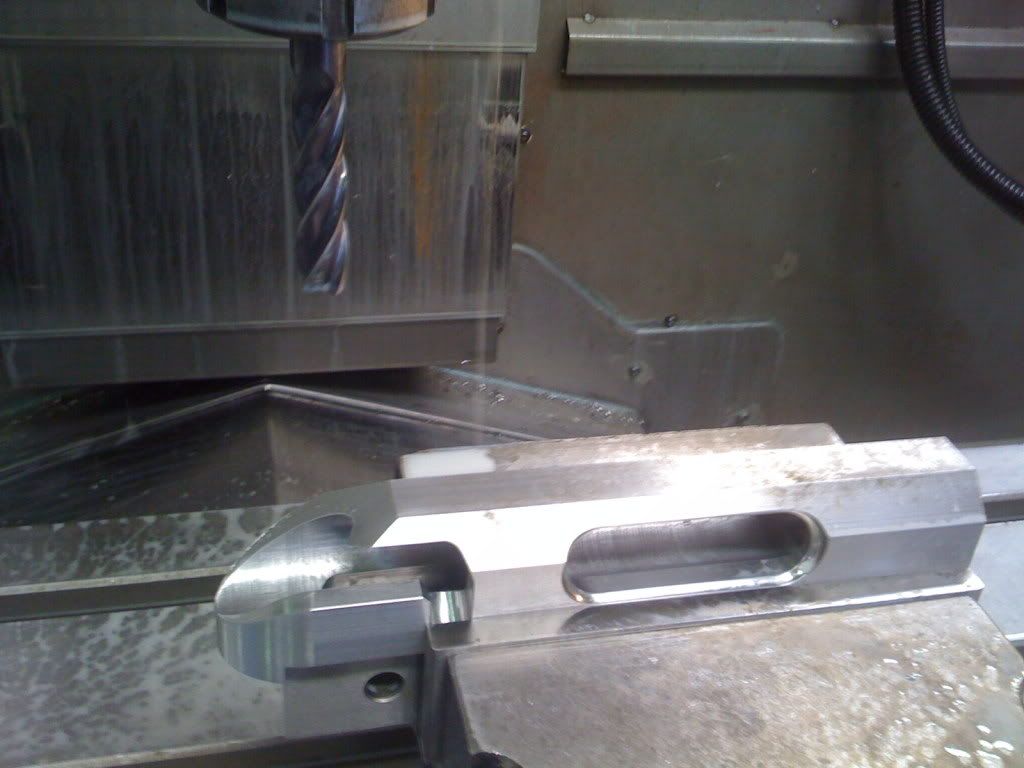
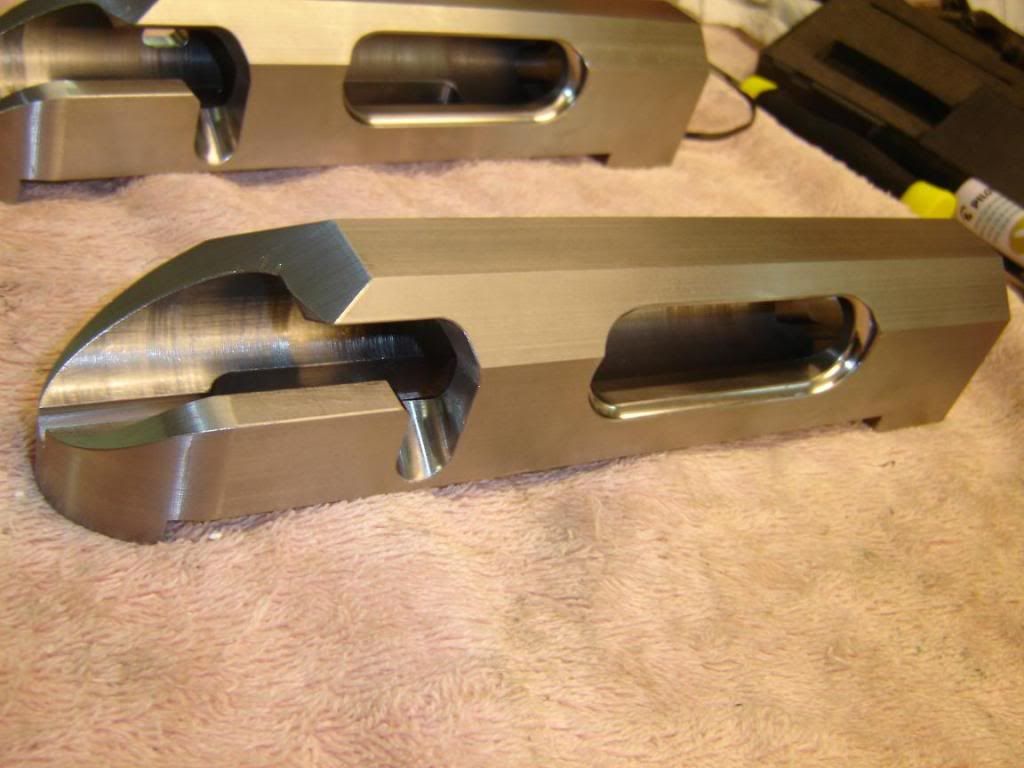
Finished receiver blanks ready for the next stage profiling..
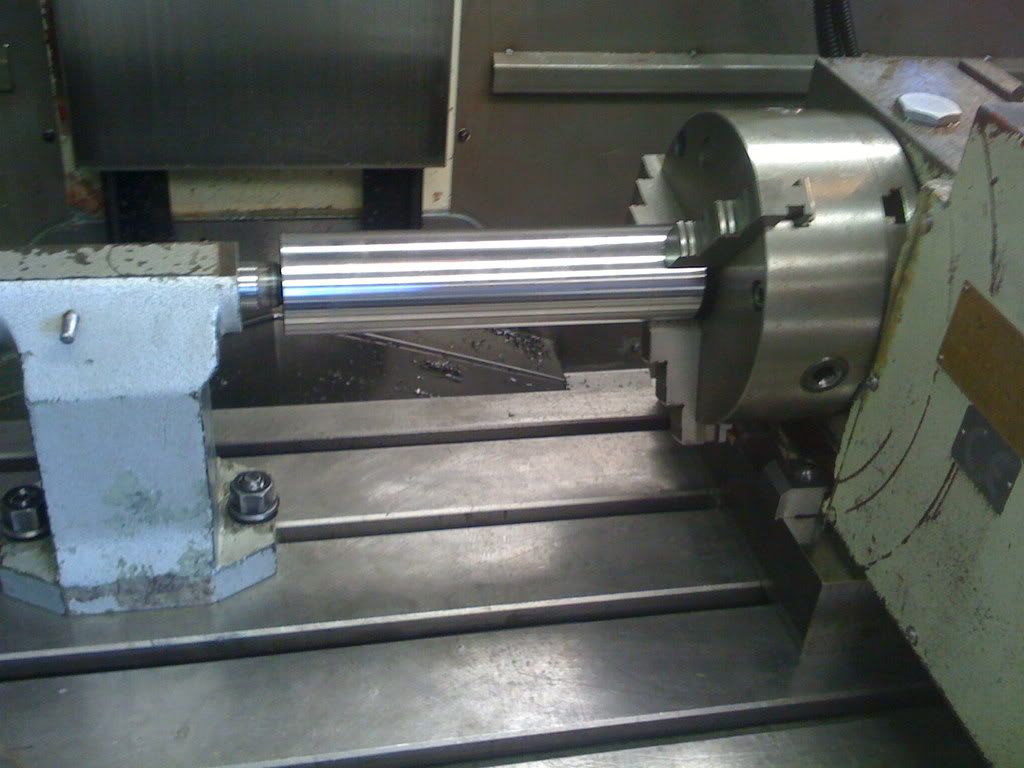
I have an RDO on Monday and should get the profiling done.
Update will follow soon..

Cheers
Leeroy
 
Last edited:
More Progress.
IMG_0129.jpg

The receiver blanks were placed in the rotary axis of the CNC mill. This means that it can be rotated very precisly to any angle desired accurate to 1000th of a degree.


IMG_0130.jpg

It was then roughed down to 0.1mm (4 thow) oversize on all 6 sides with a 40 dia insert cutter and then finished with a long series solid carbide endmill.

IMG_0131.jpg

Cutting the ejection port and the bolt handle guide port.

IMG_0132.jpg

Engraving my buisness logo and the name and serial numbers on the side. See pic below for details.

IMG_0133.jpg

Cutting the trigger slot and the "drop Port". The Drop port was left off receiver no 2 as i intend to add some kind of magazine later on..

The finished results.
IMG_0124.jpg

IMG_0125.jpg

IMG_0126.jpg

IMG_0127.jpg

Why make one when you can make two for twice the price? :D

The next operation will be to cut off the cilindrical stub and then counter bore the fron receiver ring. Then mill the locking lug rebates. After that the tang end gets cut off at an angle sloping back down towards the bottom and also rounded off.
My next RDO won't be for a few weeks so in the mean time i'll get with the jewlers files and give all the hard edges a 0.5mm chamfer.

Cheers
Leeroy
 
Last edited:
Pretty damn neat!

Mr Leroy, that's some great machining!! Now if your gonna drill your own barrel, well i'm gonna just hang myself, lol! Keep us updated! thanks joe
 
Metric??

Thanks for that John.. For the benifit of those metricly chalenged folks i'll go back and add the inch conversions in the posts later tonight.. :D

Cheers
Leeroy
 
Well Rad clearly the action won't be real good if it's built by a "Brainless Ape" like me.. So i would sudgest someone as obviously intelegent as your self shouldn't even bother reading about it.

OOH OOH OOH AAH AAH AAH..

WANKER!

Leeroy


Pal, the brainless ape wasn't aimed at you, but rather the recomended OZ website. However, why didn't you cut a Tikka mounts dovetail ending 12-15mm before the front end of the receiver on one single set-up, while you had everything lined up true and square in the milling machine? Appart from that, so far so good.Rad
 
why didn't you cut a Tikka mounts dovetail ending 12-15mm before the front end of the receiver on one single set-up, while you had everything lined up true and square in the milling machine? Appart from that, so far so good.Rad

On my initial designs i had Piccatini rail milled into the top of the receiver for scope mounts just as you say, square and in perfect alignment with the action.
However when i looked at what the two rifles were going to be used for, one for 500-1000 yard target and the other for 100-200 yard target, i decided againsted it. Since i would effectivly need 20 MOA "Milled in" for the 1000 yard action and a 0 MOA for the 100-200 yard action, i figued that it would be beter to leave the receiver flat and add the correct MOA mounts as needed.

Cheers
Leeroy


Pal, even so you still could've or rather should have made the Piccatini rails as an integral part of the otherwise very promising action. AKA SURGEON action has. The other benefits appart from being true and square is the additional component of the extra stiffness.Rad
 
Update!

G'day Fellas..

Well its been a few weeks since i had some time on the machine, but i took my RDO today and managed to get the CNC part of receiver machining finished.

The pic shows the general setup for maching the receiver ring and lug rebates. The same precision bar and bushes were used to clock up the receiver to the machine axis. Receiver 1 was ok as is but number 2 required some 0.05 shim behind the bottom face to get it do dial in.
IMG_0134.jpg


Rough drilling of the receiver ring.
IMG_0135.jpg


Ring roughed to 25 dia with a 16mm tip cutter and then finished to 25.1 with a 12mm long series carbide end mill.
IMG_0136.jpg


Bolt ring dia (16mm) finished with a 10mm carbide endmill.
IMG_0137.jpg


Lug rebates roughed out with an 8mm carbide endmill and then finished with an extra long series 5mm carbide endmill. There was lots of flex in that long skinny cutter and i preyed it didn't break! :D It took 3 passes to get it to come to finial size.
IMG_0138.jpg


The result. The solid part in the bottom of the lug rebates you can see is the alloy bush still in the receiver.
IMG_0139.jpg


Setup for cutting the tang slope. Roughed with a 16mm tip cutter and finished with the 12mm long carbide endmil.
IMG_0140.jpg


Setup for cutting the tang radius. Actualy it's not realy a radius it's an eliptical arc which thankfully is easy
to program on this machine using paramatric programming methods. Roughed again with a tip cutter and finished with a carbide endmill
IMG_0141.jpg


Cutting the tang cocking peice groove with a 4.5mm carbide andmill.
IMG_0142.jpg


The finished receiver.
IMG_0143.jpg


Locking Lugs.
IMG_0144.jpg


So thats it for the CNC part of the receiver. The rest i can do in my manual mill at home. Mostly drilling and tapping holes.
Could have done this on the machine but i wanted to minimise the time spend at work. It's also much safer to tap by hand than it is to have the machine do it, especialy on high tensile steels..
Please also not the lack of reciver threads. If the law hadn't have stopped me i would have also "Thread milled" the receiver thread in this setup to about 80% depth.
Next will be the bolt turning and then into the machine for finishing.
Update soon! :D

Cheers
Leeroy
 
Last edited:
Back
Top